
When I bake a gluten-free cake, I’m hunting for one thing: that tender, almost-delicate crumb that rivals any traditional cake. This gluten-free strawberry cake delivers exactly that. The secret isn’t a single ingredient—it’s the combination of a high-quality 1:1 gluten-free flour blend, a strategic boost of almond flour, and real strawberry puree that adds both moisture and genuine flavor. I’ve tested this enough times to know where the common failures happen, and I’ve built this recipe to sidestep every one of them.
What makes this version worth your time is the texture contrast. You get a soft, almost velvety crumb that breaks cleanly on the fork, paired with a bright strawberry flavor that tastes fresh, not artificial or flat. The frosting options—cream cheese or stabilized whipped cream—stay put and complement the cake without overwhelming it. This isn’t a finicky recipe that demands precision scales and perfect kitchen conditions. It’s built for home bakers who want reliable results and a cake that tastes like you spent real time on it.
I’ll walk you through the ingredient choices, the mixing sequence that matters most, and the timing cues that tell you when your cake is actually done. By the end, you’ll have a showstopper dessert that works for weeknight dinners, celebrations, or any moment you want strawberry cake that actually tastes like strawberry.
Quick Snapshot
- Prep Time: 20 minutes
- Cook Time: 32-36 minutes
- Total Time: 1 hour 15 minutes (including cooling)
- Yield: 8-10 servings (one 8-inch two-layer cake)
- Texture: Tender, moist crumb with slight density from almond flour
- Flavor Profile: Bright strawberry, subtle almond undertone, balanced sweetness
- Skill Level: Intermediate (no special equipment required)
Why This Recipe Works
I chose a 1:1 gluten-free flour blend as the foundation because it’s designed to mimic all-purpose flour’s hydration and structure. Brands like Bob’s Red Mill or King Arthur work beautifully here. The blend already contains xanthan gum, which means I don’t need to add extra—that’s critical because too much xanthan gum creates a gummy, dense cake. I’ve made that mistake, and the texture suffers immediately.
The second move is the almond flour. I add it not for trendy flavor but for structure. Gluten-free batters need extra binding, and almond flour provides fat and protein that stabilize the crumb without creating graininess. The ratio is 1:4 (one part almond flour to four parts gluten-free flour), which gives support without overwhelming the delicate texture I’m after.
Real strawberry puree is the third pillar. I make it by blending fresh strawberries and pushing them through a fine-mesh sieve to remove seeds. This adds moisture, natural pectin for binding, and genuine strawberry flavor that extract can’t match. The puree also tints the cake a natural pink, which looks intentional and beautiful.
Finally, I use a two-stage mixing method. Creaming butter and sugar first incorporates air and creates lift. Then I alternate wet and dry ingredients carefully, which prevents overmixing—the biggest threat to tender crumb in any cake, gluten-free or not. I stop mixing the moment I see no dry flour streaks. That’s it. Overmixing develops gluten alternatives and toughens the cake.
Ingredient Overview
- Dry Ingredients:
- 1 3/4 cups (210g) 1:1 gluten-free flour blend (with xanthan gum)
- 1/4 cup (30g) almond flour
- 1 1/2 teaspoons baking powder
- 1/2 teaspoon baking soda
- 1/2 teaspoon fine sea salt
- Wet Ingredients:
- 8 tablespoons (113g) unsalted butter, room temperature
- 3/4 cup (150g) granulated sugar
- 2 large eggs, room temperature
- 1/3 cup (80g) fresh strawberry puree (about 8-10 medium strawberries)
- 1/4 cup (60ml) whole milk
- 1 teaspoon vanilla extract
- For Assembly:
- 1/2 cup (113g) unsalted butter, softened
- 8 oz (226g) cream cheese, room temperature
- 2 cups (240g) powdered sugar
- 1/2 teaspoon vanilla extract
- Fresh strawberries for garnish
The 1:1 gluten-free flour blend is non-negotiable. I’ve tested this with other blends, and the hydration shifts enough to change the crumb. Bob’s Red Mill 1-to-1 and King Arthur Measure for Measure both work consistently. If your blend doesn’t contain xanthan gum, add 1/4 teaspoon to the dry ingredients.
Almond flour must be blanched (skin removed), not raw or roasted. Raw almond flour can add a bitter note, and roasted changes the flavor profile. Blanched almond flour is finer and more neutral. I buy it from reputable sources because old or improperly stored almond flour can turn rancid.
For the strawberry puree, I use fresh strawberries in season. If you’re baking out of season, frozen strawberries work—thaw them completely and drain excess liquid before blending. The puree should be smooth with no visible seeds. I push it through a fine-mesh sieve to catch any stragglers. Strawberry extract is not a substitute; it lacks the moisture and binding power of real puree.
Whirl Hook
This cake is built on one core idea: real strawberry puree replaces some of the liquid, delivering moisture, natural color, and genuine flavor that extract can’t touch. Pair that with a strategic flour blend and almond flour support, and you get a tender crumb that feels indulgent, not compromised. The texture contrast is the real payoff—soft cake, bright strawberry flavor, and a frosting that stays creamy without sliding.
Step-by-Step Instructions
Stage 1: Prepare Your Ingredients (5 minutes ahead)
- Make your strawberry puree first. Blend 8-10 medium fresh strawberries until completely smooth. Push the puree through a fine-mesh sieve into a small bowl, pressing gently to extract all liquid and pulp while leaving seeds behind. You should have about 1/3 cup (80g) of puree. Let it sit while you prep the rest.
- Remove butter, eggs, and cream cheese from the refrigerator. They need to sit at room temperature for at least 30 minutes. Cold ingredients won’t incorporate smoothly into the batter, and you’ll end up with lumps or a broken emulsion. I always do this step first because it’s the easiest one to forget.
- Preheat your oven to 350°F. Position the rack in the center. Grease two 8-inch round cake pans with butter or cooking spray, then line the bottoms with parchment paper. This prevents sticking and makes turning out the layers foolproof.
Stage 2: Mix Dry Ingredients (3 minutes)
- Whisk together the 1:1 gluten-free flour blend, almond flour, baking powder, baking soda, and salt in a medium bowl. Whisk for about 20 seconds to combine and aerate. This distributes the leavening evenly and prevents pockets of baking soda flavor.
- Set the dry mixture aside. Don’t sift unless your flour blend is visibly lumpy—most modern blends don’t need it, and extra handling can compact the flour.
Stage 3: Cream Butter and Sugar (3-4 minutes)
- In a large mixing bowl, beat the 8 tablespoons of softened butter and 3/4 cup sugar together on medium speed for 3-4 minutes. You’re looking for a pale, fluffy texture that’s almost mousse-like. This step incorporates air, which helps the cake rise and creates a tender crumb. If the mixture looks thin or grainy, the butter wasn’t soft enough. Stop and let it rest another 10 minutes before continuing.
Stage 4: Add Eggs (2 minutes)
- Add the first egg and beat on medium speed for about 30 seconds until fully incorporated. The mixture should look smooth, not separated or curdled. Add the second egg and beat for another 30 seconds. If the mixture looks broken (separated, grainy, or slick), don’t panic—this happens when eggs are slightly cold. Keep beating; it will come together once you add the dry ingredients.
Stage 5: Alternate Wet and Dry (4-5 minutes)
- Add one-third of the dry mixture to the butter-egg mixture. Beat on low speed for about 20 seconds until just combined. You’ll see some dry flour streaks—that’s fine. Don’t overmix.
- Add half of the combined strawberry puree and milk (mix them together in a small bowl first). Beat on low speed for about 20 seconds until just combined. Again, stop while you still see a few streaks.
- Add another third of the dry mixture. Beat on low speed for 20 seconds. The batter should be coming together but still have visible flour.
- Add the remaining strawberry-milk mixture plus the vanilla extract. Beat on low speed for 20 seconds.
- Add the final third of the dry mixture. Beat on low speed for about 30 seconds, just until no dry flour streaks remain. This is the critical moment. Overmixing here develops gluten alternatives in the flour blend, which toughens the cake. I always stop while the batter still looks slightly undermixed—it’s better to have a few tiny flour streaks than to overbeat. The residual heat and moisture will finish hydrating the flour as it sits and bakes.
Stage 6: Divide and Bake (40 minutes total)
- Divide the batter evenly between the two prepared pans. I use a kitchen scale or an ice cream scoop to ensure even layers. Tap each pan gently on the counter three times to release large air bubbles. Don’t bang hard—gentle taps only.
- Place both pans in the preheated 350°F oven on the center rack. If your oven has hot spots, rotate the pans halfway through baking (at the 16-minute mark).
- Bake for 32-36 minutes. The cakes are done when a toothpick inserted into the center comes out with just a few moist crumbs—not wet batter, but not completely clean either. The tops should spring back lightly when you touch them with your finger, and the edges should pull slightly away from the sides of the pan. Gluten-free cakes often bake faster than expected because the flour blend conducts heat differently. Start checking at 30 minutes.
- Remove the pans from the oven and let them cool in the pans for 10 minutes. This allows the crumb to set enough to handle without tearing. Then turn the layers out onto wire racks, peel off the parchment, and let them cool completely—at least 1 hour—before frosting. A warm cake will melt the frosting and create a messy finish.
Flavor Spin
The core twist here is the real strawberry puree. It does triple duty: adds moisture so the cake stays tender longer, provides natural pectin for structure, and delivers genuine strawberry flavor that tastes fresh and bright. That’s the non-negotiable move. Everything else supports it.
Whirl Factor
The texture contrast is where this cake earns its place on your table. Soft, almost velvety crumb meets bright, jammy strawberry flavor. The frosting—whether you choose cream cheese or stabilized whipped cream—stays creamy and cool against the tender cake. No graininess, no dense bottom, no flat flavor. Just a cake that tastes intentional and craveable.
Pro Tips for Best Results
- Room-temperature ingredients are non-negotiable. I learned this the hard way. Cold butter won’t incorporate smoothly into the sugar, and cold eggs can cause the batter to break. Set everything out 30-45 minutes before you start mixing. If you’re short on time, place butter and eggs in a warm (not hot) bowl of water for 10 minutes.
- Don’t skip the strawberry puree sieve step. Strawberry seeds create a gritty texture in delicate cakes. I use a fine-mesh sieve and push gently with the back of a spoon. It takes 2 minutes and transforms the mouthfeel.
- Watch for xanthan gum overload. If your flour blend already contains xanthan gum (and most 1:1 blends do), don’t add more. Too much xanthan gum creates a gummy, dense crumb. If you’re unsure, check the package label or test with a small batch first.
- The “a few moist crumbs” doneness test matters. Gluten-free cakes can dry out quickly if overbaked. I pull mine when a toothpick shows just a few moist crumbs, not wet batter but not completely clean. The carryover heat finishes the bake as it cools.
- Let the cake cool completely before frosting. A warm cake will melt the frosting and create a sliding, messy finish. I often bake the layers a few hours ahead or even the day before, which also makes frosting and assembly easier.
- Stabilize whipped cream if you want it to hold. If you prefer whipped cream over cream cheese frosting, whip heavy cream with a tablespoon of powdered sugar and 1/4 teaspoon of gelatin bloomed in cold water (then melted). This keeps the frosting stable for hours without weeping.
Whirl Finish
Frost the cooled cake with the cream cheese frosting (recipe below) or stabilized whipped cream. I pipe a generous layer between the two cake rounds, then frost the top and sides. Garnish with fresh strawberry slices or small whole berries pressed into the frosting. Serve at room temperature or chilled—both work beautifully. The cake tastes best within 2-3 days of baking, when the crumb is still tender and the frosting is creamy.
Cream Cheese Frosting Recipe
Beat 1/2 cup softened unsalted butter and 8 oz room-temperature cream cheese together on medium speed for 2-3 minutes until light and fluffy. Add 2 cups powdered sugar one cup at a time, beating on low speed after each addition. Add 1/2 teaspoon vanilla extract and beat for 30 seconds. The frosting should be thick, creamy, and spreadable. If it’s too soft, refrigerate for 15 minutes before using. This frosting holds up well for 3-4 hours at room temperature and stays creamy in the refrigerator for up to 5 days.
Spin Options
Strawberry-Lemon Variation
Replace 2 tablespoons of the strawberry puree with fresh lemon juice and add 1/2 teaspoon of lemon zest to the batter. The lemon brightens the strawberry flavor and adds a subtle tartness. Frost with lemon cream cheese frosting instead: add 1 tablespoon of lemon juice and 1/2 teaspoon of lemon zest to the cream cheese frosting recipe. The texture stays identical; only the flavor shifts. This variation is stunning for spring celebrations.
Strawberry-Vanilla Bean Variation
Split 1/2 of a vanilla bean lengthwise, scrape the seeds, and add them to the batter along with the strawberry puree. Reduce the vanilla extract to 1/2 teaspoon. The vanilla bean adds visual interest and a more complex, sophisticated flavor that pairs beautifully with strawberry. The texture and bake time remain unchanged. This version feels more elevated and is perfect for special occasions.
Strawberry-Almond Variation
Increase the almond flour to 1/3 cup (40g) and reduce the 1:1 gluten-free flour blend to 1 1/2 cups (180g). Add 1/4 teaspoon of almond extract to the batter. The almond flavor becomes more pronounced, creating a nuttier crumb that still stays tender. The bake time may shorten by 1-2 minutes because the additional almond flour conducts heat faster. Check for doneness at 30 minutes. This variation works beautifully with a mascarpone frosting instead of cream cheese for extra richness.
Serving Suggestions
Serve this cake at room temperature with a cup of strong coffee or tea. The tender crumb and bright strawberry flavor shine when the cake isn’t too cold. For an elevated option, plate individual slices with a small dollop of crème fraîche on the side and a fresh strawberry on top. The tang of crème fraîche cuts through the sweetness beautifully. You can also serve thin slices with fresh whipped cream and a compote made from macerated strawberries—just toss fresh berries with a tablespoon of sugar and let them sit for 15 minutes to release their juice.
Storage & Reheating
Store the frosted cake in an airtight container at room temperature for up to 2 days. The crumb stays tender and the frosting holds up well. For longer storage, refrigerate the cake in an airtight container for up to 4 days. The crumb may feel slightly denser when cold, but it softens quickly at room temperature. You can also freeze unfrosted cake layers wrapped tightly in plastic wrap for up to 2 months. Thaw at room temperature for 2-3 hours before frosting and serving. Do not freeze the frosted cake; the frosting separates and the texture suffers.
If you need to reheat individual slices, microwave them uncovered for 10-15 seconds on 50% power. This gently warms the crumb without drying it out. Alternatively, let slices sit at room temperature for 30 minutes before serving—the cake tastes better this way because the crumb relaxes and the frosting softens.
FAQ
Can I use frozen strawberries instead of fresh?
Yes, absolutely. Thaw frozen strawberries completely and drain any excess liquid before blending. The puree may be slightly more watery than fresh strawberry puree, so reduce the milk by 1-2 tablespoons to compensate. The flavor will be slightly less bright than fresh strawberries, but the cake will still taste delicious and the texture won’t suffer.
What if my gluten-free flour blend doesn’t contain xanthan gum?
Add 1/4 teaspoon of xanthan gum to the dry ingredients. Xanthan gum provides the binding structure that gluten would normally provide. Without it, the crumb will be crumbly and dry. If you’re unsure whether your blend contains xanthan gum, check the package label or contact the manufacturer. Most commercial 1:1 blends (Bob’s Red Mill, King Arthur) already include it.
Can I make this as a single-layer cake instead of two layers?
Yes, but increase the bake time to 40-45 minutes. Divide the batter between one 9-inch round pan or two 8-inch pans filled higher than usual. Check for doneness starting at 38 minutes. A thicker cake takes longer to bake through, and gluten-free cakes can dry out if overbaked, so watch carefully. You’ll have less frosting per slice with a single layer, which some people prefer.
What’s the best way to make sure my cake doesn’t sink in the middle?
This usually happens when the oven temperature is off or the leavening is too much. Invest in an oven thermometer and verify your oven’s actual temperature—many home ovens run 25-50°F hotter or cooler than the dial indicates. Also, don’t increase the baking powder or baking soda. The recipe is balanced for these specific amounts. Finally, avoid opening the oven door before 25 minutes of baking, as temperature fluctuations can cause sinking.
Can I substitute the almond flour with another flour?
I don’t recommend it. Almond flour provides fat and binding that other flours can’t replicate. If you have a tree nut allergy, you could try sunflower seed flour in the same amount, though the crumb may be slightly less tender. Oat flour will make the cake denser. Coconut flour will make it drier because it absorbs more liquid. If you must substitute, start with a small test batch to see how the texture shifts.
How far ahead can I bake this cake?
I bake the unfrosted layers up to 2 days ahead. Wrap them tightly in plastic wrap and store at room temperature. Frost no more than 4 hours before serving if you want the frosting to stay creamy and set. If you frost earlier, refrigerate the cake and pull it out 30 minutes before serving so the frosting softens and the crumb warms slightly. The cake tastes best within 2-3 days of baking, when the crumb is still tender.
What if I don’t have fresh strawberries for garnish?
You can skip the garnish entirely, or use freeze-dried strawberries for visual interest. They add a crunchy texture contrast and keep longer than fresh berries. You could also dust the top with powdered sugar or a light coating of cocoa powder for contrast. A simple garnish of fresh mint leaves looks elegant and doesn’t require strawberries.
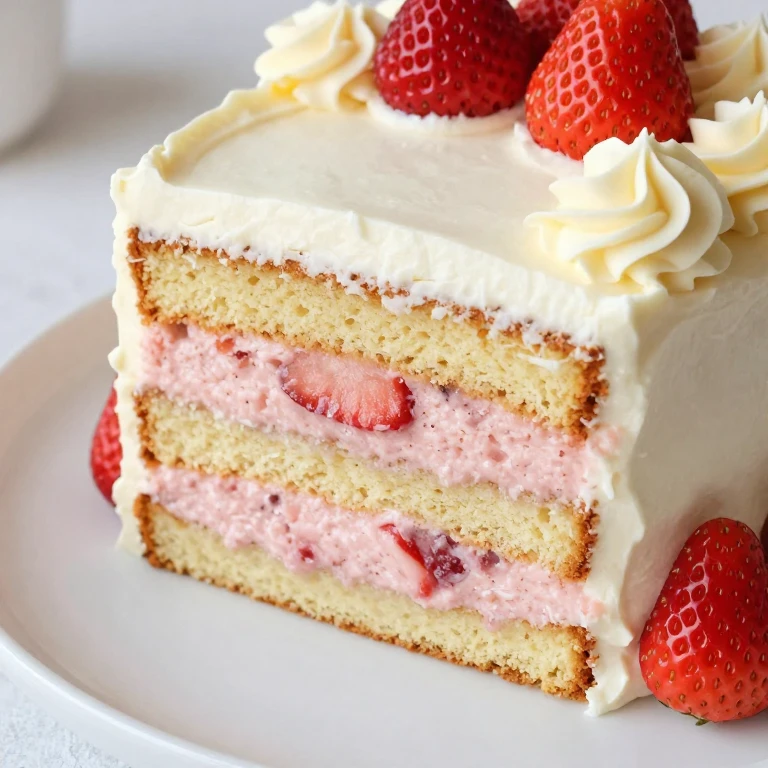
Gluten-Free Strawberry Cake With Moist, Tender Crumb
Ingredients
Method
- Preheat oven to 350°F with rack positioned in center. Grease two 8-inch round cake pans with butter or nonstick spray, then line bottoms with parchment paper. Grease the parchment too.
- Make strawberry puree by blending fresh strawberries until completely smooth. Strain through fine-mesh sieve if preferred. You need 3/4 cup puree total.
- In a medium bowl, whisk together 1 3/4 cups gluten-free flour blend, 1/2 cup almond flour, 1 1/2 teaspoons baking powder, 1/2 teaspoon baking soda, 1/4 teaspoon salt, and 1/2 teaspoon xanthan gum if your blend doesn't include it. Whisk for 30 seconds to fully combine and aerate.
- In a large bowl, cream together 12 tablespoons room-temperature butter and 3/4 cup sugar. Beat for 3-4 minutes until pale and fluffy. Scrape bowl frequently.
- Add 2 room-temperature eggs one at a time, beating for 45 seconds after each addition. The mixture should look creamy and smooth, not separated.
- Alternate adding dry ingredients and wet ingredients in three additions. Start with 1/3 of dry mixture, beat for 20 seconds. Then add half of the combined strawberry puree (3/8 cup) and 1/8 cup milk, beat for 20 seconds. Repeat with another 1/3 dry, remaining puree and milk. Finish with final 1/3 dry mixture. After the last addition, beat for 45 seconds until just combined. Do not overmix.
- Add 1 teaspoon vanilla extract and fold gently with a rubber spatula for 10 strokes. Let batter rest at room temperature for 10 minutes. You'll notice it thickens slightly as the gluten-free flour hydrates.
- Divide batter evenly between prepared pans, about 2 cups per pan. Smooth the tops gently. Tap each pan on the counter once to release large air bubbles.
- Bake for 28-32 minutes. The cake is done when a toothpick inserted in the center comes out with a few moist crumbs (not wet batter). The tops should be set and spring back lightly when touched. Do not overbake—gluten-free cakes dry out quickly.
- Cool cakes in pans for 15 minutes. Turn out onto wire racks and cool completely, about 1 hour. Once cooled, level the tops with a serrated knife if they've domed.
- For frosting, beat 8 ounces room-temperature cream cheese and 6 tablespoons room-temperature butter together for 2 minutes until smooth and creamy. Add 2 cups powdered sugar, 1/2 teaspoon vanilla, and a pinch of salt. Beat for 2-3 minutes until light and fluffy. Do not overbeat or the frosting will become greasy.
- Place one cake layer on a serving plate. Spread 3/4 cup frosting on top. Add second layer and frost top and sides with remaining frosting. Garnish with fresh strawberries. Chill for 30 minutes before slicing for clean cuts.