
Sheet cakes are the workhorse of my dessert kitchen—they feed a crowd, they’re forgiving, and they’re the perfect canvas for design work that actually impresses. Whether you’re decorating for a weeknight family dinner, pulling together something showstopping for guests, prepping components ahead, or keeping things approachable for kids, the designs I’m sharing here prove you don’t need fancy tools or years of training to make a cake that looks intentional and polished. I’ve built these 15 designs around one core principle: texture contrast and strategic color placement that makes every finish feel elevated without the fuss.
What ties these designs together is the Whirl Factor—each one combines buttercream technique with a specific texture or color contrast that transforms a simple sheet cake into something memorable. You’ll find rustic borders, bold drips, structured florals, modern linework, and gradient effects, all organized by the occasions where they shine most. Let’s build your cake design confidence.
Sheet Cake Designs for Weeknight Decorating—Speed + Impact
These designs come together in 20–30 minutes of active decorating time. I’ve chosen techniques that deliver polish without precision, so imperfect edges actually read as intentional. Each one pairs with a flavor that anchors the whole cake.
1. Rustic Border with Crumb Finish
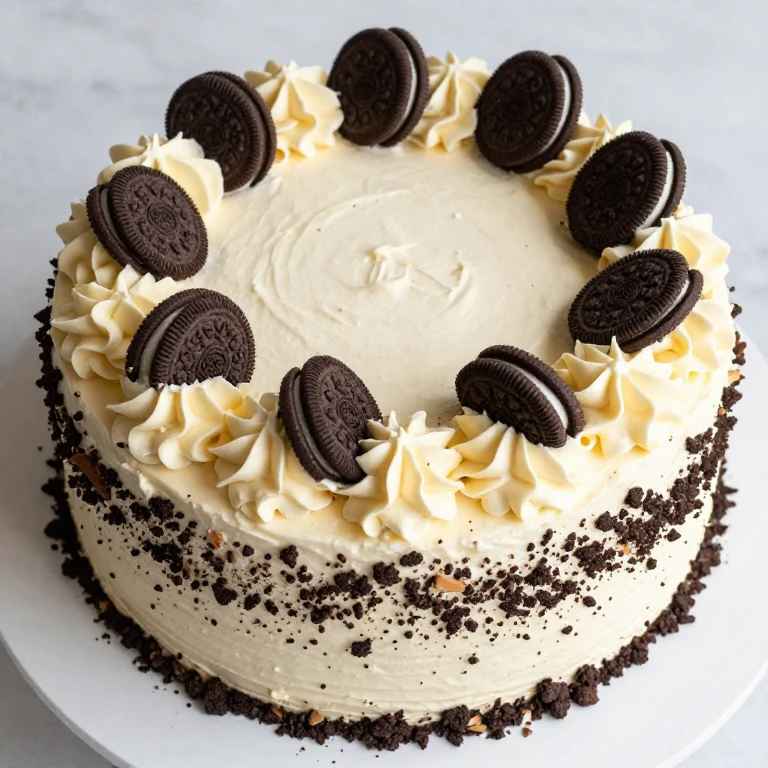
This is my go-to when I want something that looks intentional but forgives uneven piping. A thick border of buttercream around the top edge, paired with crushed cookie crumbs or toasted nuts pressed into the sides, creates immediate texture and hides any frosting imperfections. The Whirl Factor here is the contrast between smooth frosting on top and a crunchy, visible texture on the perimeter—it’s a design move that reads as purposeful, not accidental.
Ingredients
- 1 baked 9×13-inch sheet cake (any flavor)
- 2 cups buttercream (room temperature)
- 1 cup crushed cookies or toasted nuts (Oreos, graham crackers, or almonds work well)
- Offset spatula
- Piping bag with large round or star tip
- Small bowl for crumbs
Instructions
- Level the cake with a serrated knife if needed, then place on a serving board or cake board.
- Spread a thin layer of buttercream across the top as a crumb coat; chill 15 minutes.
- Pipe thick dollops or a continuous border of buttercream around the top edge using a large round or star tip, working clockwise.
- Pour crushed cookies or nuts into a small bowl. Tilt the cake slightly and press the crumbs into the frosting on the sides, working in sections.
- Smooth the top with an offset spatula, leaving the piped border visible and rustic.
- Garnish the center with a few whole cookies or a sprinkle of crumbs if desired.
Weeknight Tip: Active decorating time is 20 minutes. Use store-bought buttercream if you’re short on time—it pipes just as well as homemade and saves 10 minutes.
Make-Ahead Note: Decorate up to 4 hours ahead; store at room temperature away from direct sunlight to keep the crumb texture crisp.
2. Bold Drip with Solid Top
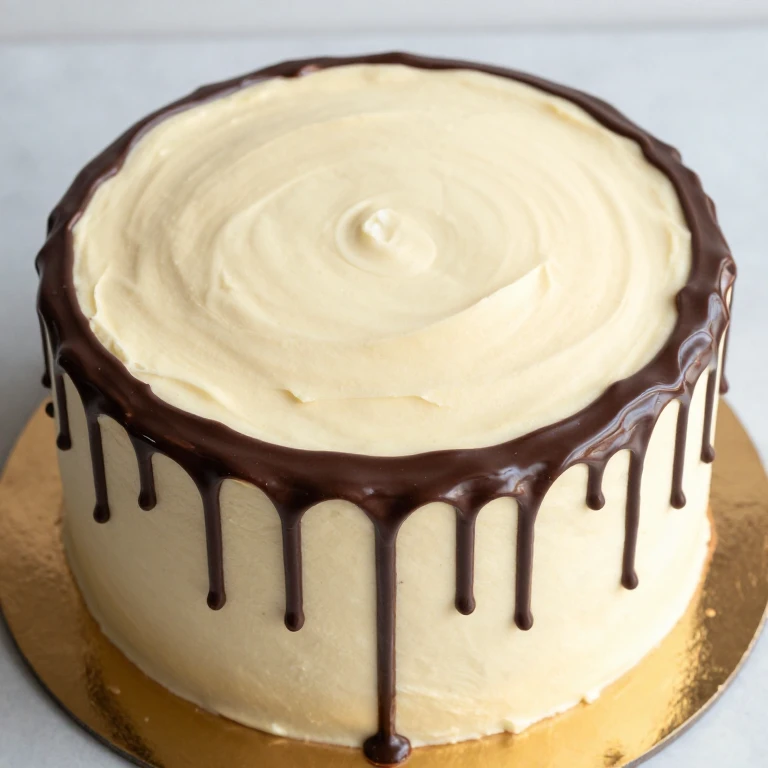
Drips feel dramatic but require zero piping skill—just a steady hand and the right consistency. I melt chocolate or thin a buttercream glaze, then pour it in a thin stream along the top edge and let gravity do the work. The Whirl Factor is the contrast between a perfectly smooth, flat-frosted top and the organic, uncontrolled movement of the drips—it’s structured chaos that reads as modern and intentional.
Ingredients
- 1 baked 9×13-inch sheet cake
- 2 cups buttercream (for the top)
- 1 cup chocolate ganache or thinned buttercream (for drips)
- Offset spatula
- Piping bag or squeeze bottle (for drips)
- Small saucepan (for melting)
Instructions
- Crumb coat the cake and chill 15 minutes.
- Apply a thick final layer of buttercream to the top, smoothing with an offset spatula until nearly flat.
- Prepare your drip mixture: warm chocolate ganache or thin buttercream with a little milk until it flows but doesn’t run.
- Transfer the drip mixture to a piping bag or squeeze bottle. Holding it 1–2 inches above the top edge, squeeze a thin, continuous stream along the perimeter, letting it flow naturally down the sides.
- Allow drips to set for 10 minutes before serving or transporting.
Weeknight Tip: Total active time is 25 minutes. Use melted chocolate chips mixed with 1 tablespoon coconut oil for a foolproof drip that sets quickly.
Make-Ahead Note: Drips can be applied up to 6 hours ahead; store at room temperature to keep them glossy.
3. Ombré Buttercream Gradient
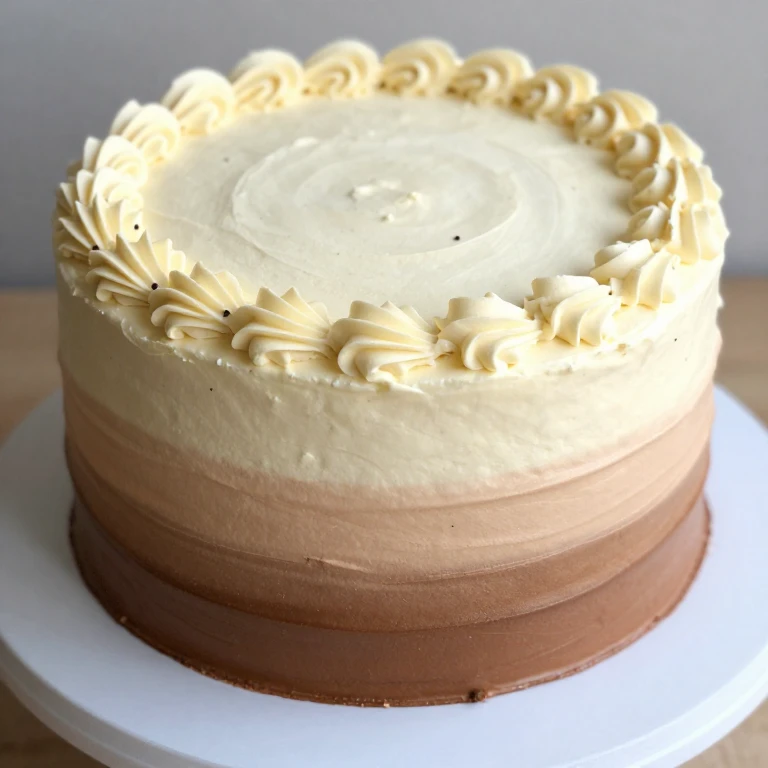
Layering buttercream in shades of one color across the top creates an ombré effect that looks complex but is surprisingly forgiving. I divide buttercream into three bowls, tint each a different shade, then sweep them across in bands with an offset spatula. The Whirl Factor is the color progression itself—it’s a design element that doesn’t require piping or precision, just intentional color choice.
Ingredients
- 1 baked 9×13-inch sheet cake
- 3 cups buttercream, divided into 3 bowls
- Gel food coloring (3 shades of the same hue)
- Offset spatula
- Piping bag with large round tip (optional, for optional dots)
Instructions
- Crumb coat and chill the cake 15 minutes.
- Tint each bowl of buttercream a different shade: lightest, medium, and darkest. Stir well to combine.
- Spread the lightest shade in a band across the top third of the cake.
- Apply the medium shade in the middle third, slightly overlapping the first band and blending the edges with a clean offset spatula.
- Finish with the darkest shade in the bottom third, blending where it meets the medium shade.
- Optional: pipe small dots or a simple border along the top edge for definition.
Weeknight Tip: This design works beautifully on chocolate or vanilla cakes and takes 20 minutes total.
Make-Ahead Note: Decorate up to 8 hours ahead; cover loosely with plastic wrap and store at room temperature.
4. Simple Piped Dots Pattern
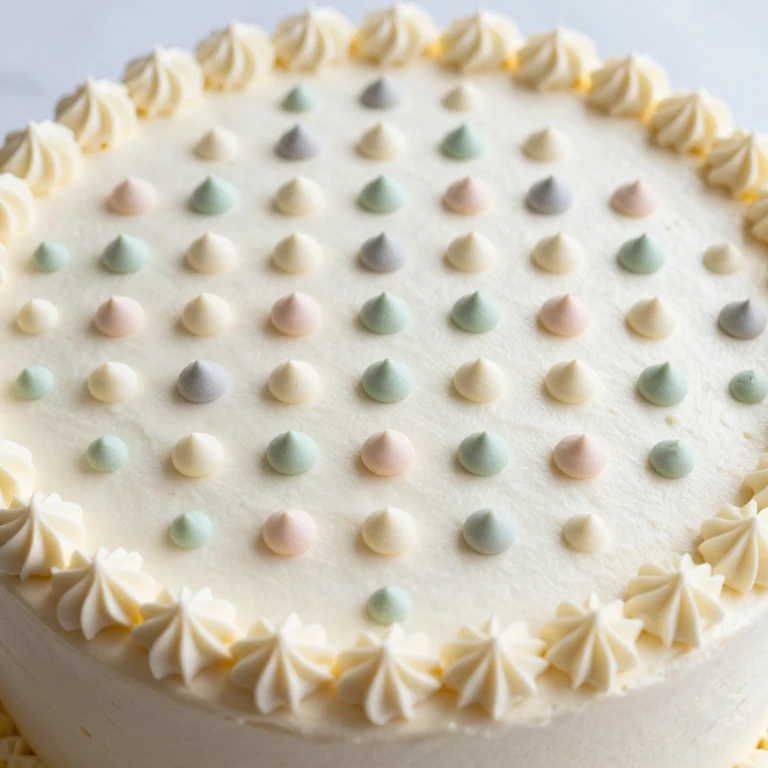
A grid or scattered pattern of piped buttercream dots is the fastest way to add visual interest without freehand piping. I use a small round tip and work in rows or a random scatter, keeping the dots consistent in size. The Whirl Factor here is repetition and rhythm—the pattern itself becomes the design, and imperfect spacing actually adds charm.
Ingredients
- 1 baked 9×13-inch sheet cake
- 2 cups buttercream
- Piping bag with small round tip (#3 or #5)
- Offset spatula
Instructions
- Crumb coat and chill 15 minutes.
- Apply a smooth base layer of buttercream to the top with an offset spatula.
- Fill your piping bag with contrasting buttercream (darker or a different color).
- Pipe small dots in a grid pattern (1 inch apart) or scattered across the top, keeping pressure consistent.
- Pipe a simple border around the top edge if desired.
Weeknight Tip: Active time is 15 minutes. Use two colors of buttercream for maximum impact with minimal effort.
Make-Ahead Note: Decorate up to 6 hours ahead; store at room temperature.
Sheet Cake Designs for Dinner Parties—Impression + Reliability
These designs build confidence and deliver showstopping results that hold up through serving. Each one can be partially prepped ahead, so you’re not scrambling during party setup. I’ve chosen techniques that look intricate but are actually quite forgiving once you understand the motion.
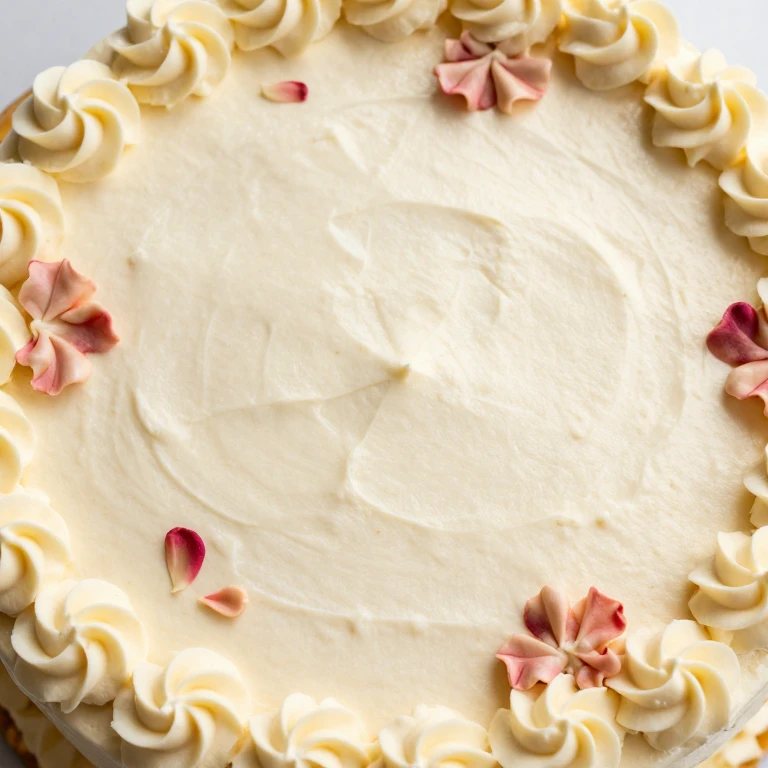
5. Floral Bouquet Arrangement
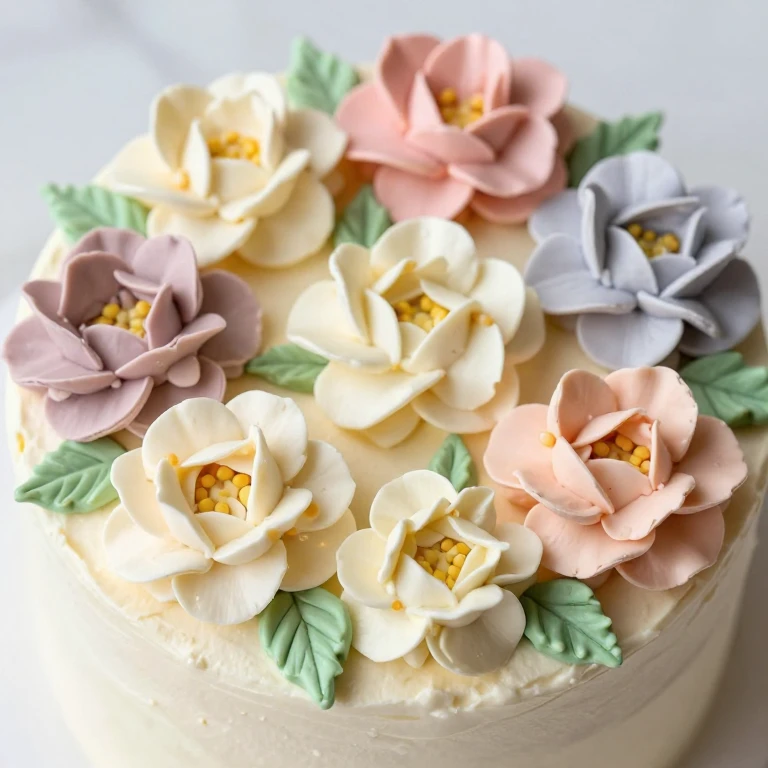
Piped buttercream flowers clustered into a loose bouquet on one corner or the center of the cake feels both elegant and modern. I use a petal tip to create roses, dahlias, or simple blooms, then group them with greenery piped using a leaf tip. The Whirl Factor is the dimensional texture of layered petals against a smooth background—it’s a design that photographs beautifully and tastes like buttercream luxury.
Ingredients
- 1 baked 9×13-inch sheet cake
- 3 cups buttercream, divided
- Piping bags with petal tip (#101 or #102) and leaf tip (#70 or #71)
- Gel food coloring (optional, for flower and leaf colors)
- Offset spatula
- Flower nail (optional, for piping individual blooms)
Instructions
- Crumb coat and chill the cake 15 minutes.
- Apply a smooth base layer of buttercream to the top with an offset spatula.
- Prepare your piping bags: one with petal tip filled with buttercream (tinted if desired), one with leaf tip filled with green-tinted buttercream.
- Pipe individual flowers on a flower nail or directly onto the cake, starting with the center and adding petals in a spiral or fan pattern.
- Pipe leaves around and between flowers, angling them to suggest movement.
- Cluster flowers into a loose bouquet, leaving some of the base frosting visible for balance.
Dinner Party Tip: Pipe flowers onto parchment paper 1–2 days ahead, chill them, then transfer to the frosted cake 2 hours before guests arrive. This removes the pressure of live piping on party day.
Make-Ahead Note: Individual flowers can be piped and chilled on parchment for up to 3 days; attach them to the frosted cake with a tiny dab of buttercream.
6. Marble Swirl Effect

Swirling two or three colors of buttercream together on the top creates an organic, artistic look that’s actually quite simple. I divide buttercream into bowls, tint each a different color, dollop them across the top, then drag a knife or offset spatula through the colors in one direction. The Whirl Factor is the color contrast and the motion itself—it’s a design that looks intentional and sophisticated without requiring precision.
Ingredients
- 1 baked 9×13-inch sheet cake
- 3 cups buttercream, divided into 3 bowls
- Gel food coloring (2–3 coordinating colors)
- Offset spatula or long serrated knife
Instructions
- Crumb coat and chill 15 minutes.
- Tint each bowl of buttercream a different color and stir well.
- Dollop each color across the top of the cake in alternating sections, using about 1 cup per color.
- Using an offset spatula or long knife, drag through the colors in one direction (left to right, or top to bottom), creating a swirled pattern.
- Wipe your tool between passes to keep the pattern clean.
- Smooth the sides if desired, or leave them rustic to match the swirled top.
Dinner Party Tip: This design works beautifully as a backdrop for fresh flowers or a simple cake topper placed in the center.
Make-Ahead Note: Complete this design up to 12 hours ahead; store at room temperature, loosely covered with plastic wrap.
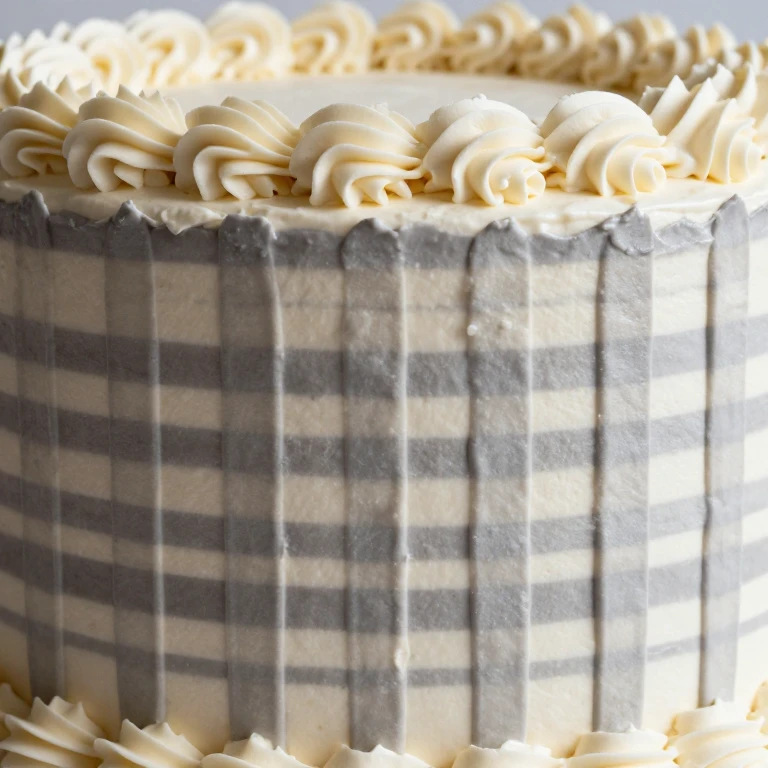
7. Geometric Linework Pattern
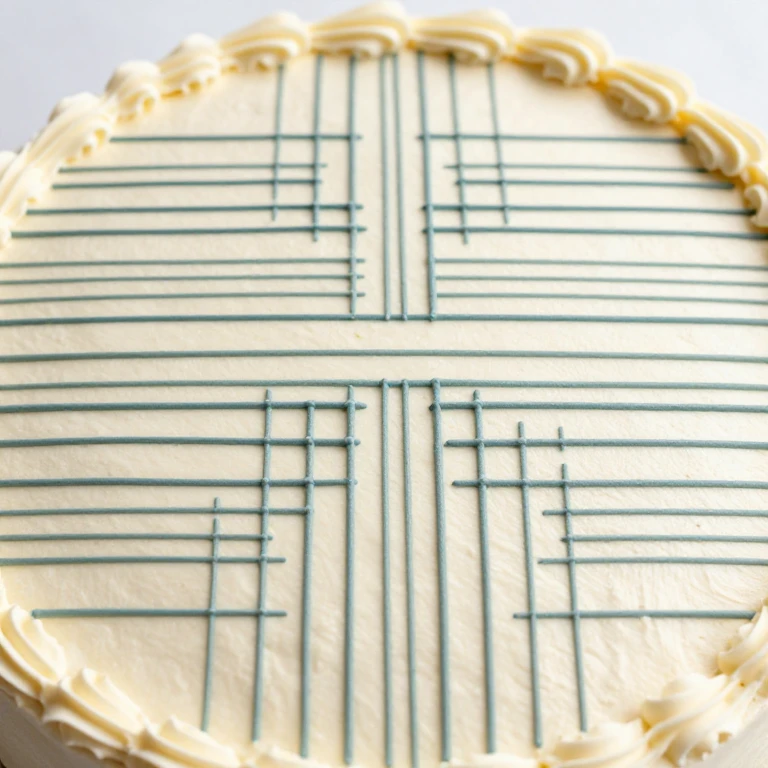
Thin, precise lines piped with a small round tip create a modern, graphic look. I pipe parallel lines, grids, or abstract patterns across the frosted top, keeping the lines evenly spaced and the pressure consistent. The Whirl Factor is the contrast between smooth buttercream and sharp, clean lines—it’s a design that reads as intentional and contemporary.
Ingredients
- 1 baked 9×13-inch sheet cake
- 2.5 cups buttercream (for base)
- 0.5 cup contrasting buttercream (for lines)
- Piping bag with small round tip (#2 or #3)
- Offset spatula
- Ruler (optional, for spacing guidance)
Instructions
- Crumb coat and chill 15 minutes.
- Apply a smooth base layer of buttercream to the top with an offset spatula, using your chosen color.
- Fill a piping bag with contrasting buttercream and attach a small round tip.
- Pipe parallel lines across the top, spacing them 1–1.5 inches apart, working left to right.
- Optional: pipe a second set of lines perpendicular to the first, creating a grid pattern.
- Finish with a clean border around the top edge.
Dinner Party Tip: Practice your line spacing on parchment paper first; consistency reads as intentional, and a few wobbly lines add character.
Make-Ahead Note: Complete up to 12 hours ahead; store at room temperature, loosely covered.
8. Textured Swoosh Border
A thick border of buttercream applied with a spatula in a swooshing motion creates a textured, sculptural frame around the top edge. I use an offset spatula to apply the frosting in overlapping strokes, creating peaks and valleys that catch light. The Whirl Factor is the dimensional texture—it’s a design that adds depth without requiring piping skill.
Ingredients
- 1 baked 9×13-inch sheet cake
- 2.5 cups buttercream
- Offset spatula (angled works best)
Instructions
- Crumb coat and chill 15 minutes.
- Apply a smooth base layer of buttercream to the top with an offset spatula.
- Using the same spatula, create a thick border around the top edge by applying additional buttercream in swooshing strokes, working counterclockwise.
- Vary the height of the swooshes slightly for visual interest.
- Use the tip of the spatula to create peaks and texture within the border.
- Step back and assess; add more texture or smooth areas as needed.
Dinner Party Tip: This design is very forgiving—imperfect peaks and uneven heights add to the artisanal appeal.
Make-Ahead Note: Complete up to 8 hours ahead; store at room temperature, loosely covered with plastic wrap.
Sheet Cake Designs for Meal Prep—Yield + Reheat Quality
These designs are built to hold up during storage and transport. I’ve chosen techniques that don’t require last-minute assembly and actually improve slightly as the frosting sets. Each one yields components that can be decorated ahead and kept fresh for 2–3 days.
9. Monochromatic Stripe Design
Piping vertical or horizontal stripes in buttercream creates a bold, graphic design that’s easy to execute and holds beautifully during storage. I use a medium round or flat tip and work in parallel lines, spacing them evenly. The Whirl Factor is the rhythm and color intensity—it’s a design that looks intentional and photographs well, and the stripes actually help visually divide the cake for portioning.
Ingredients
- 1 baked 9×13-inch sheet cake
- 2.5 cups buttercream (for base)
- 0.75 cup contrasting buttercream (for stripes)
- Piping bag with medium round or flat tip (#5 or #8)
- Offset spatula
Instructions
- Crumb coat and chill 15 minutes.
- Apply a smooth base layer of buttercream to the top with an offset spatula.
- Fill a piping bag with contrasting buttercream and attach your chosen tip.
- Pipe vertical or horizontal stripes across the top, spacing them 1–1.5 inches apart.
- Use consistent pressure to keep stripe width even.
- Optional: pipe a simple border around the top edge to frame the design.
Meal Prep Tip: This design is excellent for portioning—the stripes naturally guide where to cut, and each slice looks intentional.
Storage Note: Decorate up to 3 days ahead; store in an airtight container at room temperature. The frosting actually sets firmer over time, making slices cleaner.
10. Scattered Rosette Pattern
Small rosettes piped in a loose scatter pattern across the top create visual interest without requiring perfect spacing. I use a small rose tip and work quickly, piping small blooms in clusters and gaps. The Whirl Factor is the repetition and dimensional texture—it’s a design that holds up beautifully during storage and actually becomes more defined as the frosting sets.
Ingredients
- 1 baked 9×13-inch sheet cake
- 2.5 cups buttercream (for base)
- 1 cup buttercream (for rosettes, same or contrasting color)
- Piping bag with small rose tip (#23 or #24)
- Offset spatula
Instructions
- Crumb coat and chill 15 minutes.
- Apply a smooth base layer of buttercream to the top with an offset spatula.
- Fill a piping bag with buttercream and attach a small rose tip.
- Pipe small rosettes across the top in a scattered pattern, grouping some together and leaving gaps for balance.
- Use consistent pressure and pull straight up to release each rosette cleanly.
- Leave some base frosting visible to avoid a too-busy appearance.
Meal Prep Tip: Rosettes are dimensional and hold their shape beautifully through storage and transport.
Storage Note: Decorate up to 3 days ahead; store in an airtight container at room temperature. Rosettes actually become more defined as they set.
11. Buttercream Icing with Sprinkle Border
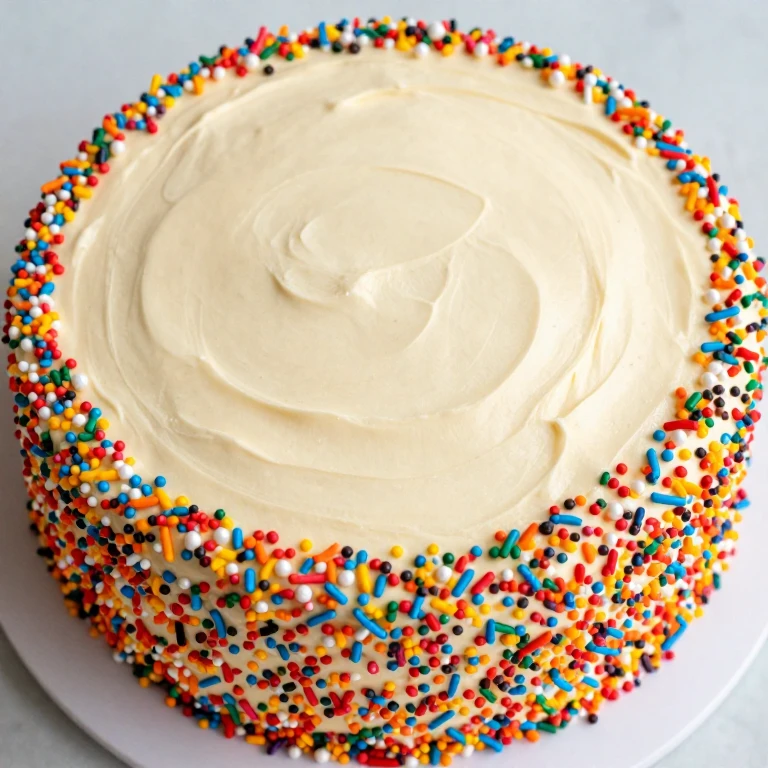
A smooth, flat-frosted top paired with a thick border of sprinkles around the perimeter is quick, foolproof, and visually striking. I apply the base frosting, then press sprinkles into the sides and a thin line along the top edge. The Whirl Factor is the texture contrast and the pop of color—it’s a design that looks polished and holds beautifully during storage.
Ingredients
- 1 baked 9×13-inch sheet cake
- 2.5 cups buttercream
- 1 cup sprinkles (any style: pearl, rod, or nonpareils)
- Offset spatula
- Small bowl (for sprinkles)
Instructions
- Crumb coat and chill 15 minutes.
- Apply a smooth, flat layer of buttercream to the top with an offset spatula.
- Pour sprinkles into a small bowl. Working in sections, tilt the cake and press sprinkles into the frosting along the sides, covering them fully.
- Apply a thin line of sprinkles along the top edge where it meets the frosted top.
- Use a clean offset spatula to gently smooth the top, being careful not to drag sprinkles into the center.
Meal Prep Tip: This design is extremely stable during storage and transport—sprinkles don’t shift or smudge.
Storage Note: Decorate up to 5 days ahead; store in an airtight container at room temperature. The sprinkles actually adhere more firmly as the frosting sets.
12. Naked Cake with Crumb Top
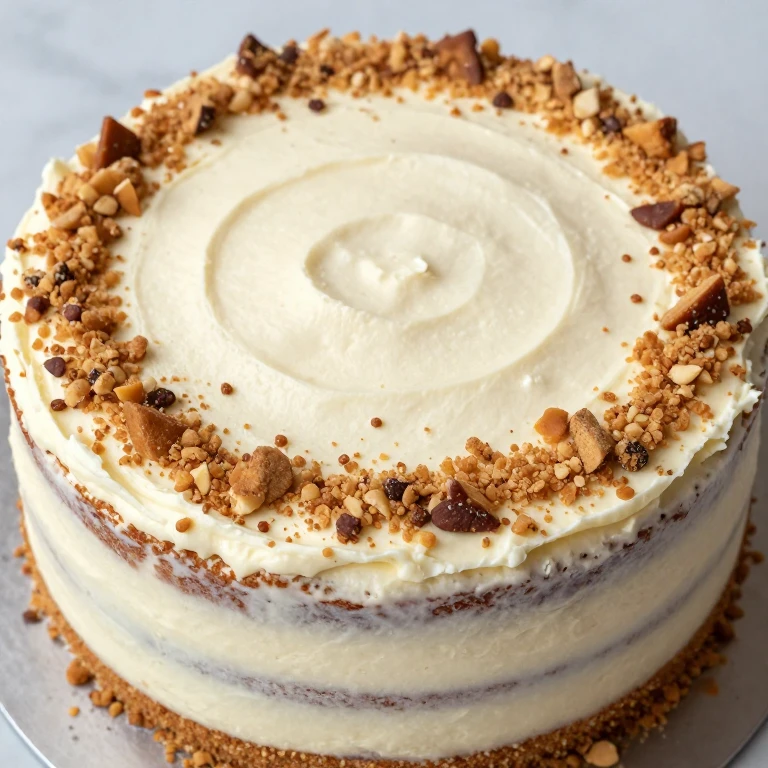
Leaving the sides unfrosted (or lightly frosted to show cake crumb) and focusing decoration on the top creates a rustic, modern aesthetic. I frost the top smoothly, then press crushed cookies, toasted nuts, or cake crumbs into a border or scattered across the surface. The Whirl Factor is the contrast between smooth frosting and visible texture—it’s a design that celebrates the cake itself and holds beautifully through storage.
Ingredients
- 1 baked 9×13-inch sheet cake
- 2 cups buttercream (for top only)
- 1.5 cups crushed cookies, toasted nuts, or cake crumbs
- Offset spatula
- Small bowl (for crumbs)
Instructions
- Level the cake and place on a serving board.
- Apply a smooth layer of buttercream to the top only, leaving the sides bare or with just a thin crumb coat.
- Pour crumbs into a small bowl. Press them into the frosting around the top edge, working in sections.
- Scatter a few crumbs across the top center for balance.
- Optional: pipe a simple border or add fresh fruit for color contrast.
Meal Prep Tip: This design is excellent for cakes that will be transported—the exposed sides are less likely to smudge or get damaged.
Storage Note: Decorate up to 4 days ahead; store in an airtight container at room temperature. The cake structure actually firms up nicely over time.
Sheet Cake Designs for Family-Friendly Decorating—Approachability + Flexibility
These designs are forgiving, fun, and easy to adapt based on what you have on hand. I’ve chosen techniques that kids can help with and that celebrate imperfection as part of the charm. Each one is flexible—swap colors, toppings, or techniques based on what’s in your pantry.
13. Candy and Sprinkle Scatter
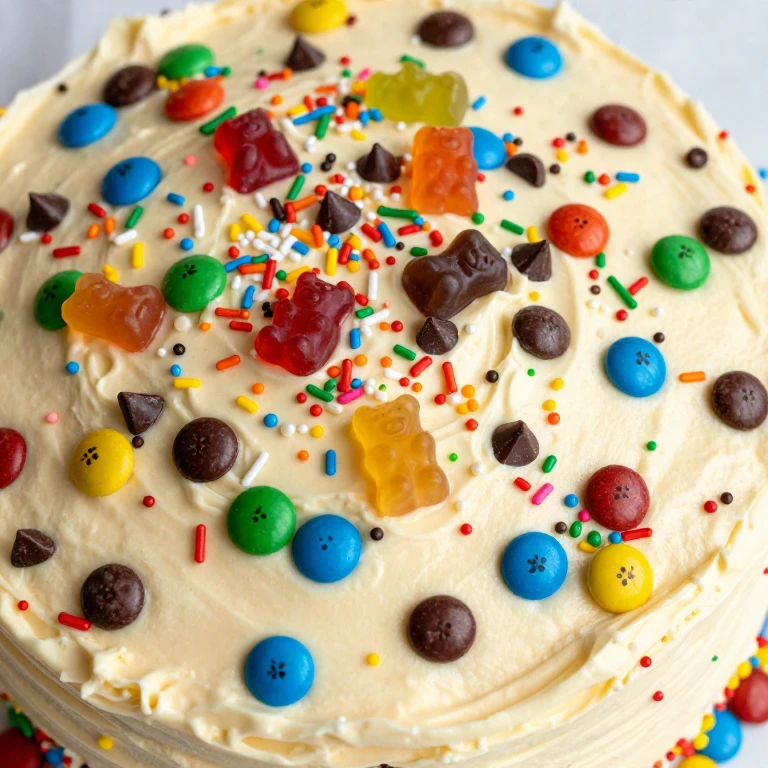
Simply scattering candies, sprinkles, and small chocolate pieces across a frosted top is the fastest way to make a cake look festive without any piping skill. I frost the cake smoothly, then press whatever candies are on hand into the frosting while it’s still soft. The Whirl Factor is the color and texture variety—it’s a design that celebrates abundance and works with any flavor combination.
Ingredients
- 1 baked 9×13-inch sheet cake
- 2.5 cups buttercream
- 1 cup assorted candies and sprinkles (M&Ms, gummy bears, chocolate chips, pearl sprinkles, etc.)
- Offset spatula
Instructions
- Crumb coat and chill 15 minutes.
- Apply a smooth layer of buttercream to the top with an offset spatula.
- While the frosting is still soft, scatter candies and sprinkles across the top, pressing them gently into the frosting.
- Work in sections to ensure even coverage and avoid over-crowding.
- Step back and add more candies to any sparse areas.
Family-Friendly Tip: This is a perfect decorating project for kids—let them choose candies and press them in. The more imperfect, the more fun it looks.
Storage Note: Decorate up to 6 hours ahead if using chocolate candies; longer if using non-chocolate sprinkles. Store at room temperature away from direct sunlight.
14. Whipped Cream Cloud Finish
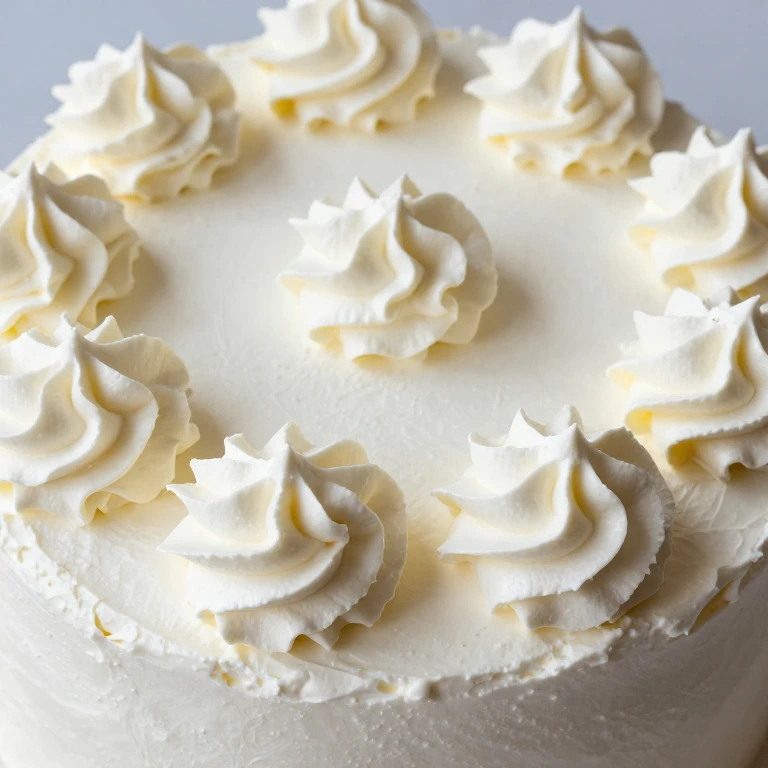
Dolloping whipped cream across the top and creating peaks with a spatula is quick, kid-friendly, and surprisingly elegant. I use homemade or store-bought whipped cream, apply it in generous dollops, then create height and texture with a spatula. The Whirl Factor is the light, airy texture contrast against the dense cake—it’s a design that feels indulgent and tastes like a cloud.
Ingredients
- 1 baked 9×13-inch sheet cake
- 1 cup buttercream (thin crumb coat)
- 2 cups heavy whipping cream (or 16 oz store-bought whipped cream)
- 2 tablespoons powdered sugar (if making fresh whipped cream)
- 1 teaspoon vanilla extract (if making fresh whipped cream)
- Offset spatula
Instructions
- Crumb coat the cake with a thin layer of buttercream and chill 15 minutes.
- If making fresh whipped cream: whip heavy cream, powdered sugar, and vanilla until stiff peaks form (2–3 minutes).
- Dollop whipped cream across the top in generous mounds, spacing them about 2 inches apart.
- Use an offset spatula to create peaks and swirls, varying the height for visual interest.
- Fill gaps with more whipped cream as needed.
- Chill until serving time.
Family-Friendly Tip: Kids love the cloud-like texture and can help create peaks with a spatula. This is a great design for afternoon baking projects.
Storage Note: Decorate no more than 4 hours ahead; store in the refrigerator. Whipped cream is best fresh but holds well when chilled.
15. Simple Piped Name or Message
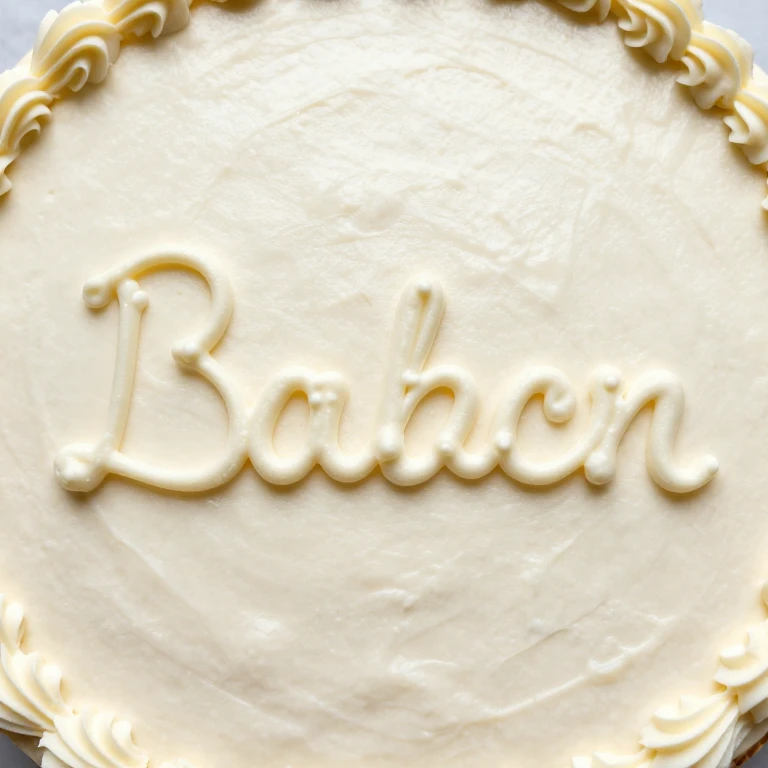
Piping a name, birthday message, or simple greeting across the frosted top is personal, meaningful, and easier than it sounds. I use a small round tip and practice the letters on parchment paper first, then pipe directly onto the cake. The Whirl Factor is the personalization itself—it’s a design that makes the cake feel custom and special without requiring advanced piping skills.
Ingredients
- 1 baked 9×13-inch sheet cake
- 2.5 cups buttercream (for base)
- 0.5 cup contrasting buttercream (for lettering)
- Piping bag with small round tip (#2 or #3)
- Offset spatula
- Parchment paper (for practice)
Instructions
- Crumb coat and chill the cake 15 minutes.
- Apply a smooth base layer of buttercream to the top with an offset spatula.
- Practice your message on parchment paper using the same piping bag and tip you’ll use on the cake.
- Fill a piping bag with contrasting buttercream and attach a small round tip.
- Pipe your message across the center of the cake, working slowly and keeping consistent pressure.
- If you make a mistake, smooth it out with a spatula and try again—the frosting is forgiving.
Family-Friendly Tip: This design is perfect for birthdays, anniversaries, or celebration cakes. The personalization makes it feel handmade and special.
Storage Note: Decorate up to 12 hours ahead; store at room temperature, loosely covered with plastic wrap.
Sheet Cake Design FAQs
What’s the best buttercream consistency for piping designs?
I always use room-temperature buttercream for piping—it flows smoothly without being so soft it loses shape. If your buttercream is too stiff, it won’t pipe cleanly; too soft, and it won’t hold detail. The test: when you press your finger into it, it should leave a slight indent that holds. If you need to adjust, warm it gently in a bowl over hot water (30 seconds at a time) or chill it slightly. I also sift powdered sugar into my buttercream to firm it up if I’m doing detailed piping.
How far in advance can I decorate a sheet cake?
Most buttercream designs hold beautifully for 12–24 hours at room temperature, depending on the technique. Drips and smooth finishes can be done up to 6 hours ahead; piped details like flowers or dots hold for up to 12 hours; textured designs like borders or rosettes actually improve as they set and can be done up to 3 days ahead. Whipped cream finishes are best within 4 hours. I always store decorated cakes loosely covered with plastic wrap to prevent the frosting from drying out or absorbing odors from the fridge.
What if my piping doesn’t look perfect?
Imperfection is part of the charm—I promise. If a line is wobbly, a dot is lopsided, or a flower isn’t symmetrical, it reads as handmade and intentional, not as a mistake. If you really want to fix something, use a small offset spatula or the back of a spoon to gently smooth it out while the frosting is still soft, then try again. The frosting is incredibly forgiving. I’ve found that stepping back and looking at the whole cake rather than scrutinizing individual details is the best way to assess whether the design works—and almost always, it does.
Can I use store-bought frosting for these designs?
Absolutely. Store-bought buttercream pipes just as well as homemade, and it saves time. The only adjustment I make is sometimes adding a tablespoon of milk or cream to thin it slightly if it’s very stiff, or a bit of powdered sugar if it’s too soft. I also prefer store-bought frosting for designs that require piping strength (like flowers or detailed linework) because it tends to be slightly firmer than homemade. The flavor trade-off is worth the convenience, especially on weeknights or when you’re decorating multiple cakes.
What’s the best way to transport a decorated sheet cake?
I always place the decorated cake on a sturdy cake board or cardboard base, then set it in a cake box or large plastic container with a tight-fitting lid. For car transport, I place the box on a flat surface in the car (never on a seat where it might slide). Designs with textured elements like crumbs or sprinkles are the most stable during transport; smooth designs with piped details are slightly more fragile. I avoid transporting whipped cream cakes if possible—they’re best decorated at the destination. If I’m traveling more than 20 minutes, I keep the cake in a cooler with a cold pack nearby (not touching the cake directly) to keep the frosting firm.
How do I choose colors that work together?
I always start with a color scheme in mind: monochromatic (one color in multiple shades), complementary (opposite colors on the color wheel), or analogous (colors next to each other). For sheet cakes, I prefer keeping it to 2–3 colors maximum—it reads cleaner and more intentional. I also consider the cake flavor and occasion: chocolate cakes look stunning with jewel tones or metallics; vanilla cakes are flexible and work with pastels, brights, or earth tones. Gel food coloring gives the most vibrant, true colors; I avoid liquid coloring because it thins the buttercream. I always test colors on a small amount of frosting first to see how they look once piped.
Can I make these designs ahead and freeze them?
Yes, but with caution. Buttercream designs freeze beautifully for up to 2 weeks when the cake is wrapped tightly in plastic wrap and placed in an airtight container. Thaw the cake in the refrigerator for 2–3 hours before serving—this prevents condensation from forming on the frosting. Designs with delicate piping (like flowers) hold their shape better in the freezer than softer designs like drips. Whipped cream designs do not freeze well and should be made fresh. I find that freezing is most useful for make-ahead entertaining—decorate the cake 1–2 weeks ahead, freeze it, then thaw and serve with minimal fuss.