
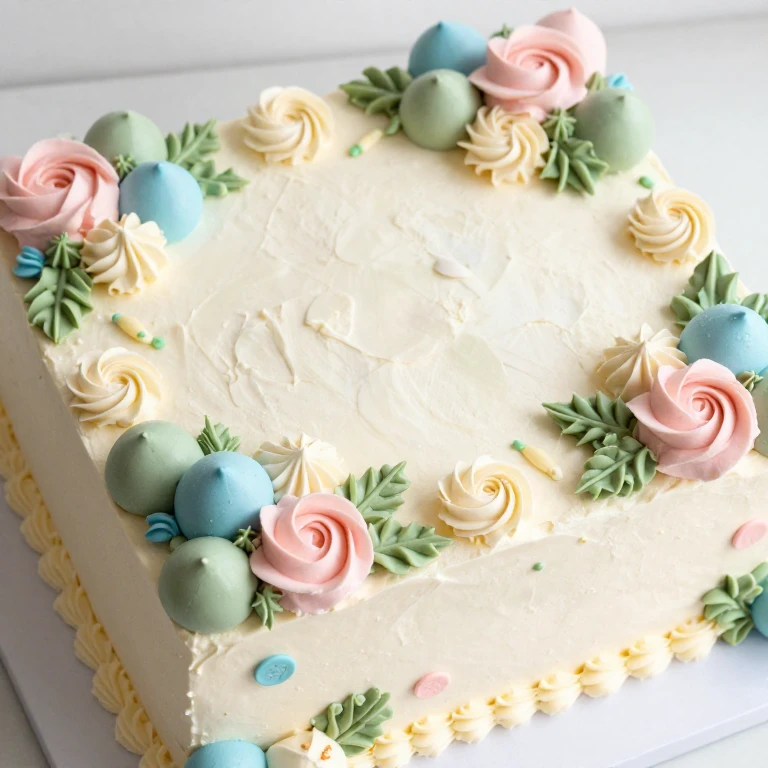
This flowers and balloons sheet cake with buttercream is my go-to design when I want festive impact without fussy techniques. I’ve found that combining playful balloon clusters with elegant piped rosettes creates visual drama that looks professionally decorated but stays totally achievable in a home kitchen. The moist vanilla cake base pairs with silky American buttercream, and the real magic happens in the piping—balloon groupings, leafy accents, and clean lettering that tie the whole design together. Whether you’re decorating for a birthday, bridal shower, or graduation, this sheet cake delivers cheerful, slice-worthy results that taste as good as they look.
Why You’ll Love This
- Piped balloon and floral design feels upscale but uses only basic piping tips—no specialty tools required
- Feeds 12-16 people on one standard sheet pan with zero stacking or layering stress
- Buttercream can be made 2 days ahead and the cake baked the day before, so final assembly takes 30-40 minutes
- Color palette is fully customizable—swap pastels for bold brights, or match your party theme exactly
- Texture contrast between soft crumb and crisp piped details keeps every bite interesting
- Works equally well for casual garden parties or polished celebration events
Ingredient Breakdown
For the Cake
- 2 3/4 cups all-purpose flour
- 2 teaspoons baking powder
- 1/2 teaspoon salt
- 1/2 cup unsalted butter, softened
- 1 1/2 cups granulated sugar
- 3 large eggs, room temperature
- 1 cup whole milk, room temperature
- 2 teaspoons vanilla extract
For the Buttercream
- 1 pound unsalted butter, softened to cool room temperature
- 4-5 cups powdered sugar, sifted
- 3-4 tablespoons heavy cream or whole milk
- 2 teaspoons vanilla extract
- 1/4 teaspoon salt
For Decoration
- Gel food coloring in your chosen palette (I use rose, sage, sky blue, and cream)
- Piping bags and tips: Wilton 1M or 2D for rosettes, Wilton 352 or 353 for leaves, Wilton 3 or 5 for balloon outlines and lettering
- Small balloon shapes (optional, for reference while piping)
The buttercream is the workhorse here—it holds piped details crisply and stays stable at room temperature for several hours. I always sift my powdered sugar to avoid lumps that interrupt smooth piping.
Whirl Hook
The Whirl Factor: Moist, tender vanilla cake meets bold piped design with a texture contrast between soft crumb and crisp buttercream details. The playful balloon clusters and elegant rosettes create visual interest without requiring advanced decorating skills—just confident piping and a clear color strategy.
Step-by-Step
- Preheat your oven to 350°F. Grease a 9 × 13-inch sheet pan, line the bottom with parchment, and grease the parchment. This prevents sticking and makes the cake easier to frost once cooled.
- Whisk together flour, baking powder, and salt in a medium bowl. Set aside.
- In a large bowl, cream softened butter and sugar together for 2-3 minutes on medium speed until pale and fluffy. The mixture should look light and airy, not dense.
- Add eggs one at a time, beating well after each addition. Scrape down the bowl between additions to ensure even mixing.
- Add half the flour mixture and beat on low speed for 30 seconds until just combined. Pour in half the milk, beat for 30 seconds. Repeat with remaining flour and milk. Add vanilla extract and beat for 10-15 seconds until the batter is smooth and no streaks of flour remain.
- Pour batter into the prepared pan and spread evenly with a spatula. Tap the pan gently on the counter 2-3 times to release air bubbles.
- Bake for 28-32 minutes until a toothpick inserted in the center comes out with just a few moist crumbs. The cake should spring back lightly when touched in the center.
- Cool in the pan for 15 minutes, then turn out onto a wire rack to cool completely. This takes 1-2 hours depending on your kitchen temperature.
- While the cake cools, make the buttercream. Beat softened butter on medium speed for 2-3 minutes until pale and creamy. Gradually add sifted powdered sugar, 1 cup at a time, beating well after each addition.
- Once all sugar is incorporated, add cream, vanilla, and salt. Beat on medium-high speed for 1-2 minutes until the frosting is light, fluffy, and spreadable. It should hold stiff peaks when you lift the beaters.
- Divide buttercream into separate bowls and tint each portion with gel food coloring. Use a toothpick to add color gradually—gel is potent, and you can always add more.
- Place the cooled cake on a flat serving surface or cake board. Spread a thin crumb coat of plain or pale buttercream over the entire surface. This seals in crumbs and gives you a clean base for piped details. Chill for 15-20 minutes until the crumb coat is set.
- Apply a second, thicker layer of buttercream as your base coat. Use an offset spatula to create smooth, even coverage. This is your canvas for piping.
- Fit piping bags with your chosen tips and fill each with a different buttercream color. Start with balloon clusters: hold the piping bag at a 45-degree angle and pipe rounded, overlapping mounds in groups of 3-5 across the cake. Leave space between clusters for rosettes and lettering.
- Pipe rosettes using a large open-star tip, filling in the gaps between balloon clusters. Hold the piping bag perpendicular to the cake surface and pipe small, tight swirls. These add elegance and visual density.
- Add leafy accents using a leaf tip, piping small leaves around the rosettes and between balloon clusters. This grounds the design and creates a garden-party feel.
- Using a small round tip, add clean lettering—names, ages, or celebratory words—in a contrasting color. Practice on parchment first if you’re uncertain about letter sizing.
- Step back and assess your design. Fill any bare spots with small additional rosettes, leaves, or dots. The goal is balanced coverage without overcrowding.
- Chill the decorated cake for at least 30 minutes before serving. This sets the piped details and makes slicing cleaner.
Visual Cooking Timeline
- 0:00 — Preheat oven to 350°F, prepare your sheet pan with grease and parchment
- 0:10 — Whisk dry ingredients, cream butter and sugar until fluffy
- 0:20 — Add eggs and alternate flour and milk, mix until smooth batter forms
- 0:25 — Pour into pan, tap to release air bubbles, transfer to oven
- 0:55 — Cake is done (28-32 minutes baking); cool 15 minutes in pan, then turn out to cool completely
- 2:00 — Make buttercream while cake cools, divide and tint colors
- 2:20 — Apply crumb coat, chill 15-20 minutes
- 2:40 — Apply base coat of buttercream, begin piping balloon clusters, rosettes, and leaves
- 3:15 — Add lettering and final details, chill 30 minutes before serving
Flavor Spin
I always start with classic vanilla because it lets the buttercream and decoration shine, but here’s where you can pivot: swap 1 teaspoon of vanilla extract for almond extract for a delicate, slightly floral note that pairs beautifully with pastel decorations. Or add 1 tablespoon of fresh lemon zest to the batter for brightness that cuts through the richness of buttercream. Both shifts keep the cake moist and tender while adding personality.
Whirl Factor: Texture & Design Contrast
The real payoff here is the textural interplay: soft, tender crumb against crisp, defined piped details. When you bite through a piped rosette or balloon cluster, there’s a satisfying snap before you hit the moist cake underneath. This contrast is what makes the cake feel special and intentional. The color palette amplifies this—bold, saturated colors in the piping create visual pop against the softer cake base, making every slice look like it came from a professional bakery.
Quick Tips
- Bring all ingredients to room temperature before mixing—cold eggs and milk can seize the batter and create a dense, uneven crumb
- Use gel food coloring, not liquid, for deeper, more stable colors that won’t thin your buttercream
- Pipe directly onto the cake rather than piping onto parchment first—buttercream details adhere better when applied fresh
- If a piped detail doesn’t look right, use a small offset spatula or bench scraper to smooth it away and try again. Buttercream is forgiving
- Keep piping bags in a tall glass filled partway with warm water between color changes—this keeps the buttercream from drying out and clogging the tip
- Chill the decorated cake for at least 30 minutes before slicing; cold buttercream cuts cleanly and holds shape better
Substitution Ideas
- Chocolate cake → Vanilla cake: Use a devil’s food or dark chocolate cake if you prefer richer flavor; piping technique stays identical, though dark cake may show crumbs more easily
- American buttercream → Swiss or Italian buttercream: Both hold piped details more sharply and have a less sweet profile; adjust color intensity since these frostings are denser
- Gel coloring → Powdered coloring: Powdered colors won’t thin buttercream, but they’re harder to blend smoothly—mix with a tiny amount of clear alcohol (vodka works) to create a paste before stirring into frosting
- Rosettes → Dots or dashes: If piping rosettes feels intimidating, use a small round tip to pipe tight dots or simple dashes in clusters—equally charming and faster to execute
- Dairy-free option: Substitute butter with dairy-free butter (like Earth Balance) and use unsweetened almond milk for the cake and frosting; the texture will be slightly less rich but still moist and tender
Make-Ahead Options
Two days before: Make buttercream, divide into portions, tint with gel coloring, and store in airtight containers at room temperature. Buttercream stays stable for up to 3 days this way, and having colors prepped saves significant time on decoration day. One day before: Bake the cake, cool completely, wrap tightly in plastic wrap, and store at room temperature. The cake actually improves slightly as it sits—the crumb becomes more tender and flavors meld. Morning of the party: Remove cake from plastic wrap, place on your serving surface, and apply the crumb coat. Chill for 15-20 minutes, then apply the base coat and begin piping. This staged approach means you’re only piping details on the day of, which keeps you calm and lets you focus on design precision. Do not frost the cake more than 4 hours before serving—buttercream can soften in warm kitchens, and piped details may lose definition.
Spin Options: Design Variations
Garden Party Remix
Skip the balloon clusters entirely and focus on piped flowers: use a petal tip to create roses, carnations, and ranunculus in soft pastels. Add delicate leaf work throughout. This version skews more elegant and works beautifully for bridal showers or garden-themed celebrations.
Bold Celebration Remix
Use bright, saturated colors—hot pink, electric blue, vibrant yellow—and pack the piping density higher. Pipe larger balloon clusters and add small dots between details for a confetti effect. This version is more playful and suits kids’ birthday parties and casual celebrations.
Minimalist Remix
Stick to two colors maximum: perhaps cream and one bold accent color. Pipe simple balloon clusters in one corner and a few rosettes along one edge, leaving significant white space on the cake. Add a single line of lettering in the accent color. This approach feels modern and sophisticated while staying totally achievable.
Whirl Finish: Serving & Storage
Serving: Cut the cake into 12-16 pieces using a hot, wet knife—dip the blade in hot water, wipe dry, cut one slice, then repeat. This prevents buttercream from dragging and keeps piped details intact. Serve at room temperature or slightly chilled, depending on your preference and kitchen temperature. Storage: Keep the decorated cake covered loosely with plastic wrap at room temperature for up to 2 days. If your kitchen is warm, refrigerate the cake but remove it 30 minutes before serving so the buttercream softens to the right texture. Leftover slices can be individually wrapped and frozen for up to 3 weeks; thaw at room temperature for 1-2 hours before eating.
FAQ
Can I make this cake the night before and decorate the morning of the party?
Absolutely. Bake and cool the cake completely, wrap it tightly in plastic wrap, and store at room temperature. The next morning, unwrap it, apply the crumb coat, chill 15-20 minutes, then apply the base coat and start piping. This timing works perfectly for an afternoon party.
What if my buttercream is too soft to hold piped details?
Your kitchen is likely warm. Chill the piping bags in the freezer for 5-10 minutes between uses, and work quickly. Alternatively, chill the entire decorated cake for 15 minutes after every 2-3 minutes of piping to reset the buttercream firmness.
Can I use store-bought cake and frosting?
Yes, though homemade cake has better texture and moisture. If you use store-bought, let the frosting come to room temperature and beat it for 2-3 minutes to lighten it before piping—commercial frosting can be dense straight from the container.
What’s the best way to transport this cake?
Keep it in a cake box on a flat surface in your car. If you don’t have a box, place it on a non-slip mat or damp towel on a flat seat to prevent sliding. Avoid stacking anything on top, and transport it as late as possible—the longer it sits, the more buttercream can soften.
How do I fix a piped detail that looks messy?
Use a small offset spatula or bench scraper to gently smooth it away, then re-pipe over the same spot. Buttercream is forgiving—you can redo details multiple times without damaging the cake underneath.
Flowers and Balloons Sheet Cake with Buttercream
Ingredients
Method
- Preheat your oven to 350°F. Grease a 9 × 13-inch sheet pan, line the bottom with parchment, and grease the parchment.
- Whisk together flour, baking powder, and salt in a medium bowl. Set aside.
- In a large bowl, cream softened butter and sugar together for 2-3 minutes on medium speed until pale and fluffy.
- Add eggs one at a time, beating well after each addition. Scrape down the bowl between additions.
- Add half the flour mixture and beat on low speed for 30 seconds until just combined. Pour in half the milk, beat for 30 seconds. Repeat with remaining flour and milk. Add vanilla extract and beat for 10-15 seconds until smooth.
- Pour batter into the prepared pan and spread evenly with a spatula. Tap the pan gently on the counter 2-3 times to release air bubbles.
- Bake for 28-32 minutes until a toothpick inserted in the center comes out with just a few moist crumbs. The cake should spring back lightly when touched in the center.
- Cool in the pan for 15 minutes, then turn out onto a wire rack to cool completely. This takes 1-2 hours depending on your kitchen temperature.
- While the cake cools, make the buttercream. Beat softened butter on medium speed for 2-3 minutes until pale and creamy.
- Gradually add sifted powdered sugar, 1 cup at a time, beating well after each addition. Once all sugar is incorporated, add cream, vanilla, and salt. Beat on medium-high speed for 1-2 minutes until light, fluffy, and spreadable.
- Divide buttercream into separate bowls and tint each portion with gel food coloring. Use a toothpick to add color gradually.
- Place the cooled cake on a flat serving surface or cake board. Spread a thin crumb coat of plain or pale buttercream over the entire surface. Chill for 15-20 minutes until the crumb coat is set.
- Apply a second, thicker layer of buttercream as your base coat. Use an offset spatula to create smooth, even coverage.
- Fit piping bags with your chosen tips and fill each with a different buttercream color. Pipe rounded, overlapping mounds in groups of 3-5 across the cake to create balloon clusters. Leave space between clusters for rosettes and lettering.
- Pipe rosettes using a large open-star tip, filling in the gaps between balloon clusters. Hold the piping bag perpendicular to the cake surface and pipe small, tight swirls.
- Add leafy accents using a leaf tip, piping small leaves around the rosettes and between balloon clusters.
- Using a small round tip, add clean lettering—names, ages, or celebratory words—in a contrasting color.
- Step back and assess your design. Fill any bare spots with small additional rosettes, leaves, or dots.
- Chill the decorated cake for at least 30 minutes before serving. This sets the piped details and makes slicing cleaner.