
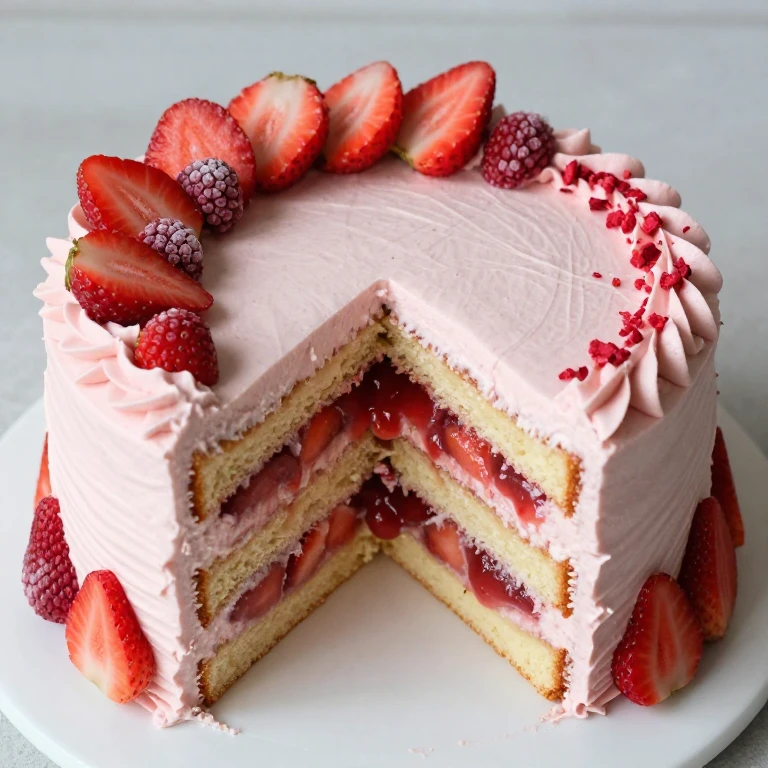
This strawberry layer cake recipe delivers even, level rounds stacked with stable strawberry filling and smooth buttercream—no bulges, no slides, no guesswork. I’ve built this method around reduced strawberry puree (for bold flavor without excess moisture), syrup-brushed layers (for structure and taste), and a frosting dam (to contain filling and keep your crumb coat clean). You’ll get tidy, impressive slices every time, and I’ll walk you through leveling, crumb coating, and the chilling windows that make the difference between a cake that holds and one that shifts.
Why You’ll Love This
- Reduced strawberry puree concentrates flavor so you taste berries, not water.
- Syrup-brushed layers add structure and moisture without softening the cake.
- Frosting dam prevents filling bulge—your cake stays neat from assembly through plating.
- Leveling and crumb-coat steps are spelled out so your stacks are even and your finish is smooth.
- Make-ahead friendly: bake layers days ahead, assemble the day before serving.
- Scales easily from two-layer to three or four-layer without changing core method.
Ingredient Breakdown
For the Cake
- 2 1/4 cups all-purpose flour
- 2 teaspoons baking powder
- 1/2 teaspoon salt
- 1/2 cup unsalted butter, softened
- 1 1/2 cups granulated sugar
- 3 large eggs, room temperature
- 1 teaspoon vanilla extract
- 3/4 cup whole milk, room temperature
For the Strawberry Reduction and Syrup
- 1 1/2 pounds fresh strawberries, hulled and halved
- 1/2 cup granulated sugar
- 2 tablespoons fresh lemon juice
- 1/4 cup water
- 1 tablespoon cornstarch
- 1/4 teaspoon salt
- 2 tablespoons simple syrup (1 part sugar, 1 part water, cooled)
For the Strawberry Filling
- 1 cup reduced strawberry puree (from above)
- 1/2 cup heavy whipping cream
- 2 tablespoons powdered sugar
- 1/4 teaspoon vanilla extract
- 8 ounces cream cheese, softened
- 1/2 cup unsalted butter, softened
- 2 cups powdered sugar
- 1/4 teaspoon salt
For Assembly and Finish
- 2-3 tablespoons simple syrup (for brushing layers)
- Fresh strawberries, sliced or whole (for garnish)
- Freeze-dried strawberries, crushed (optional, for texture)
The reduced strawberry puree is your anchor: it gives you bold berry flavor without the moisture that can make layer cakes soggy. I strain out seeds and simmer the puree down to about 1 cup—thick enough to hold without weeping into the cake.
Whirl Hook
The core twist here is reduced strawberry puree paired with a frosting dam. Most strawberry layer cakes fail because fresh puree is watery and filling bulges out under the weight of stacked layers. I solve this by simmering the berries down to concentrate flavor and viscosity, then building a frosting barrier around the inside edge of each layer before adding filling. That dam keeps everything contained, your crumb coat stays clean, and your slices are tidy.
Flavor Spin
This cake balances bright, concentrated strawberry against creamy, tangy filling. The syrup brush on each layer adds subtle sweetness and structure without overwhelming the berry note. If you want to push the strawberry further, infuse your simple syrup with fresh lemon juice or a pinch of freeze-dried strawberry powder. For a deeper flavor direction, swap half the strawberry filling with a light cream cheese frosting and layer thin slices of fresh strawberry between them—you get texture contrast and a more sophisticated bite.
Step-by-Step
Make the Strawberry Reduction
- Combine hulled and halved strawberries, 1/2 cup sugar, and lemon juice in a heavy-bottomed saucepan over medium heat.
- Stir occasionally until berries release their liquid and mixture comes to a gentle simmer, 8-10 minutes.
- Whisk together cornstarch and 1/4 cup water in a small bowl until smooth, then pour into the simmering berries.
- Stir constantly until the mixture thickens and turns glossy, 2-3 minutes—you should see the puree coat the back of a spoon.
- Remove from heat, stir in 1/4 teaspoon salt, and pour through a fine-mesh strainer into a bowl, pressing gently to extract puree and leave seeds behind.
- Cool completely, then measure out 1 cup for the filling (reserve any extra for topping or another use).
Bake the Cake Layers
- Preheat your oven to 350°F and line two 8-inch round cake pans with parchment paper and a light coat of nonstick spray.
- Whisk together flour, baking powder, and salt in a medium bowl and set aside.
- In a large bowl, cream softened butter and 1 1/2 cups sugar on medium-high speed until pale and fluffy, 3-4 minutes.
- Add eggs one at a time, beating well after each addition, then add vanilla extract and mix until combined.
- Alternate adding the flour mixture and milk in three additions, starting and ending with flour: 1/3 flour, 1/2 milk, 1/3 flour, 1/2 milk, 1/3 flour. Mix on low speed until just combined after each addition—do not overmix.
- Divide batter evenly between prepared pans and smooth the tops.
- Bake 28-32 minutes until a toothpick inserted in the center comes out clean and the edges are set but the cake still springs back when lightly pressed.
- Cool in pans for 10 minutes, then turn out onto wire racks and cool completely, at least 1 hour.
Level and Prepare Cake Layers
- Once cooled, use a serrated knife or cake leveler to trim the domed top from each layer so the surfaces are flat and even.
- If you want thinner, more delicate layers, use a long serrated knife to carefully split each layer in half horizontally—mark the halfway point with toothpicks first, then saw slowly and steadily.
- Place your first layer on a turntable or cake board, flat side up.
Brush and Build the Dam
- Using a pastry brush, lightly brush the top of the first cake layer with 1/2 tablespoon simple syrup—just enough to dampen, not soak.
- Fit a piping bag with a 1/2-inch round tip and fill with a portion of your strawberry-cream cheese frosting (see below).
- Pipe a 1/2-inch-thick ring of frosting around the outer edge of the layer, about 1/2 inch in from the edge—this is your dam.
- Spoon 2-3 tablespoons of reduced strawberry puree into the center of the dam and spread gently with an offset spatula, keeping it within the frosting barrier.
Stack and Repeat
- Carefully place your second cake layer on top, flat side down, and gently press to set.
- Repeat the syrup brush, frosting dam, and puree fill for the second layer.
- If using a third or fourth layer, repeat the process—each dam keeps the filling contained and prevents shifting.
- Top with your final cake layer, flat side up, and press gently to level.
Crumb Coat and Chill
- Spread a thin, even layer of strawberry-cream cheese frosting over the top and sides of the cake—this is your crumb coat, and it traps any loose crumbs before your final frosting layer.
- Chill the cake in the refrigerator for 30-45 minutes until the crumb coat is set and firm to the touch.
Final Frosting and Finish
- Apply your final layer of strawberry-cream cheese frosting, working from top to bottom and using an offset spatula or bench scraper to create a smooth finish—chill between coats if needed for a polished look.
- Garnish with fresh strawberry slices, whole berries, or crushed freeze-dried strawberries for texture contrast.
- Chill the finished cake for at least 2 hours before slicing—this sets the frosting and makes cuts clean and tidy.
Visual Cooking Timeline
- 0:00 — Preheat oven to 350°F, line cake pans, and gather ingredients.
- 0:15 — Combine strawberries, sugar, and lemon juice in saucepan; begin heating.
- 0:25 — Thicken strawberry mixture with cornstarch slurry, strain, and cool.
- 0:35 — Cream butter and sugar while strawberry reduction cools.
- 0:45 — Mix eggs and vanilla into butter mixture, then alternate flour and milk.
- 1:00 — Divide batter into pans and place in oven.
- 1:35 — Remove cakes from oven, cool in pans 10 minutes, then turn out onto racks.
- 2:45 — Cakes fully cooled; level layers and begin assembly.
- 3:00 — Brush syrup, pipe frosting dams, and fill each layer.
- 3:15 — Stack all layers and apply crumb coat.
- 4:00 — Crumb coat set; apply final frosting layer.
- 6:00 — Cake fully chilled and ready to slice and serve.
Whirl Factor
Texture contrast: tender, moist cake + thick, stable filling + smooth, creamy frosting. The syrup brush gives you structure without heaviness. The reduced puree delivers concentrated berry flavor and viscosity—no weeping, no sliding. The frosting dam is your secret to tidy slices and a professional-looking finish. Together, these moves turn a potentially fragile dessert into one that holds its shape and tastes bold every single time.
Spin Options
Lemon-Strawberry Variation
Infuse your simple syrup with lemon zest and juice—brush it on the layers and fold a teaspoon of lemon zest into your strawberry-cream cheese frosting. The citrus brightens the berry and adds complexity without competing for attention.
Strawberry Shortcake Spin
Reduce the sugar in the cake layers by 1/4 cup and increase vanilla to 1 1/2 teaspoons for a lighter crumb. Fill with whipped cream instead of frosting and top with macerated fresh strawberries. You lose the dam structure but gain a more delicate, summery texture.
White Chocolate Strawberry
Replace half your strawberry-cream cheese frosting with white chocolate buttercream (melt 4 ounces white chocolate, cool, then fold into 1 cup softened butter mixed with 2 cups powdered sugar). Layer it alternately with the strawberry filling for a richer, more indulgent bite.
Quick Tips
- Room-temperature eggs and milk matter: Cold dairy and eggs can cause the batter to break and create a dense crumb. Pull them out 30 minutes before mixing.
- Don’t skip the syrup brush: It adds moisture and structure—two tablespoons per layer is enough to dampen without soaking.
- Freeze-dried strawberries are your texture hero: Crushed on top, they add crunch and visual pop without introducing moisture.
- Offset spatula + bench scraper combo: Use the offset to spread frosting and the bench scraper to smooth and level as you rotate the turntable.
- Chill between every major step: Crumb coat, final frosting, and the finished cake all benefit from a cold rest—it makes everything set cleaner and cuts sharper.
Substitution Ideas
Fresh raspberries → Strawberries: Use the same reduction method; raspberries will cook down faster (6-8 minutes), so watch for thickening. The flavor will be more delicate, so add 1/2 teaspoon lemon zest to compensate.
Cream cheese frosting → All-butter buttercream: Omit cream cheese and increase softened butter to 1 cup, powdered sugar to 3 cups, and add 1/4 teaspoon salt. Fold in 2-3 tablespoons reduced strawberry puree for color and flavor. The frosting will be lighter and less tangy.
All-purpose flour → Cake flour: Use 2 1/2 cups cake flour (it’s lower protein, so your crumb will be more tender). Reduce baking powder to 1 1/2 teaspoons because cake flour already contains some leavening.
Whole milk → Buttermilk: Swap 1:1 and reduce baking powder to 1 1/2 teaspoons, add 1/4 teaspoon baking soda. Buttermilk will give you a slightly tangier crumb and more tender structure.
Make-Ahead Options
Three days ahead: Bake and cool cake layers completely. Wrap each layer tightly in plastic wrap and store at room temperature (or refrigerate if your kitchen is warm). Level the layers the day before assembly.
Two days ahead: Make the strawberry reduction and cool completely. Store in an airtight container in the refrigerator. Make the strawberry-cream cheese frosting and refrigerate in an airtight container.
One day ahead: Assemble the entire cake through the crumb coat. Refrigerate uncovered for 45 minutes until the crumb coat is set, then cover loosely with plastic wrap and refrigerate overnight. Apply the final frosting layer and garnish the morning of serving.
Morning of serving: If the cake was assembled the night before, remove from refrigerator 30 minutes before the final frosting step so the layers come to a cool room temperature (this prevents condensation under the plastic). Apply final frosting and garnish, then chill for 2 hours before slicing.
Do not make ahead: Fresh strawberry garnish—add sliced or whole berries within 2 hours of serving so they stay bright and don’t weep into the frosting.
Whirl Finish
Serve chilled, slice with a long serrated knife dipped in hot water between each cut, and plate with a strawberry slice or two on the side. The cold sets the frosting and filling so your slices stay neat. Store leftovers covered in the refrigerator for up to 3 days—the cake stays moist and the frosting holds its shape.
FAQ
Can I make this cake without a turntable?
Yes. Use a cake board or flat plate on a stable surface and rotate it as you frost instead of spinning it. It takes a bit longer, but the result is just as polished.
What if my cake layers are domed and uneven?
Use a serrated knife or cake leveler to trim the dome flat. If the layers are significantly uneven, you can split them horizontally with a long serrated knife—mark the halfway point with toothpicks and saw slowly and steadily.
Can I use frozen strawberries for the reduction?
Yes, but thaw them first and drain excess liquid. Frozen berries often release more water, so you may need to simmer the reduction a bit longer to reach the right thickness.
How do I know when the crumb coat is set?
Touch it gently with your fingertip—it should feel firm and not stick. If it’s still tacky, chill for another 15 minutes.
Can I make this a two-layer cake instead of three?
Absolutely. Divide the batter between two pans, bake as directed, and use the same frosting dam and filling method. You’ll have fewer layers but the same technique applies.
What’s the best way to get clean slices?
Use a long serrated knife, dip it in hot water, wipe it dry, then slice with one smooth downward motion. Chill the cake for at least 2 hours before slicing—the cold sets everything and prevents smudging.
Can I add food coloring to the frosting?
Yes. Add gel food coloring a tiny bit at a time while mixing—gel colors are more concentrated than liquid, so you need less. A few drops of pink or red will tint the frosting without thinning it.
Strawberry Layer Cake With Stable Filling and Smooth Finish
Ingredients
Method
- Preheat your oven to 350°F and line two 8-inch round cake pans with parchment paper and a light coat of nonstick spray.
- Whisk together flour, baking powder, and salt in a medium bowl and set aside.
- In a large bowl, cream softened butter and 1 1/2 cups sugar on medium-high speed until pale and fluffy, 3-4 minutes.
- Add eggs one at a time, beating well after each addition, then add vanilla extract and mix until combined.
- Alternate adding the flour mixture and milk in three additions, starting and ending with flour. Mix on low speed until just combined after each addition—do not overmix.
- Divide batter evenly between prepared pans and smooth the tops.
- Bake 28-32 minutes until a toothpick inserted in the center comes out clean and the edges are set but the cake still springs back when lightly pressed.
- Cool in pans for 10 minutes, then turn out onto wire racks and cool completely, at least 1 hour.
- Combine hulled and halved strawberries, 1/2 cup sugar, and lemon juice in a heavy-bottomed saucepan over medium heat.
- Stir occasionally until berries release their liquid and mixture comes to a gentle simmer, 8-10 minutes.
- Whisk together cornstarch and 1/4 cup water in a small bowl until smooth, then pour into the simmering berries.
- Stir constantly until the mixture thickens and turns glossy, 2-3 minutes—you should see the puree coat the back of a spoon.
- Remove from heat, stir in 1/4 teaspoon salt, and pour through a fine-mesh strainer into a bowl, pressing gently to extract puree and leave seeds behind.
- Cool completely, then measure out 1 cup for the filling.
- Once cooled, use a serrated knife or cake leveler to trim the domed top from each layer so the surfaces are flat and even.
- If you want thinner, more delicate layers, use a long serrated knife to carefully split each layer in half horizontally—mark the halfway point with toothpicks first, then saw slowly and steadily.
- Place your first layer on a turntable or cake board, flat side up.
- Using a pastry brush, lightly brush the top of the first cake layer with 1/2 tablespoon simple syrup—just enough to dampen, not soak.
- Fit a piping bag with a 1/2-inch round tip and fill with a portion of your strawberry-cream cheese frosting.
- Pipe a 1/2-inch-thick ring of frosting around the outer edge of the layer, about 1/2 inch in from the edge—this is your dam.
- Spoon 2-3 tablespoons of reduced strawberry puree into the center of the dam and spread gently with an offset spatula, keeping it within the frosting barrier.
- Carefully place your second cake layer on top, flat side down, and gently press to set.
- Repeat the syrup brush, frosting dam, and puree fill for the second layer.
- If using a third or fourth layer, repeat the process—each dam keeps the filling contained and prevents shifting.
- Top with your final cake layer, flat side up, and press gently to level.
- Spread a thin, even layer of strawberry-cream cheese frosting over the top and sides of the cake—this is your crumb coat, and it traps any loose crumbs before your final frosting layer.
- Chill the cake in the refrigerator for 30-45 minutes until the crumb coat is set and firm to the touch.
- Apply your final layer of strawberry-cream cheese frosting, working from top to bottom and using an offset spatula or bench scraper to create a smooth finish—chill between coats if needed for a polished look.
- Garnish with fresh strawberry slices, whole berries, or crushed freeze-dried strawberries for texture contrast.
- Chill the finished cake for at least 2 hours before slicing—this sets the frosting and filling and makes cuts clean and tidy.