
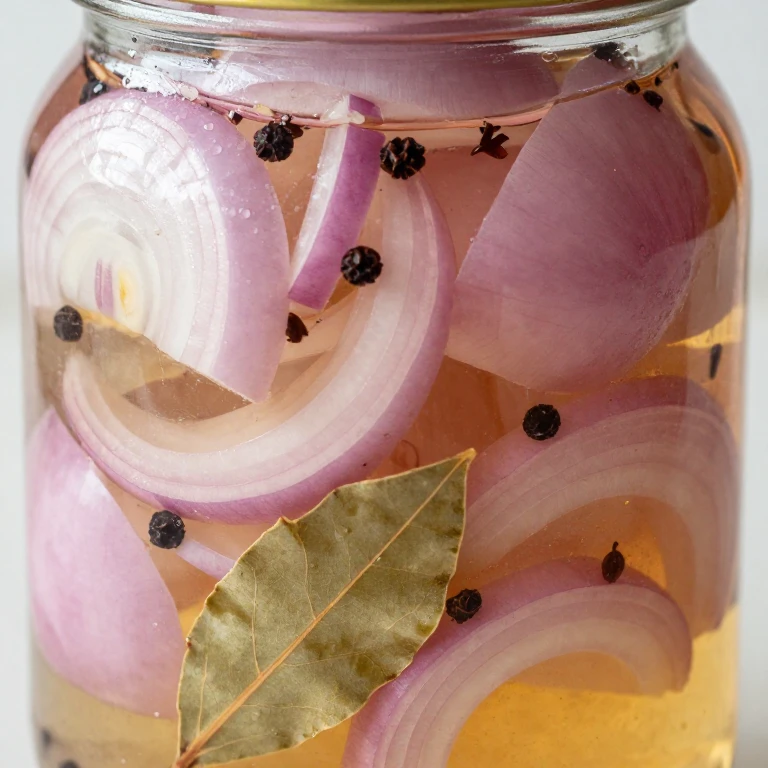
Spiced pickled onions hit different when the brine carries warmth instead of just vinegar bite. I’ve built this recipe around bay leaf, allspice, clove, and peppercorn—a spice lineup that deepens without overpowering the onion’s natural sweetness and crisp snap. The magic happens in the quick refrigerator method, which means you’re eating these within hours, not waiting days for flavor to develop.
What makes this version worth your time: the balance. Too many spiced pickles tip into dessert territory or taste like medicine cabinet. This one lands in the middle—warm, tangy, and genuinely crave-worthy alongside roast chicken, grain bowls, or charcuterie boards. The red or white onion choice is yours; both work beautifully, though red onions bleed into the brine and create a deeper color.
Let me walk you through the technique, the spice ratios that actually work, and how to customize these for your table.
Quick Snapshot
- Prep Time: 15 minutes
- Cook Time: 5 minutes
- Total Time: 20 minutes (plus 2-4 hours chilling)
- Yield: 1 quart jar (about 4 cups)
- Texture: Crisp, snappy onion with a warm-spiced brine
- Flavor Profile: Tangy, aromatic, gently sweet
- Skill Level: Beginner
Why This Recipe Works
The spice ratio matters more than most home cooks realize. One whole bay leaf, four whole allspice berries, two whole cloves, and eight peppercorns per cup of brine creates depth without drowning the onion’s flavor. I’m not grinding these spices; whole spices release flavor gradually and stay visually distinct in the jar. This approach also prevents the brine from turning murky or bitter—a common mistake when cooks overload the spice.
The brine itself balances acid and sweetness in a 1:1 ratio of vinegar to sugar, which keeps the onions snappy rather than mushy. I’m using apple cider vinegar for its subtle fruitiness, though white vinegar works if that’s what you have. The quick refrigerator method skips the water bath canning step entirely, making this a same-day project with zero equipment fuss.
Temperature control during the brine’s brief simmer ensures the spices bloom without burning. A gentle simmer for 2-3 minutes releases the aromatics; boiling hard will scorch the clove and make the brine taste sharp instead of rounded. This is the moment most home cooks rush, so I’m flagging it now.
Ingredient Overview
- 2 pounds red or white onions (about 6-8 medium onions)
- 1 cup apple cider vinegar
- 1 cup water
- 1 cup sugar
- 2 tablespoons kosher salt
- 4 whole bay leaves
- 16 whole allspice berries
- 8 whole cloves
- 32 black peppercorns
- 1 teaspoon red pepper flakes (optional, for heat)
Red onions give you a jewel-toned brine and a slightly sharper bite; white onions stay pale and taste milder. I prefer red onions for visual drama and their natural sweetness, but this recipe adapts to either without changing the method. The key is slicing them uniformly—about 1/4 inch thick—so they pickle at the same rate and stay crisp rather than turning soft.
Kosher salt dissolves faster than table salt and doesn’t contain anti-caking agents that cloud the brine. If you only have table salt, use 1.5 tablespoons instead of 2. The spices are all whole, which means you’re buying them from the bulk section or a spice shop where they’re fresher than the pre-ground jars that have been sitting in warehouse boxes for months.
Whirl Hook
This is where the twist becomes obvious: warm spices in a quick-pickle brine that’s ready to use in hours, not days. The bay, allspice, clove, and peppercorn create a flavor profile that’s neither sweet nor aggressive—it’s the spice blend you’d find in a classic pickling spice, but dialed in for balance.
Flavor Spin
The core twist here is the spice-forward brine that deepens the onion without masking it. Most pickled onions lean heavily on vinegar or sugar; this one builds a warm, aromatic base that makes these onions taste intentional and crave-worthy. The allspice carries a hint of cinnamon and nutmeg naturally, the bay leaf adds herbaceous depth, and the clove rounds everything into a cozy finish. This isn’t a condiment that apologizes for itself—it’s a bold finishing move that elevates whatever plate it lands on.
Step-by-Step Instructions
- Slice the onions: Cut off the root and stem ends, peel away the papery skin, then halve each onion through the root. Place each half flat-side down on your cutting board and slice into 1/4-inch-thick half-moons. Uniform thickness prevents some slices from pickling faster than others. You should have about 8 cups of sliced onion.
- Combine the brine ingredients: Pour the apple cider vinegar, water, and sugar into a medium saucepan. Sprinkle the kosher salt over the liquid and stir until the sugar and salt dissolve completely. Don’t skip this step—undissolved crystals will create an uneven brine.
- Add the spices: Drop in the bay leaves, allspice berries, cloves, and peppercorns. If you’re using red pepper flakes for heat, add them now. Stir gently to distribute the spices evenly throughout the liquid.
- Simmer the brine: Place the saucepan over medium heat and bring to a gentle simmer—you should see small bubbles breaking the surface, not a rolling boil. Maintain this gentle heat for 2-3 minutes, which allows the spices to release their aromatics without burning. Clove especially will taste bitter if the brine gets too hot. You’ll smell the warmth rising from the pan; that’s your signal the spices are blooming.
- Pack the jar: While the brine simmers, transfer the sliced onions to a clean quart-sized jar or two pint jars. Pack them loosely—don’t compress them. Loose packing allows the brine to circulate and ensures even pickling.
- Pour and cool: Once the brine has simmered for 2-3 minutes, carefully pour it over the onions, making sure to distribute the spices evenly. The brine will be hot; the onions will wilt slightly as the heat hits them. This is normal and desirable—it softens the onion just enough without making it mushy. Let the jar sit at room temperature for 30 minutes to allow the temperature to drop slightly.
- Chill: Transfer the jar to the refrigerator and chill for at least 2 hours before using. The onions will continue to soften and absorb flavor as they cool. By 4 hours, they’re fully pickled and ready to use.
Pro Tips for Best Results
- Slice thickness matters: Onions thinner than 1/4 inch will become mushy within hours; thicker than 1/2 inch won’t pickle evenly. A mandoline or sharp knife makes uniform slicing easier and faster. If you’re hand-slicing, take your time—uniform thickness is your insurance policy against texture disappointment.
- Don’t boil the brine: A rolling boil scorches the clove and makes the brine taste harsh instead of warm. Aim for a gentle simmer where you see small bubbles, not aggressive steam. This is the single most common mistake, and it’s entirely preventable with a watchful eye.
- Use a quart jar, not multiple small jars: One large jar means better flavor distribution and easier storage. If you need to use two pint jars, divide the spices between them so each jar has its own aromatics.
- Taste at 2 hours, 4 hours, and 24 hours: The flavor develops over time. At 2 hours, you have a crisp, lightly spiced onion. At 4 hours, the spices have settled into the brine and the flavor deepens. At 24 hours, the onions taste fully pickled. Knowing these checkpoints helps you pickle to your preference.
- Save the brine: Once you’ve used the onions, don’t throw away the brine. Use it as a base for vinaigrettes, add it to braised meats, or pour it over fresh onion slices to make a second batch. The spices have already released their flavor, so a second batch will pickle faster—usually within 1-2 hours.
- Red vs. white onion color bleed: Red onions will tint the brine a deep pink or burgundy within hours. This is purely visual; the flavor isn’t affected. If you prefer a clear brine, use white onions. If you love the jewel-tone aesthetic, red onions deliver.
Whirl Factor
The texture contrast here is essential: crisp, snappy onion against a warm-spiced brine that doesn’t compete for attention. The allspice, bay, and clove create a flavor base that feels intentional without tasting heavy or medicinal. This is a condiment that works as hard as you do—it’s bold enough to stand on its own, subtle enough to enhance roast meats, grain bowls, or cheese boards without overpowering them. The quick refrigerator method means you’re eating these within hours, not waiting for the slow-pickle timeline. That speed combined with the spice balance is what makes this version worth your counter space.
Spin Options
Warm Spice Variation (Cinnamon and Ginger)
Replace the allspice with one 3-inch cinnamon stick and add 1 tablespoon of fresh ginger slices to the brine. Reduce the cloves to 1 teaspoon (about 6 cloves) to avoid overpowering the ginger. This variation leans into warmth and works beautifully alongside roasted root vegetables or pork shoulder. The ginger adds a subtle heat that builds as you eat.
Spicy Heat Variation (Chili and Garlic)
Add 1 teaspoon of red pepper flakes and 4-6 smashed garlic cloves to the brine. Keep all the other spices the same. The garlic mellows as it sits, and the heat from the red pepper flakes builds gradually. This version pairs perfectly with tacos, grain bowls, or grilled meats where you want a spicy finishing kick.
Herbal Variation (Fresh Dill and Thyme)
Keep the bay, allspice, clove, and peppercorn base, then add 2-3 fresh dill sprigs and 2-3 fresh thyme sprigs to the jar before pouring the brine. Skip the red pepper flakes. This variation tastes lighter and more herbaceous, making it ideal alongside seafood, salads, or lighter grain bowls. The fresh herbs will soften and infuse the brine over 24 hours.
Serving Suggestions
Spoon these over roasted chicken thighs or pulled pork where the warm spice complements the richness of the meat. The acidity cuts through fat beautifully, and the crisp onion texture provides contrast to soft, cooked proteins. This is my go-to move for weeknight roasts that need a finishing flourish.
Layer them into grain bowls with roasted vegetables, grains, and a protein of your choice. The spiced brine acts as a built-in dressing and adds brightness without needing extra acid. Try them over quinoa with roasted beets, goat cheese, and candied walnuts for an elevated lunch that feels intentional.
Serve alongside a cheese board or charcuterie platter where they balance rich cured meats and aged cheeses. The warmth of the spices and the tang of the brine cut through fat and prevent the plate from feeling heavy. Guests always ask what these are and where to buy them.
Whirl Finish
Store these in an airtight jar in the refrigerator for up to 3 weeks. The onions will continue to soften slightly over time, but they’ll stay crisp enough to use as a condiment through week two. The brine gets deeper and more flavorful as the days pass—day one tastes bright and fresh, day three tastes fully developed and complex. Don’t discard the brine once you’ve used the onions; use it as a vinaigrette base or pour it over fresh onion slices for a second batch. The spices have already released their flavor, so a second batch will pickle in 1-2 hours instead of 4. These don’t freeze well due to texture changes, so stick with refrigerator storage.
FAQ
Can I use distilled white vinegar instead of apple cider vinegar?
Yes, though the flavor will be sharper and less fruity. Apple cider vinegar adds a subtle sweetness that rounds the spice profile; white vinegar is more aggressive. If you use white vinegar, reduce the sugar by 1-2 tablespoons to prevent the brine from tasting cloying. Taste at 2 hours and adjust to your preference.
How do I know when the brine is simmered enough?
You’ll smell the spices—a warm, aromatic scent that rises from the pan. The brine will look slightly steamy but not aggressively boiling. If you’re uncertain, simmer for exactly 3 minutes and remove from heat. Timing matters less than temperature; a gentle simmer for 2-3 minutes is the sweet spot.
Can I make these without a jar, using a bowl instead?
You can, but the onions will oxidize and turn brown where they’re exposed to air. A jar with a tight-fitting lid keeps them submerged and prevents browning. If you only have a bowl, cover it tightly with plastic wrap and use the pickled onions within 3-4 days instead of 3 weeks.
What if my onions are still too crisp after 4 hours?
They’re supposed to be crisp—that’s the point. If they taste too raw or sharp, let them sit in the refrigerator for 24 hours instead of 4. The longer they sit, the softer they become and the deeper the flavor develops. Some people prefer them snappy at 4 hours; others like them softer at 24 hours. Taste at different intervals and pickle to your preference.
Can I double this recipe?
Yes, double everything and use a half-gallon jar or two quart jars. The method stays the same—simmer the brine for 2-3 minutes, pour over the onions, and chill for at least 2 hours. Doubling doesn’t change the timing because the brine-to-onion ratio stays the same.
Are these safe to can using a water bath?
This recipe is designed as a refrigerator pickle, not a shelf-stable canned product. The brine’s acid level is safe for refrigerator storage but not for water bath canning without additional acid. If you want to can these, consult a tested canning recipe from a source like the National Center for Home Food Preservation to ensure safety.
What’s the difference between pickling spice and the spices in this recipe?
Pickling spice is a pre-mixed blend that usually includes mustard seeds, coriander seeds, dill seeds, and other spices. This recipe uses whole bay, allspice, clove, and peppercorn—a more aromatic, warm-spice approach. You could use pickling spice as a substitute, but the flavor profile will be different and less warm. I prefer building the blend myself for control over the final taste.
Spiced Pickled Onions Recipe With Bay and Allspice
Ingredients
Method
- Cut off the root and stem ends, peel away the papery skin, then halve each onion through the root. Place each half flat-side down on your cutting board and slice into 1/4-inch-thick half-moons. Uniform thickness prevents some slices from pickling faster than others. You should have about 8 cups of sliced onion.
- Pour the apple cider vinegar, water, and sugar into a medium saucepan. Sprinkle the kosher salt over the liquid and stir until the sugar and salt dissolve completely. Don't skip this step—undissolved crystals will create an uneven brine.
- Drop in the bay leaves, allspice berries, cloves, and peppercorns. If you're using red pepper flakes for heat, add them now. Stir gently to distribute the spices evenly throughout the liquid.
- Place the saucepan over medium heat and bring to a gentle simmer—you should see small bubbles breaking the surface, not a rolling boil. Maintain this gentle heat for 2-3 minutes, which allows the spices to release their aromatics without burning. Clove especially will taste bitter if the brine gets too hot. You'll smell the warmth rising from the pan; that's your signal the spices are blooming.
- While the brine simmers, transfer the sliced onions to a clean quart-sized jar or two pint jars. Pack them loosely—don't compress them. Loose packing allows the brine to circulate and ensures even pickling.
- Once the brine has simmered for 2-3 minutes, carefully pour it over the onions, making sure to distribute the spices evenly. The brine will be hot; the onions will wilt slightly as the heat hits them. This is normal and desirable—it softens the onion just enough without making it mushy. Let the jar sit at room temperature for 30 minutes to allow the temperature to drop slightly.
- Transfer the jar to the refrigerator and chill for at least 2 hours before using. The onions will continue to soften and absorb flavor as they cool. By 4 hours, they're fully pickled and ready to use.