
Whether you’re decorating a sheet cake for a weeknight celebration or prepping something show-stopping for a dinner party, the right design elevates everything. I’ve found that most home bakers overthink the decorating part—but it doesn’t take specialty tools or years of piping practice to create cakes that look polished and intentional. These 12 designs pair bold, modern techniques with flavors that deserve the spotlight: vanilla funfetti, cookies-and-cream, chocolate fudge, and more. Each design teaches you a core decorating move—borders, rosettes, drips, lettering, confetti edges—so you can mix and match based on your mood, your crowd, and how much time you have.
I’m sharing the sheet cake recipe designs that actually work in a home kitchen, with color palettes and spacing guides built in. You’ll learn which components you can prep ahead, how to keep decorations from sliding, and storage tricks that keep your cake fresh and beautiful through the celebration. Let’s turn a simple bake into something that stops people mid-conversation.
Birthday Sheet Cake Designs for Weeknight Celebrations — Speed + Impact
Weeknight cakes need to come together fast without sacrificing presence. These three designs use buttercream piping, simple color blocking, and hand-lettering that reads as intentional in under 30 minutes of active decorating time. I always prep the cake layers the day before and frost the crumb coat ahead, so on celebration day it’s just final touches and flavor pop.
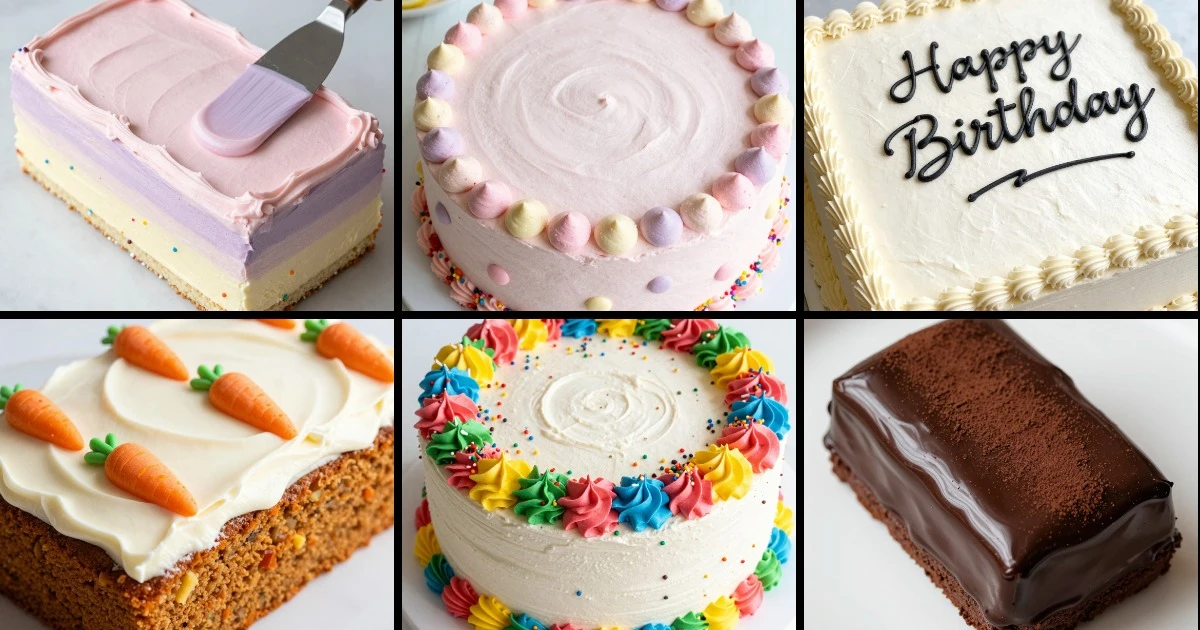
1. Bold Striped Buttercream Border with Hand Lettering
This design plays on vertical color blocks and clean piping—it’s the move I reach for when I want maximum impact with zero fussy technique. Pair it with vanilla funfetti or classic chocolate to let the decoration shine. The stripe pattern reads as modern and intentional, and the hand-lettered age or message adds personality without requiring a pastry bag.
Ingredients
- One 9×13-inch sheet cake (vanilla or chocolate, cooled)
- 3 cups unsalted butter, softened
- 6 cups powdered sugar, sifted
- 6 tablespoons heavy cream
- 2 teaspoons vanilla extract
- Gel food coloring (2–3 colors of choice)
- Offset spatula
- Piping bag and large round tip
- Edible marker or food-safe pen
Instructions
- Beat softened butter until pale, about 2 minutes.
- Add powdered sugar in two additions, mixing on low speed until combined.
- Pour in heavy cream and vanilla; beat on medium-high until light and fluffy, 3–4 minutes.
- Divide frosting into bowls and tint each with gel color to your chosen palette.
- Place cake on serving board. Spread a thin crumb coat of white frosting over top and sides; chill 15 minutes.
- Using an offset spatula, apply vertical stripes of each color across the top, alternating every 1.5 inches.
- Pipe a thick border around the top edge with your largest round tip, using one of your tinted colors.
- Let frosting set for 10 minutes, then hand-letter the age or message in the center using an edible marker.
- Chill until serving; frosting sets fully at room temperature within 30 minutes.
Weeknight win: Active decorating time is 20 minutes; the hand-lettering step removes the need for piping script. Crumb coat the day before and you’re golden.
Storage: Cover loosely with plastic wrap; keeps 3 days at room temperature or 5 days refrigerated.
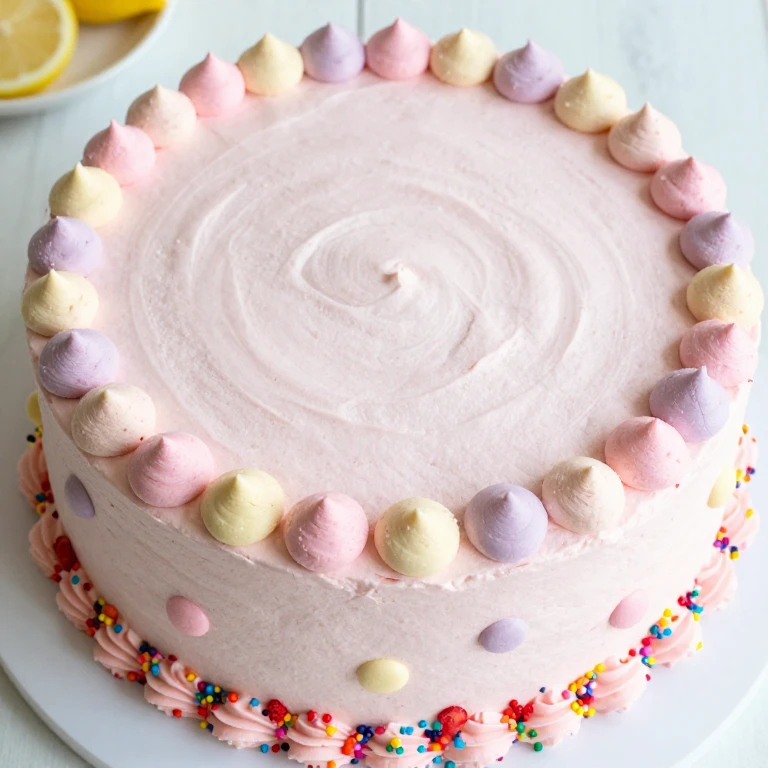
2. Confetti Edge with Sprinkle Cascade
I love this design because it feels celebratory without requiring precision. Colored sprinkles hug the base and top edge, and the simple swirl of frosting in the center leaves room for a message or just pure color. Pair with cookies-and-cream or lemon cake for a flavor that matches the festive energy.
Ingredients
- One 9×13-inch sheet cake (cooled)
- 2.5 cups unsalted butter, softened
- 5 cups powdered sugar, sifted
- 4 tablespoons heavy cream
- 1.5 teaspoons vanilla extract
- Gel food coloring (1–2 colors)
- Colored sprinkles (nonpareils or jimmies, 1 cup)
- Offset spatula
- Piping bag and medium round tip
Instructions
- Cream butter until smooth; gradually add powdered sugar, cream, and vanilla, beating until fluffy.
- Reserve 1 cup frosting for piping; tint remaining frosting with your chosen color.
- Spread tinted frosting over cooled cake in an even layer.
- Pour sprinkles into a shallow bowl. Holding the cake at a slight angle, press the base edge into sprinkles to coat; repeat along the top edge.
- Transfer any loose sprinkles to the center of the cake for a cascading effect.
- Pipe small rosettes or dots with reserved white frosting in a loose pattern across the top.
- Chill for at least 30 minutes before serving.
Weeknight win: Sprinkles do the visual heavy lifting—no piping skill required. Total active time is 15 minutes.
Storage: Keep in an airtight container at room temperature for 2 days; refrigerate up to 4 days. Sprinkles stay crisp in cool conditions.
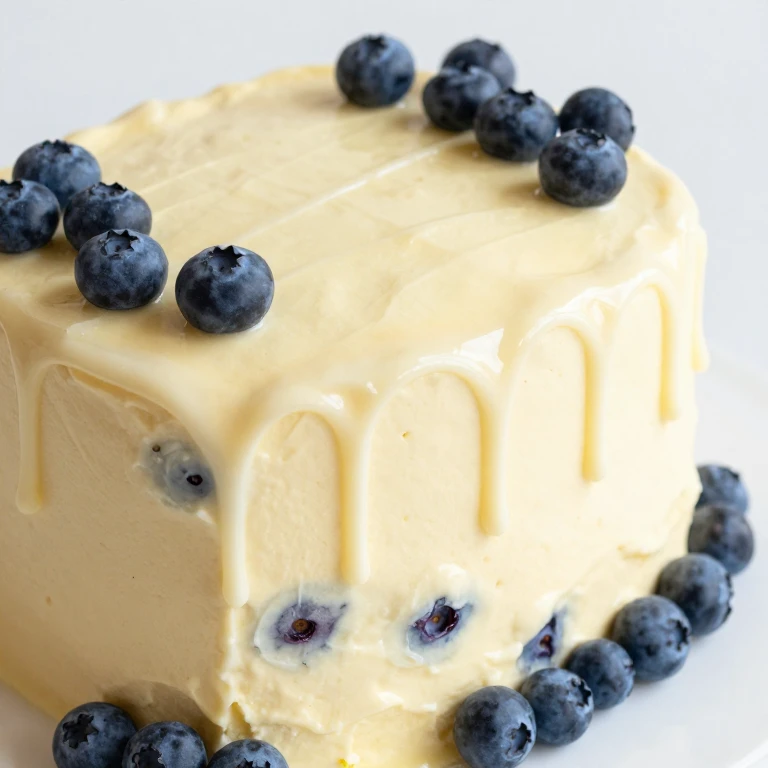
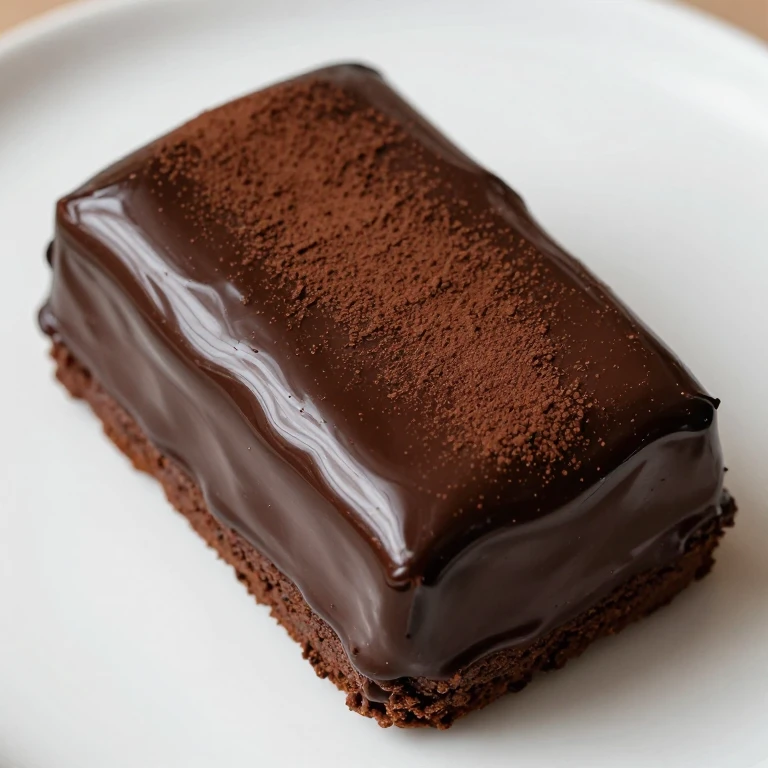
3. Minimalist Drip with Geometric Lettering
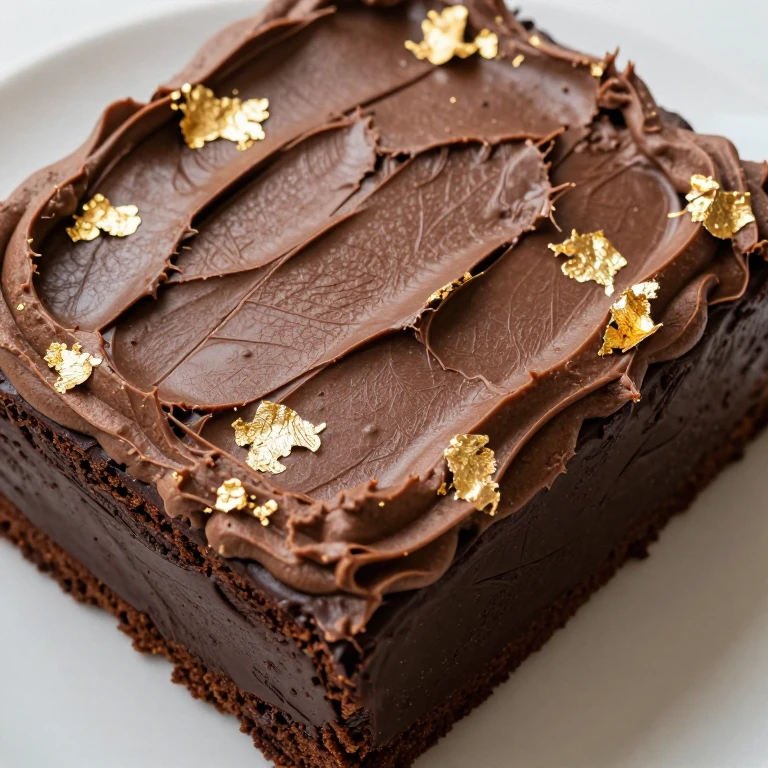
Clean lines and a single-color drip create a modern, intentional look that reads as deliberately designed rather than decorated. I pair this with dark chocolate or red velvet to let the simplicity amplify the flavor. The drip is forgiving—slight irregularity adds to the aesthetic.
Ingredients
- One 9×13-inch sheet cake (cooled)
- 3 cups unsalted butter, softened
- 6 cups powdered sugar, sifted
- 5 tablespoons heavy cream
- 2 teaspoons vanilla extract
- Gel food coloring (1 color for drip, 1 for base)
- 2 tablespoons chocolate or colored candy melts (for drip)
- Offset spatula
- Small piping bottle or squeeze bottle
- Edible marker
Instructions
- Make buttercream: beat butter, add powdered sugar in batches, then cream and vanilla until fluffy.
- Divide frosting; tint one portion for the base and reserve white for lettering.
- Frost cake evenly with tinted base frosting.
- Melt candy melts or thin chocolate with 1 tablespoon coconut oil until pourable.
- Transfer to a small squeeze bottle; let cool slightly (warm drip spreads too fast).
- Starting at the top edge of the cake, gently squeeze the drip in a steady stream, allowing it to flow naturally down the sides. Space drips 2–3 inches apart.
- Once drip is set (5 minutes), use an edible marker to hand-letter a simple message or date in the center.
- Chill until ready to serve.
Weeknight win: The drip is the only piping element; everything else is frosting and marker. 20 minutes total.
Storage: Cover and refrigerate; keeps 4 days. Drip may soften slightly at room temperature—keep cool until serving.
Birthday Sheet Cake Designs for Dinner Party Showstoppers — Impression + Reliability
Dinner party cakes need to hold their beauty through the meal and impress at the reveal. These three designs use piped rosettes, palette-knife texture, and strategic color blocking that you can prep almost entirely the day before. I always make the crumb coat and tint my frostings 24 hours ahead, so the final assembly feels calm and controlled.
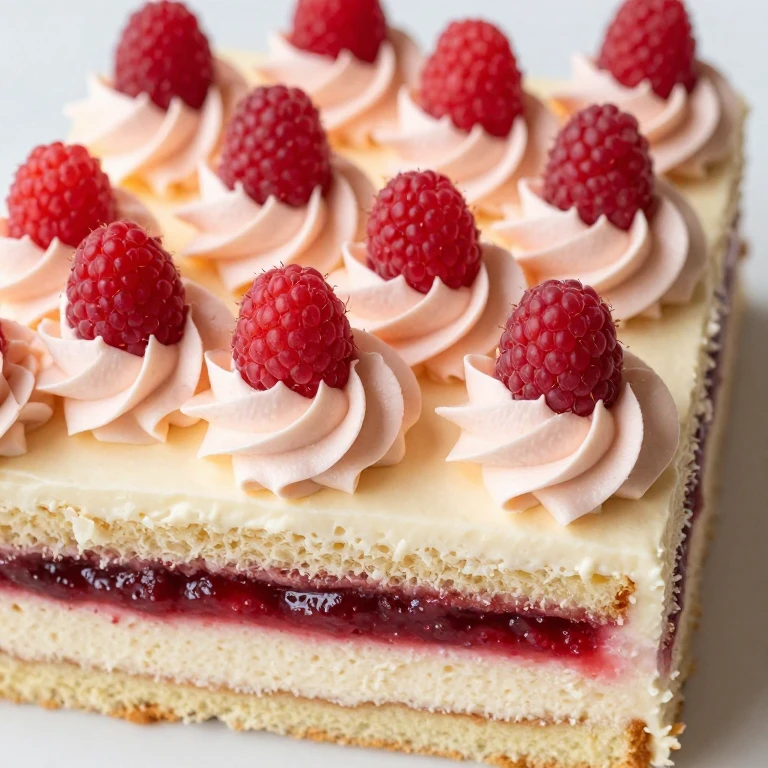
4. Ombré Rosette Garden
This is the design that gets people talking. Piped rosettes in a gradient of one color create depth and movement without requiring perfect technique—slight variation actually enhances the effect. I pair this with vanilla bean or champagne cake to keep the focus on the visual.
Ingredients
- One 9×13-inch sheet cake (cooled)
- 4 cups unsalted butter, softened
- 8 cups powdered sugar, sifted
- 8 tablespoons heavy cream
- 3 teaspoons vanilla extract
- Gel food coloring (1 color in 3–4 shades)
- Offset spatula
- Piping bag and large rosette tip (1M or 2D)
- Parchment paper
Instructions
- Make buttercream: beat butter until pale; add powdered sugar in batches, then cream and vanilla, beating until fluffy and light.
- Divide frosting into 4 bowls. Tint each to a different shade of your chosen color—lightest to darkest.
- Crumb coat the cake with white frosting; chill 20 minutes.
- Spread the lightest shade over the cake as your base layer.
- Fill piping bag with rosette tip. Load the lightest shade first; pipe a test rosette on parchment to check pressure and size.
- Pipe rosettes in tight rows, starting at one corner. After completing the first section, switch to the next shade and continue, creating a gradient across the cake.
- Fill any gaps with the darkest shade for visual weight at the bottom or corners.
- Chill for at least 1 hour before serving; rosettes firm up and hold their shape beautifully.
Dinner party note: You can pipe all rosettes the day before and refrigerate overnight. Assemble the gradient arrangement on the morning of your party.
Make-ahead: Piped rosettes keep refrigerated for 2 days. Transport on a flat surface; they’re sturdy once set.
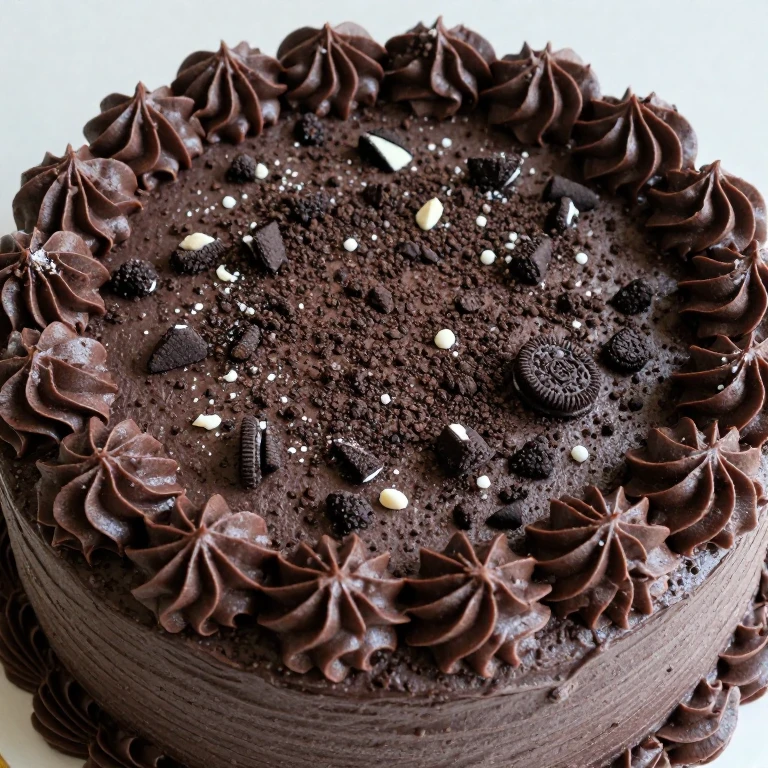
5. Palette-Knife Texture with Color Blocking
A palette knife creates organic, artistic texture that looks intentional and modern. I use bold color blocking—two or three contrasting hues—to anchor the design. This pairs beautifully with cookies-and-cream or marble cake, where the texture echoes the flavor complexity.
Ingredients
- One 9×13-inch sheet cake (cooled)
- 3.5 cups unsalted butter, softened
- 7 cups powdered sugar, sifted
- 6 tablespoons heavy cream
- 2.5 teaspoons vanilla extract
- Gel food coloring (2–3 colors)
- Offset spatula (4–6 inch)
- Palette knife or small icing spatula
Instructions
- Make buttercream: beat butter, add powdered sugar gradually, then cream and vanilla until fluffy.
- Divide frosting and tint each portion to your chosen colors.
- Crumb coat the cake with white frosting; chill 15 minutes.
- Spread one color in a thick, uneven layer across half the cake top.
- Apply the second color to the remaining half, creating a bold dividing line.
- Using a palette knife, drag, swirl, and press the knife into the frosting in varied directions—no two strokes should match. This creates organic, textured peaks.
- Add the third color in accent strokes if desired, using the same palette-knife technique.
- Chill for 45 minutes; the textured surface sets and becomes more pronounced.
Dinner party note: Texture can be created the morning of your party; it actually benefits from a few hours of chilling before guests arrive.
Transport tip: Keep the cake on a flat, stable surface. The textured surface is sturdy once chilled.
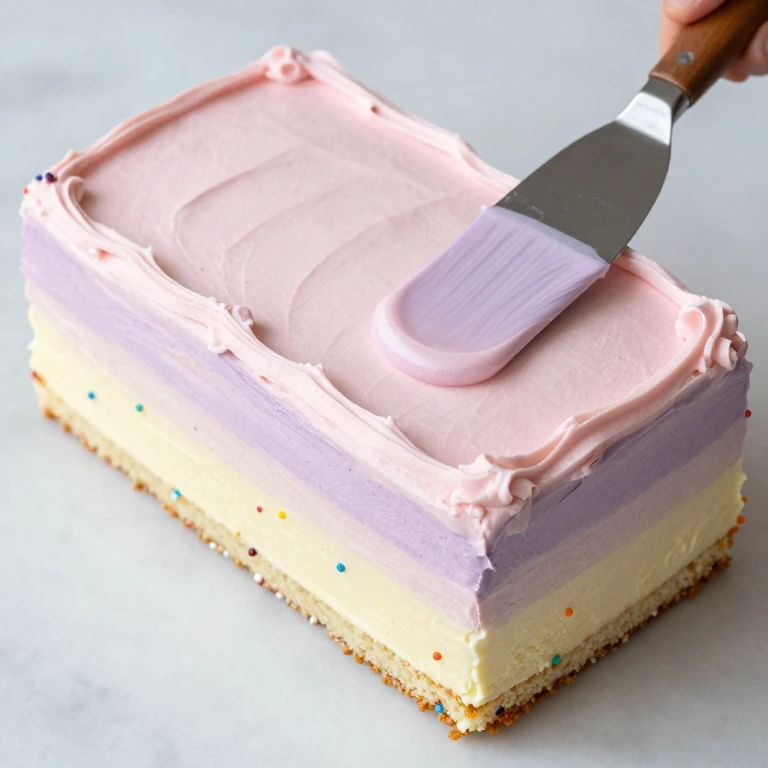
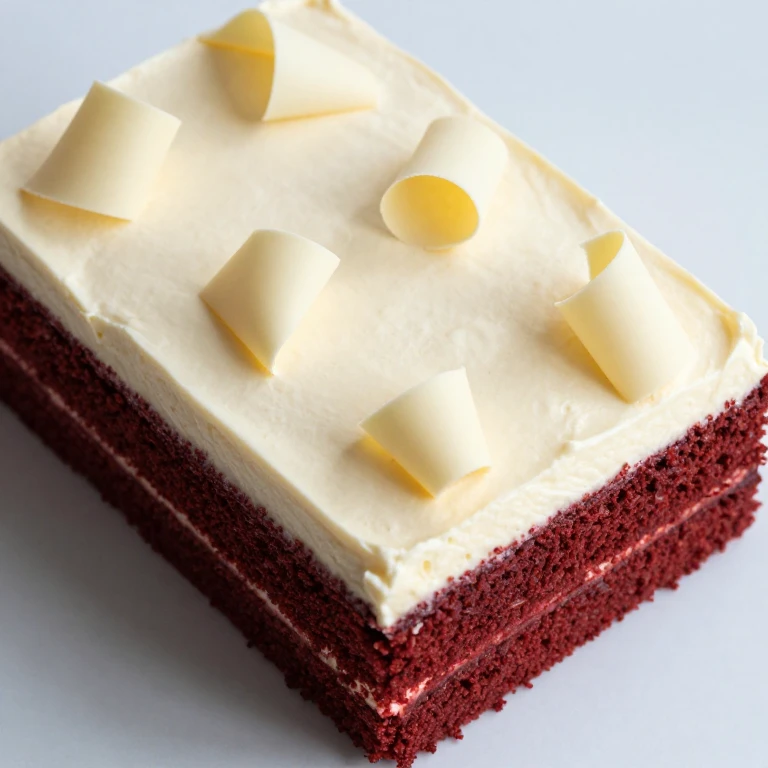
6. Classic Piped Border with Monogram Center

A thick piped border in one color with a hand-lettered or piped monogram in the center reads as timeless and elegant. I use this design for milestone birthdays or when I want the focus on the cake flavor itself. Pair with red velvet or dark chocolate for maximum impact.
Ingredients
- One 9×13-inch sheet cake (cooled)
- 3 cups unsalted butter, softened
- 6 cups powdered sugar, sifted
- 5 tablespoons heavy cream
- 2 teaspoons vanilla extract
- Gel food coloring (1 color)
- Offset spatula
- Piping bag and large round or star tip
- Edible marker or small piping bag with fine tip
Instructions
- Make buttercream: beat butter, add powdered sugar gradually, then cream and vanilla until fluffy.
- Reserve 1 cup white frosting for the monogram; tint the remaining frosting.
- Crumb coat and chill 15 minutes.
- Spread tinted frosting evenly over the cake.
- Fill piping bag with your chosen tip and tinted frosting. Pipe a thick border around the top edge of the cake, using steady, even pressure.
- Pipe a second border around the base of the cake if desired.
- Using an edible marker or small piping bag with white frosting, hand-letter or pipe a monogram, initials, or date in the center.
- Chill for 30 minutes before serving.
Dinner party note: Borders can be piped 12 hours ahead. The monogram can be added the morning of your party.
Make-ahead: Fully decorated cake keeps refrigerated for 3 days; frosting stays smooth and firm.
Birthday Sheet Cake Designs for Meal Prep — Yield + Reheat Quality
Meal prep cakes are about baking ahead and portioning smartly. These three designs hold their structure through storage and reheating without losing visual impact. I always make the full cake and frosting 2–3 days ahead, then portion and freeze individual slices if needed. Decoration stays fresh because it’s sealed by the crumb coat and final frosting layer.
7. Simple Swirl with Piped Dots
A loose swirl of frosting topped with piped dots is forgiving, scalable, and looks intentional on every slice. I prep this entirely ahead—the swirl and dots actually firm up beautifully during storage. Pair with vanilla or lemon for bright, clean flavor that reads fresh even after a few days.
Ingredients
- One 9×13-inch sheet cake (cooled)
- 3 cups unsalted butter, softened
- 6 cups powdered sugar, sifted
- 5 tablespoons heavy cream
- 2 teaspoons vanilla extract
- Gel food coloring (1–2 colors)
- Offset spatula
- Piping bag and medium round tip
Instructions
- Make buttercream: beat butter, add powdered sugar gradually, then cream and vanilla until fluffy.
- Divide frosting; tint one portion and reserve white for dots.
- Crumb coat the cake with white frosting; chill 20 minutes.
- Spread tinted frosting in a loose, organic swirl pattern across the top using an offset spatula.
- Fill piping bag with white frosting and round tip. Pipe evenly spaced dots across the swirl in rows or a scattered pattern.
- Chill for at least 1 hour before slicing and storing.
Meal prep note: This design holds beautifully when portioned. Slice into 12 pieces, wrap individually in plastic wrap, and refrigerate for 5 days or freeze for up to 1 month.
Reheating: Thaw at room temperature for 1 hour before serving. Frosting re-sets as it cools.
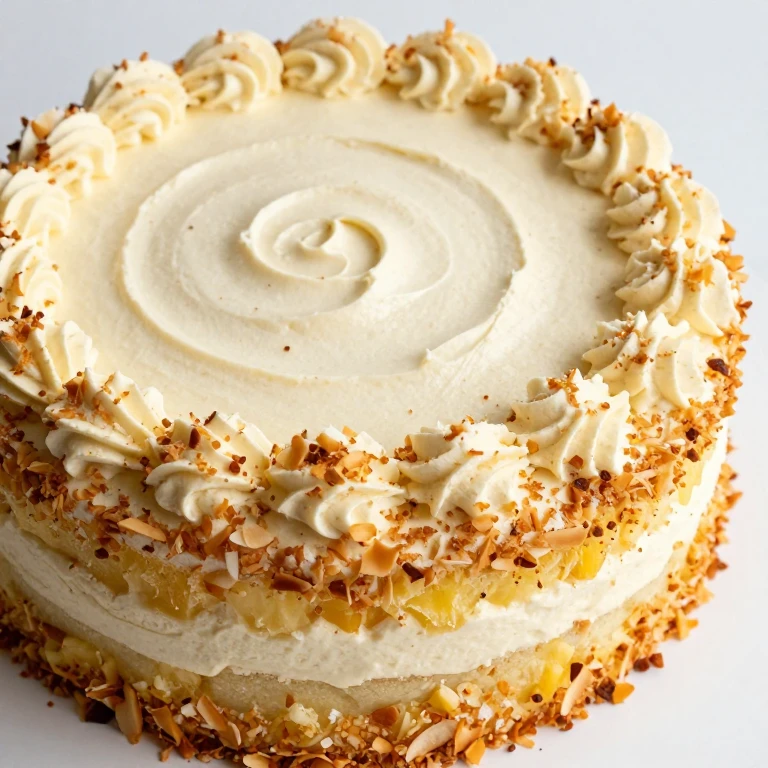
8. Buttercream Texture with Sprinkle Accent

A textured buttercream finish (created by dragging a fork or offset spatula through the frosting) plus a sprinkle accent at the base creates visual interest that photographs well and stores reliably. I use this design when I’m prepping cakes to slice and freeze for later.
Ingredients
- One 9×13-inch sheet cake (cooled)
- 3.5 cups unsalted butter, softened
- 7 cups powdered sugar, sifted
- 6 tablespoons heavy cream
- 2.5 teaspoons vanilla extract
- Gel food coloring (1 color)
- Colored sprinkles (1/2 cup)
- Offset spatula
- Fork or small texture tool
Instructions
- Make buttercream: beat butter, add powdered sugar gradually, then cream and vanilla until fluffy.
- Tint frosting with gel color.
- Crumb coat the cake; chill 15 minutes.
- Spread tinted frosting evenly over the cake.
- Using a fork or small offset spatula, drag across the frosting in varied directions to create peaks and valleys.
- Press sprinkles along the top and bottom edges, gently pressing them into the frosting so they adhere.
- Chill for at least 1 hour until the texture sets.
Meal prep note: Texture and sprinkles hold beautifully through storage. Portion into individual slices; wrap and refrigerate or freeze.
Storage: Refrigerate up to 5 days; freeze individual slices up to 1 month. Thaw at room temperature for 1 hour.
9. Gradient Color Wash with Hand-Lettered Label
A gradient color wash (created by blending two colors of frosting directly on the cake) with a simple hand-lettered label is striking and practical for meal prep. The gradient is forgiving—slight blending adds to the aesthetic. This pairs with any flavor and looks polished on individual servings.
Ingredients
- One 9×13-inch sheet cake (cooled)
- 3 cups unsalted butter, softened
- 6 cups powdered sugar, sifted
- 5 tablespoons heavy cream
- 2 teaspoons vanilla extract
- Gel food coloring (2 colors)
- Offset spatula
- Edible marker
Instructions
- Make buttercream: beat butter, add powdered sugar gradually, then cream and vanilla until fluffy.
- Divide frosting and tint each portion to a different color.
- Crumb coat the cake with white frosting; chill 15 minutes.
- Spread the first color across the left half of the cake. Spread the second color across the right half.
- Using an offset spatula, blend the two colors where they meet, dragging back and forth until you achieve a smooth gradient.
- Once the gradient is set (about 30 minutes), use an edible marker to hand-letter the date or a label in a corner or center.
- Chill until ready to portion.
Meal prep note: The gradient sets beautifully and stays vibrant through storage. Slice and wrap individual portions; label each with the date.
Storage: Refrigerate up to 5 days; freeze up to 1 month. The gradient color stays true even after thawing.
Birthday Sheet Cake Designs for Family-Friendly Celebrations — Approachability + Flexibility
Family cakes need to be fun, forgiving, and adaptable to different ages and preferences. These three designs use simple piping, bold colors, and interactive elements that kids can help with. I always make extra frosting in case someone wants to add their own touches—it keeps the celebration playful and low-pressure.
10. Rainbow Stripe Layer with Piped Borders
Vertical stripes in rainbow colors with piped borders on top and bottom create a bold, celebratory look that appeals to all ages. This is the design I reach for when the birthday person is young or when I want maximum visual fun. Pair with funfetti or vanilla for a flavor that matches the energy.
Ingredients
- One 9×13-inch sheet cake (cooled)
- 3.5 cups unsalted butter, softened
- 7 cups powdered sugar, sifted
- 6 tablespoons heavy cream
- 2.5 teaspoons vanilla extract
- Gel food coloring (5–6 colors for rainbow)
- Offset spatula
- Piping bag and large round or star tip
Instructions
- Make buttercream: beat butter, add powdered sugar gradually, then cream and vanilla until fluffy.
- Divide frosting into 6 bowls and tint each to a different color of the rainbow.
- Crumb coat the cake with white frosting; chill 15 minutes.
- Starting at the left edge, apply vertical stripes of each color across the cake, alternating colors every 1.5–2 inches.
- Fill piping bag with your chosen color and large tip. Pipe a thick border around the top edge, using one solid color or alternating colors.
- Pipe a matching border around the base of the cake.
- Chill for at least 30 minutes before serving.
Family-friendly note: Kids can help apply the stripes with an offset spatula—it’s forgiving and fun. Let them choose the border color.
Storage: Cover loosely and keep at room temperature for 2 days or refrigerate up to 4 days.
11. Balloon and Confetti Design with Piped Stems
Simple piped balloons (just circles with thin stems) scattered across the cake with sprinkle confetti creates a playful, celebratory feel. This design is forgiving because balloons don’t need to be perfect—slight variation adds charm. Pair with any flavor; the design does the celebrating.
Ingredients
- One 9×13-inch sheet cake (cooled)
- 3 cups unsalted butter, softened
- 6 cups powdered sugar, sifted
- 5 tablespoons heavy cream
- 2 teaspoons vanilla extract
- Gel food coloring (3–4 colors for balloons)
- Offset spatula
- Piping bag and medium round tip
- Piping bag and small round tip (for stems)
- Colored sprinkles (1/2 cup)
Instructions
- Make buttercream: beat butter, add powdered sugar gradually, then cream and vanilla until fluffy.
- Divide frosting and tint each portion to a different color for balloons. Keep white frosting for stems.
- Spread white frosting evenly over the cake.
- Fill piping bag with medium round tip and first balloon color. Pipe a circle (about 2 inches across) on the cake; repeat across the cake, spacing them 2–3 inches apart.
- Switch colors and continue piping balloon circles, creating a scattered pattern.
- Switch to the small round tip and white frosting. Pipe thin stems from the base of each balloon down toward the bottom of the cake.
- Scatter sprinkles across the cake for confetti effect.
- Chill for at least 30 minutes.
Family-friendly note: Kids can help scatter sprinkles and even pipe simple balloons with guidance. It’s interactive and low-pressure.
Storage: Keep at room temperature for 2 days or refrigerate up to 4 days. Sprinkles stay crisp in cool conditions.
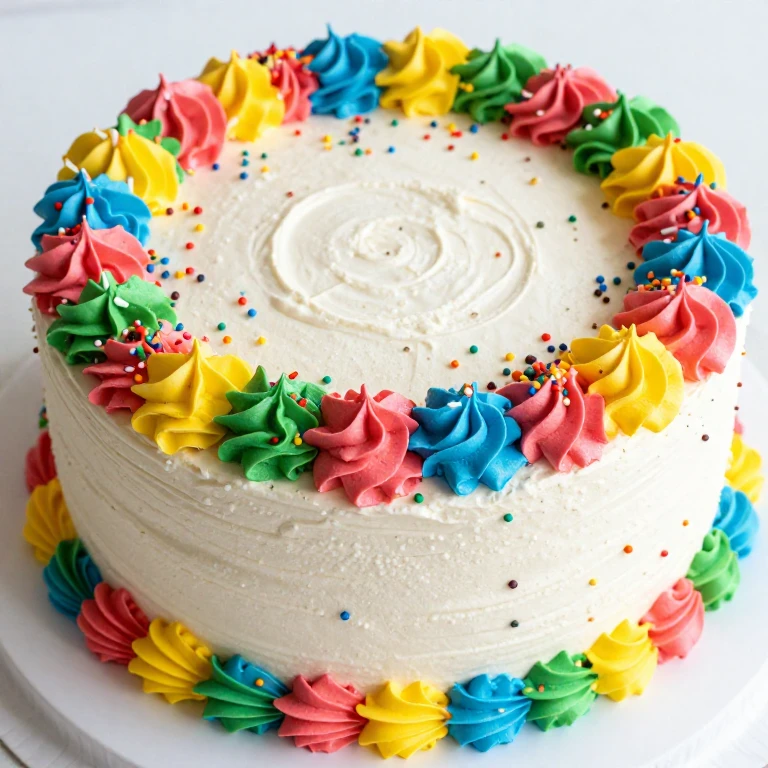
12. Simple Message Banner with Piped Rosettes
A bold, hand-lettered message banner (using an edible marker) paired with simple piped rosettes in the corners creates a personalized, intentional look. This design is adaptable—you can change the message, colors, and rosette placement based on the celebration. Pair with any flavor.
Ingredients
- One 9×13-inch sheet cake (cooled)
- 3 cups unsalted butter, softened
- 6 cups powdered sugar, sifted
- 5 tablespoons heavy cream
- 2 teaspoons vanilla extract
- Gel food coloring (1–2 colors)
- Offset spatula
- Piping bag and medium rosette tip
- Edible marker or food-safe pen
Instructions
- Make buttercream: beat butter, add powdered sugar gradually, then cream and vanilla until fluffy.
- Divide frosting; tint one portion and reserve white for rosettes.
- Spread tinted frosting evenly over the cake.
- Using an edible marker, hand-letter a message (Happy Birthday, Happy 5th, etc.) in the center of the cake. Keep lettering bold and simple.
- Fill piping bag with white frosting and rosette tip. Pipe rosettes in each corner of the cake, using steady pressure and lifting straight up.
- Add rosettes along the top and bottom edges if desired.
- Chill for at least 30 minutes.
Family-friendly note: The hand-lettered message makes it personal without requiring piping skill. You can practice lettering on parchment beforehand.
Storage: Keep at room temperature for 2 days or refrigerate up to 4 days. The message stays crisp and legible.
FAQ
How far ahead can I frost and decorate a sheet cake?
I frost the crumb coat 1–2 days ahead and refrigerate it. The final frosting layer and decoration can be done up to 24 hours before serving. Keep the cake refrigerated until 30 minutes before guests arrive so the frosting stays firm and the design holds its shape. If you’re using a drip or delicate piping, add those within 12 hours of serving for the best appearance.
What’s the best frosting for piping borders and rosettes?
American buttercream (butter, powdered sugar, cream, vanilla) is my go-to because it’s stable, pipes beautifully, and tastes great. Make sure your butter is softened but not warm, and beat the frosting until it’s light and fluffy—this creates the aeration needed for clean piping. If your kitchen is warm, chill the piping bag for 15 minutes before starting.
How do I keep sprinkles from sliding off or getting soggy?
Press sprinkles gently into frosting that’s still slightly soft (not fully set), so they adhere. For a confetti edge, apply sprinkles within 30 minutes of frosting the cake. Keep the finished cake at room temperature or in a cool spot—humidity and heat cause sprinkles to soften and slide. For longer storage, refrigerate; sprinkles stay crisp in cool conditions.
Can I make these designs with a different frosting, like cream cheese or Swiss meringue?
Yes, but with adjustments. Cream cheese frosting is softer and requires chilling before piping; it’s better for textured designs than precise borders. Swiss meringue buttercream is more stable and pipes beautifully but has a different flavor. Whipped frosting is too soft for piping borders—stick to American buttercream for the designs that require precision piping.
What’s the best way to transport a decorated sheet cake?
Keep the cake on a flat, stable surface (like a baking sheet or cake board) in a cool car. Avoid placing anything on top of the cake. For delicate designs like rosette gardens, chill the cake for at least 1 hour before transport so the frosting is fully set. If you’re traveling more than 20 minutes, keep the cake in a cake box or cover it loosely with plastic wrap to protect from dust.
How do I scale these designs if I need a larger cake?
Most designs translate well to a 9×13 or 10×15 sheet cake with simple scaling. For borders and piping, use the same tip size but pipe more rows or rosettes. For stripe and color-block designs, adjust stripe width proportionally. For lettering, use a larger edible marker or practice on parchment first. Always test your design on a practice cake or parchment before committing to the final cake.
What’s the best way to store leftover decorated cake?
Keep the cake covered loosely with plastic wrap at room temperature for up to 2 days. For longer storage, refrigerate for up to 5 days—the frosting stays smooth and firm. Slice the cake, wrap individual pieces in plastic wrap, and freeze for up to 1 month. Thaw at room temperature for 1 hour before serving. Frosting re-sets as it cools, so the design stays intact through thawing.