
Wedding sheet cakes occupy a special place in celebration baking. They need to feed a crowd, look polished enough for photos, and hold up through hours of events—whether you’re prepping days ahead for a weekend ceremony or finishing touches the morning of. I’ve learned that the right design paired with stable frosting and smart timing transforms a sheet cake from functional to genuinely impressive. These 10 designs balance sophistication with repeatability, so you can execute them confidently without fussy techniques or specialized tools.
Each design here gets its own Whirl Factor—a specific texture contrast or finish move that elevates the cake beyond standard buttercream. I’m walking you through stable frosting formulas, make-ahead timelines, and the exact cues that tell you when each layer is ready for the next step. Pick your style, nail the structure, and deliver a sheet cake that tastes as good as it looks.
Wedding Sheet Cake Designs for Weeknight Prep — Speed-Build Finishes
Weeknight prep means you’re building components in advance and assembling close to service. These designs rely on make-ahead frosting, pre-baked layers, and finishes you can execute in 30–45 minutes once everything is chilled and ready.
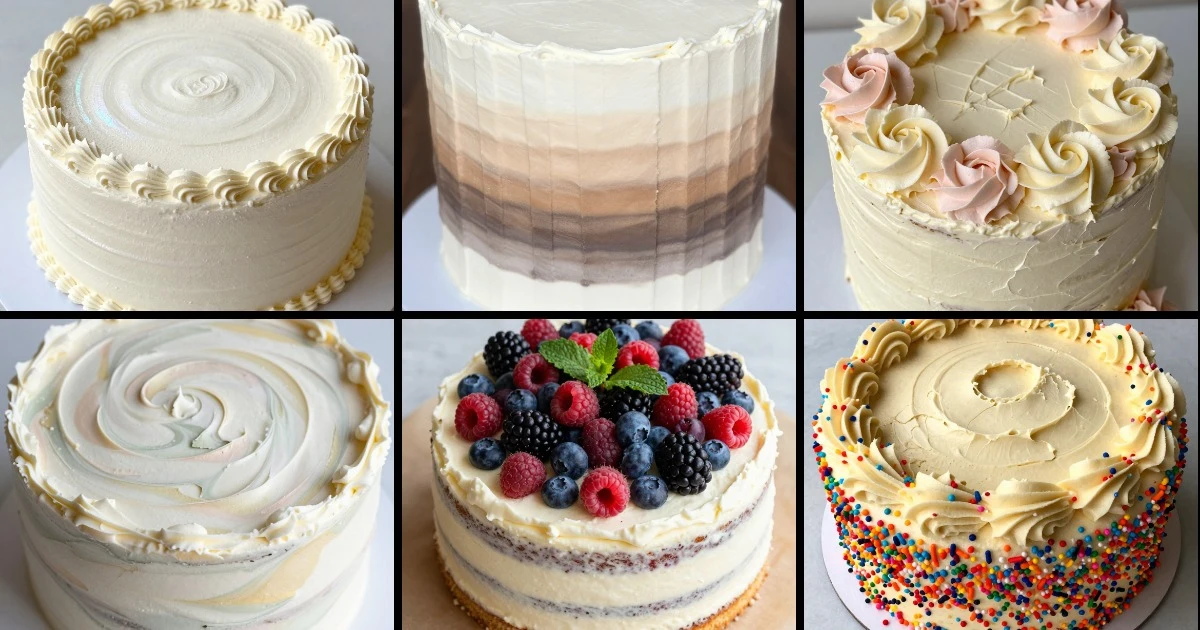
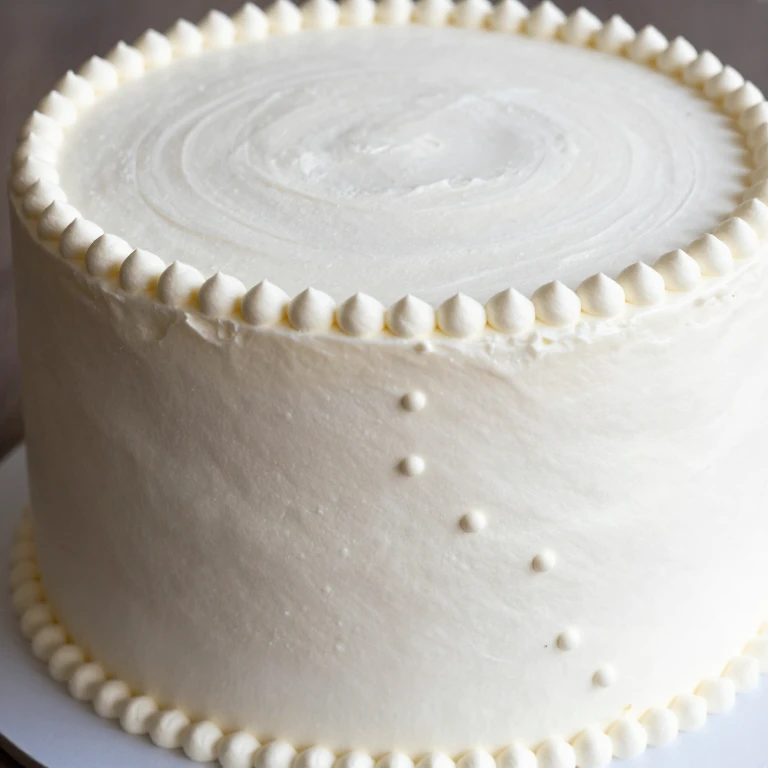
1. Smooth Buttercream with Pearl Border
This is my go-to when I need clean lines without piping skill. A perfectly smooth crumb coat and Swiss meringue buttercream create the base; pearl dust and a piped border add the Whirl Factor. Total active time on finish day: 35 minutes.
Ingredients
- 2 cups Swiss meringue buttercream (prepared ahead)
- 1 tablespoon pearl dust mixed with 1 teaspoon clear alcohol (vodka or lemon extract)
- 1 piping bag fitted with a small round tip
- 2 pre-baked sheet cake layers (9×13 inch)
- 1 cup simple syrup for cake brushing
- Offset spatula
- Bench scraper
- Small paintbrush
- Chilled cake boards and cake strips
Instructions
- Level both cake layers with a serrated knife, brush each with simple syrup, and let sit 5 minutes to absorb moisture.
- Crumb coat the stacked cake with a thin layer of buttercream, chill for 20 minutes until firm.
- Apply final buttercream layer with an offset spatula, working from center outward, then smooth the top and sides with a bench scraper dipped in warm water.
- Paint pearl dust mixture along the top edge and down the sides with a small brush for a soft shimmer.
- Pipe a border of small dots or beads around the base and top perimeter using the round tip.
- Chill until service; transport on a sturdy cake board with non-slip matting underneath.
Whirl Factor: Pearl dust gives a soft-focus luxury finish that reads as refined without requiring smooth piping.
Make-Ahead Note: Bake layers up to 2 days ahead, wrap tightly, and freeze. Prepare buttercream 1 day ahead. Assemble and frost up to 8 hours before service; keep refrigerated until 30 minutes before cutting.
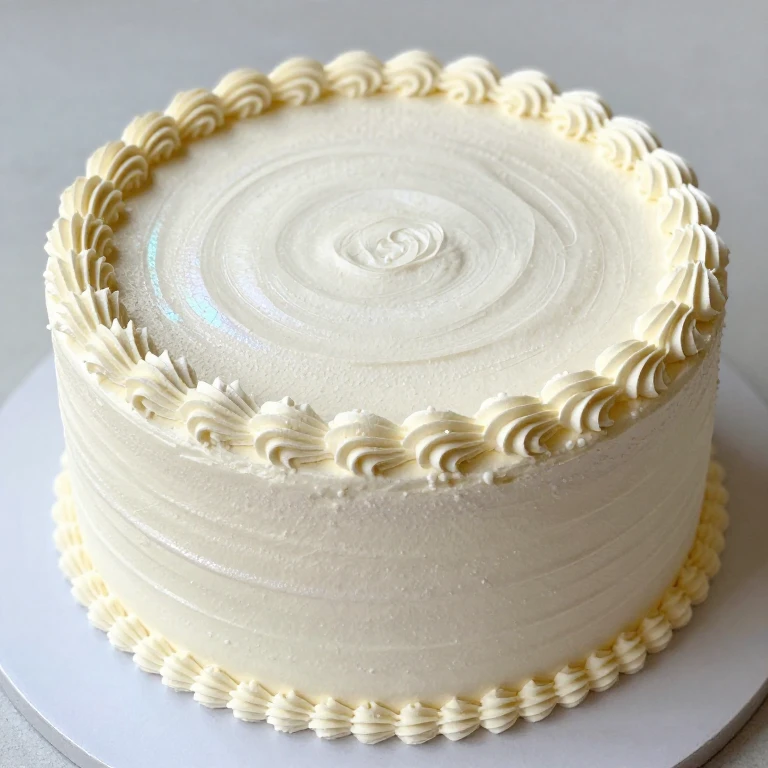
2. Palette-Knife Texture with Dried Florals
I love the controlled chaos of a palette-knife finish paired with real dried flowers. The texture reads modern and organic; the florals anchor the design without needing fresh flower expertise. Active time: 40 minutes.
Ingredients
- 2.5 cups American buttercream (prepared ahead)
- 1 offset or palette knife
- Dried petal mix (roses, lavender, cornflower—food-safe varieties)
- 2 pre-baked layers
- 1 cup simple syrup
- Cake strips and boards
- Small tweezers for petal placement
- Bench scraper
Instructions
- Brush cake layers with simple syrup, stack with crumb coat, and chill 20 minutes.
- Apply final buttercream layer and use the palette knife to create deliberate swoops and peaks across the top and sides—work in one direction for consistency.
- Once the frosting is set (chill 15 minutes), use tweezers to place dried petals in clusters across the top and along the sides.
- Step back and assess balance; add petals to fill visual gaps without overcrowding.
- Chill until 30 minutes before service; transport carefully to avoid disturbing petals.
Whirl Factor: Palette-knife marks create movement and texture; dried florals add dimension and a natural, unfussy vibe.
Make-Ahead Note: Layers freeze up to 2 days ahead. Buttercream holds 1 day refrigerated. Frost and decorate up to 12 hours before service; keep chilled and add petals no more than 6 hours ahead to preserve their appearance.
Wedding Sheet Cake Designs for Dinner Party — Impress-Ahead Finishes
Dinner party cakes need components that hold through service hours and can be mostly finished the day before. These designs emphasize make-ahead elements, stable frostings, and finishes that improve with a few hours of chilling.
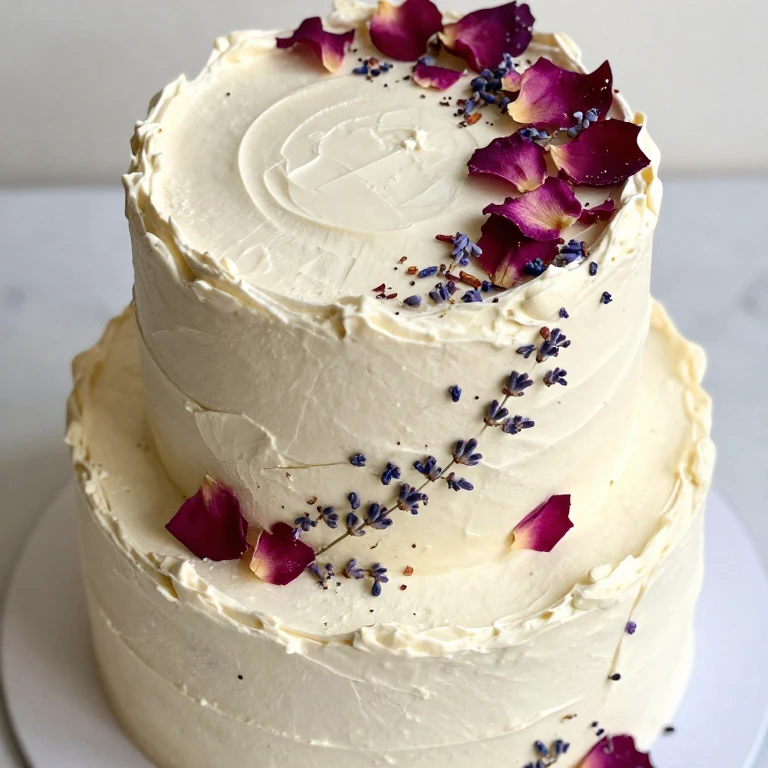
3. Smooth Finish with Piped Lace Detail
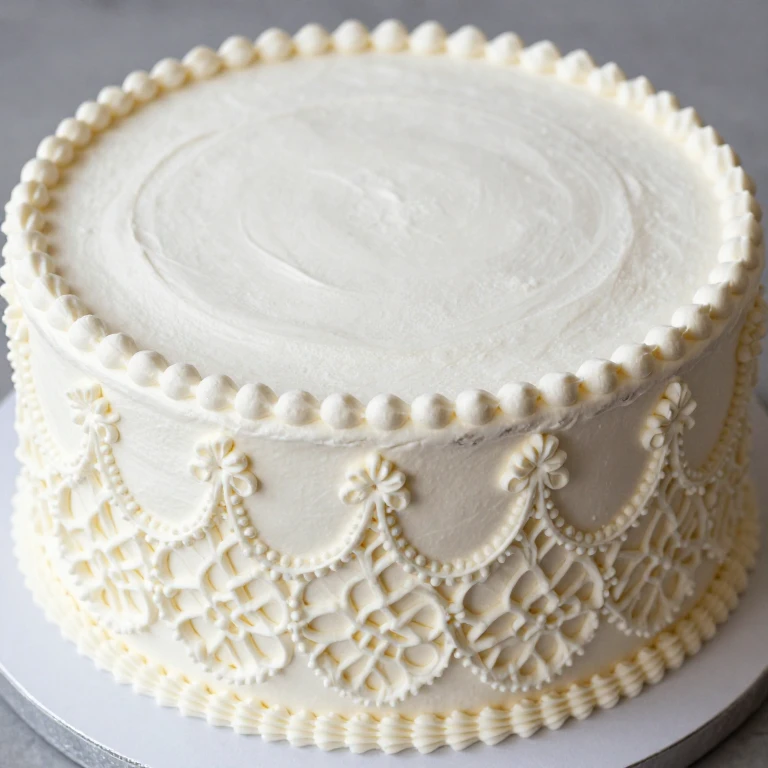
When I want to look polished without overdoing it, I pipe a delicate lace pattern on the sides using a small round tip. The smooth top stays clean; the laced sides become the statement. Prep-ahead friendly and visually striking.
Ingredients
- 2.5 cups Swiss meringue buttercream
- 1 piping bag with small round tip (size 2 or 3)
- 2 pre-baked layers
- 1 cup simple syrup
- Offset spatula and bench scraper
- Cake strips and boards
- Parchment paper and pencil (optional, for lace template)
Instructions
- Prepare layers with simple syrup, stack, and crumb coat; chill 20 minutes.
- Apply smooth buttercream finish to top and sides using offset spatula and bench scraper technique (warm water dips between passes).
- Chill the frosted cake for 30 minutes until surface is firm.
- Pipe a continuous lace or vine pattern around the sides using the small round tip—work freehand or use a pencil template transferred to the cake surface.
- Pipe a simple border (dots or beads) around the top and base.
- Chill at least 2 hours before service to set piped details.
Whirl Factor: Contrast between a mirror-smooth top and detailed piped sides creates visual interest without competing elements.
Make-Ahead Note: Bake and freeze layers up to 3 days ahead. Prepare buttercream 2 days ahead. Frost completely 1 day before service and chill overnight; piping holds beautifully and actually sets more cleanly with extra chilling time.
4. Ombré Buttercream Stripe
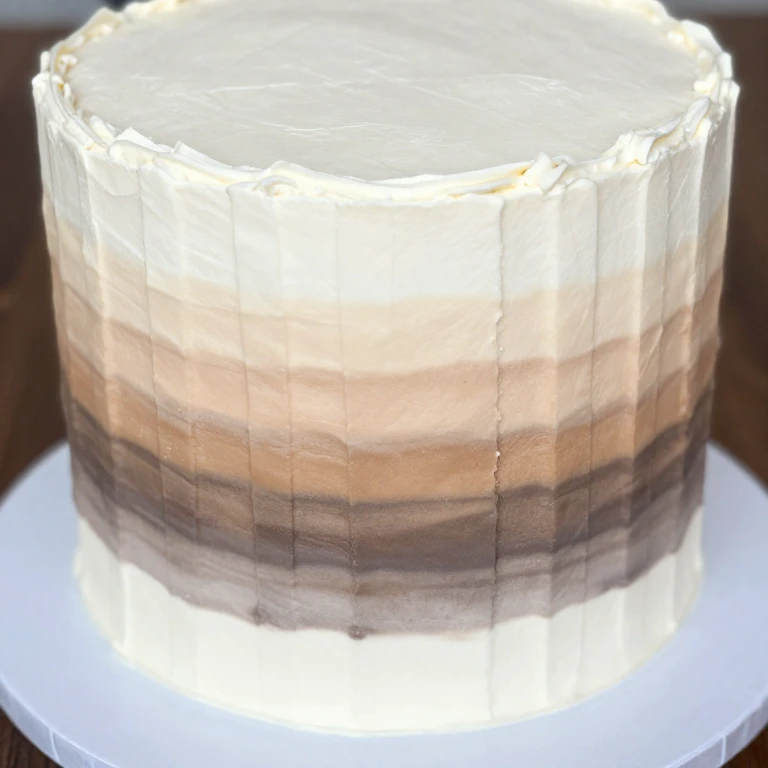
I pipe vertical stripes in graduated buttercream shades—from soft blush to deep rose, or sage to forest green. The effect is modern and memorable. Requires food coloring prep but minimal piping skill.
Ingredients
- 2.5 cups American buttercream, divided into 4 portions
- Gel food coloring in 2 shades (light and dark)
- 4 piping bags fitted with medium round tips
- 2 pre-baked layers
- 1 cup simple syrup
- Offset spatula
- Bench scraper
- Cake strips and boards
Instructions
- Brush cake layers with simple syrup, stack with crumb coat, and chill 20 minutes.
- Divide buttercream into 4 bowls and tint: leave one white, tint the second a light shade, the third medium, and the fourth dark. Load each into a separate piping bag.
- Apply a thin base layer of white buttercream to the top and sides with an offset spatula.
- Pipe vertical stripes starting with the lightest shade on one side, progressing to the darkest shade on the opposite side—pipe from top to bottom in even lines spaced about 1 inch apart.
- Use an offset spatula to gently blend the edges where stripes meet, creating a gradient effect.
- Chill for at least 2 hours; the stripes will hold their definition as the buttercream firms.
Whirl Factor: Ombré striping adds depth and movement; the gradient reads sophisticated and intentional.
Make-Ahead Note: Tint and pipe buttercream stripes up to 1 day ahead; store the frosted cake refrigerated. The stripes actually set and look cleaner after overnight chilling.
5. Smooth Finish with Gold Leaf Accent
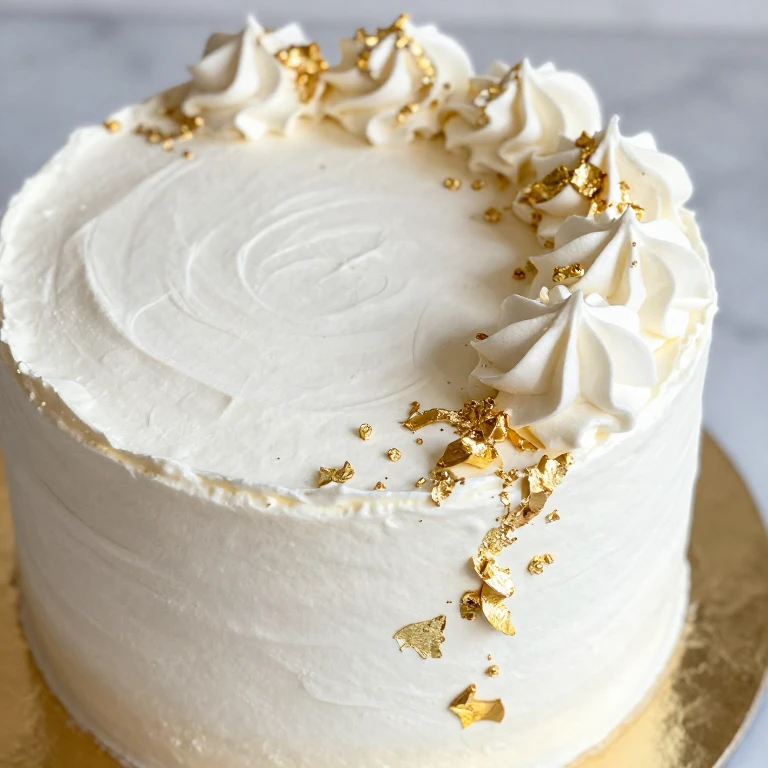
Food-grade gold leaf applied to a smooth buttercream base creates instant luxury. I place single leaves at the top corners and a scattered few down one side—restrained but unmissable.
Ingredients
- 2.5 cups Swiss meringue buttercream
- Food-grade edible gold leaf sheets
- Tweezers
- 2 pre-baked layers
- 1 cup simple syrup
- Offset spatula and bench scraper
- Cake strips and boards
Instructions
- Brush layers with simple syrup, stack with crumb coat, and chill 20 minutes.
- Apply final buttercream layer and smooth with bench scraper technique (warm water dips); chill 30 minutes until surface is completely set and firm.
- Using tweezers, gently lift individual gold leaf pieces and place them on the chilled frosting—the surface should be firm enough that the leaf adheres without sinking.
- Position leaves in a small cluster at one top corner, then scatter 2–3 more down the adjacent side for visual balance.
- Chill until service; gold leaf remains stable and won’t transfer or smudge once the buttercream is fully set.
Whirl Factor: Gold leaf adds opulence and catches light beautifully; it’s a single-element statement that elevates without fuss.
Make-Ahead Note: Frost completely 1 day ahead. Apply gold leaf 4–6 hours before service, once the buttercream surface is completely firm. Gold leaf won’t adhere well to warm frosting.
Wedding Sheet Cake Designs for Meal Prep — Build-Ahead Stability
Meal prep timing means you’re building the cake 2–3 days ahead and relying on stable frostings and designs that actually improve with chilling time. These designs use buttercream formulas that hold their shape, don’t weep, and transport safely.
6. Textured Crumb Coat with Piped Rosettes
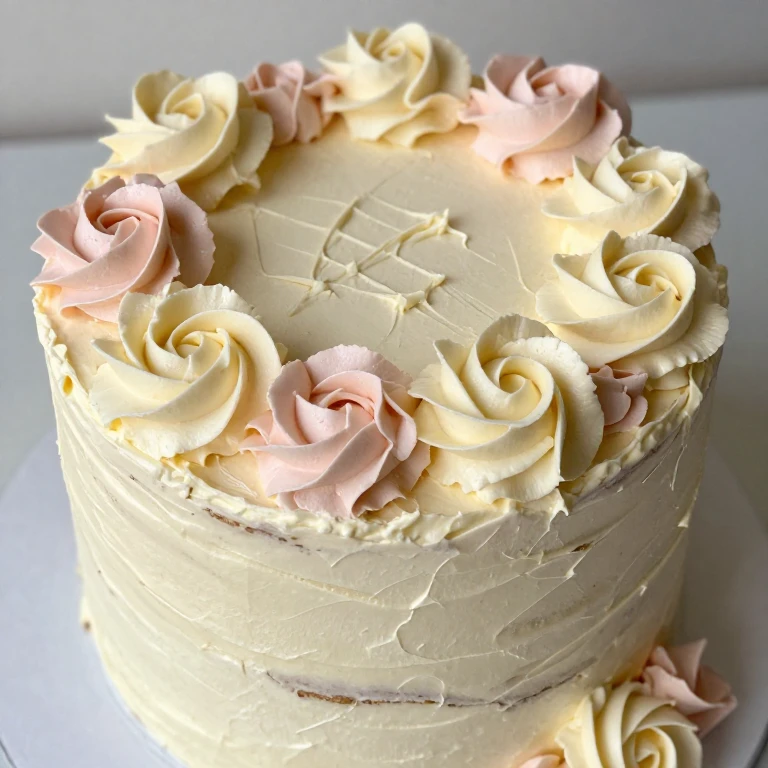
I apply a thick, textured crumb coat as the main finish, then pipe small buttercream rosettes across the top. It’s forgiving, looks intentional, and holds beautifully through transport and hours of sitting.
Ingredients
- 3 cups American buttercream
- 1 piping bag fitted with a large rose tip (Wilton 1M or similar)
- 2 pre-baked layers
- 1 cup simple syrup
- Offset spatula
- Bench scraper
- Cake strips and boards
- Non-slip matting for transport
Instructions
- Brush cake layers with simple syrup, stack with a thin crumb coat, and chill 20 minutes.
- Apply a thicker final coat of buttercream (about 1/4 inch), working in broad strokes with the offset spatula to create deliberate peaks and valleys.
- Use the bench scraper to define the texture further—drag it across the surface in one direction, then perpendicular, creating a crosshatch or wave pattern.
- Chill for 30 minutes until the textured base is completely firm.
- Pipe rosettes across the top in a scattered pattern, leaving some of the textured base visible for contrast.
- Chill at least 4 hours or overnight before transport; the rosettes will set hard and won’t shift during movement.
Whirl Factor: Textured base plus piped rosettes create depth and dimension; the design reads full without requiring precision.
Make-Ahead Note: Bake layers up to 3 days ahead and freeze. Prepare buttercream 2 days ahead. Frost, texture, and pipe 2 days before service. Chill overnight; the cake actually transports better when fully chilled and set. Keep refrigerated until 30 minutes before cutting.
7. Smooth Finish with Piped Dot Cascade
I pipe small dots in a cascading pattern down one or two sides of the cake. The dots are quick to pipe, create visual movement, and the design holds perfectly through transport and service hours.
Ingredients
- 2.5 cups Swiss meringue buttercream
- 1 piping bag fitted with a small round tip (size 2)
- 2 pre-baked layers
- 1 cup simple syrup
- Offset spatula and bench scraper
- Cake strips and boards
Instructions
- Brush layers with simple syrup, stack with crumb coat, and chill 20 minutes.
- Apply smooth buttercream finish using offset spatula and bench scraper (warm water dips); chill 30 minutes until firm.
- Pipe a vertical line of small dots starting at the top corner, spacing them about 1/2 inch apart, and let the line cascade down the side in a gentle curve.
- Repeat on the opposite side or one adjacent side for balance.
- Pipe a simple border (dots or beads) around the base and top perimeter.
- Chill at least 4 hours; the piped details set hard and won’t shift during transport.
Whirl Factor: Cascading dots create motion and visual interest on a clean base; the design is modern and graphic.
Make-Ahead Note: Bake and freeze layers up to 3 days ahead. Prepare buttercream 2 days ahead. Frost and pipe completely 1–2 days before service. Chill overnight and keep refrigerated; piped details hold beautifully and won’t shift during transport or service.
8. Marble Buttercream Swirl
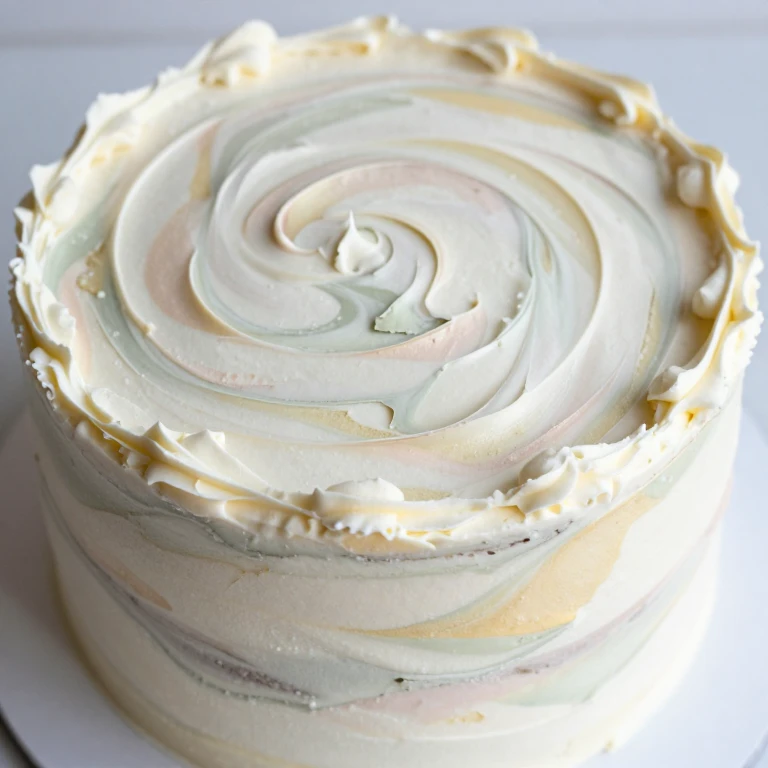
When I want visual drama with minimal fuss, I swirl two buttercream colors together. White and blush, white and sage, or white and pale gold create an organic, elegant look that reads expensive but requires just two colors and a spatula.
Ingredients
- 2 cups white American buttercream
- 1 cup tinted American buttercream (blush, sage, or pale gold)
- Offset spatula
- 2 pre-baked layers
- 1 cup simple syrup
- Bench scraper
- Cake strips and boards
Instructions
- Brush cake layers with simple syrup, stack with crumb coat, and chill 20 minutes.
- Dollop white and tinted buttercream alternately onto the top and sides in irregular patches.
- Using an offset spatula, swirl the colors together in broad strokes—work from one side to the other, then perpendicular, creating a marbled effect without fully blending.
- Aim for visible color separation with soft blended edges where the colors meet.
- Smooth the top slightly with the bench scraper if needed, but keep the swirled texture visible.
- Chill at least 4 hours or overnight; the swirl pattern sets and holds beautifully through transport and service.
Whirl Factor: Two-color marble creates sophistication and movement; the organic swirl reads as intentional and modern.
Make-Ahead Note: Bake and freeze layers up to 3 days ahead. Prepare both buttercream colors 2 days ahead. Frost and marble 2 days before service. Chill overnight; the swirl actually looks cleaner and more defined after full chilling. Keep refrigerated until service.
Wedding Sheet Cake Designs for Family-Friendly — Flexible, Foolproof Finishes
Family-friendly designs need to be approachable for a home baker, flexible if something doesn’t go perfectly, and forgiving through transport and service. These designs hide minor imperfections and scale easily if you need to adjust portions.
9. Naked Cake with Berry Cluster Top
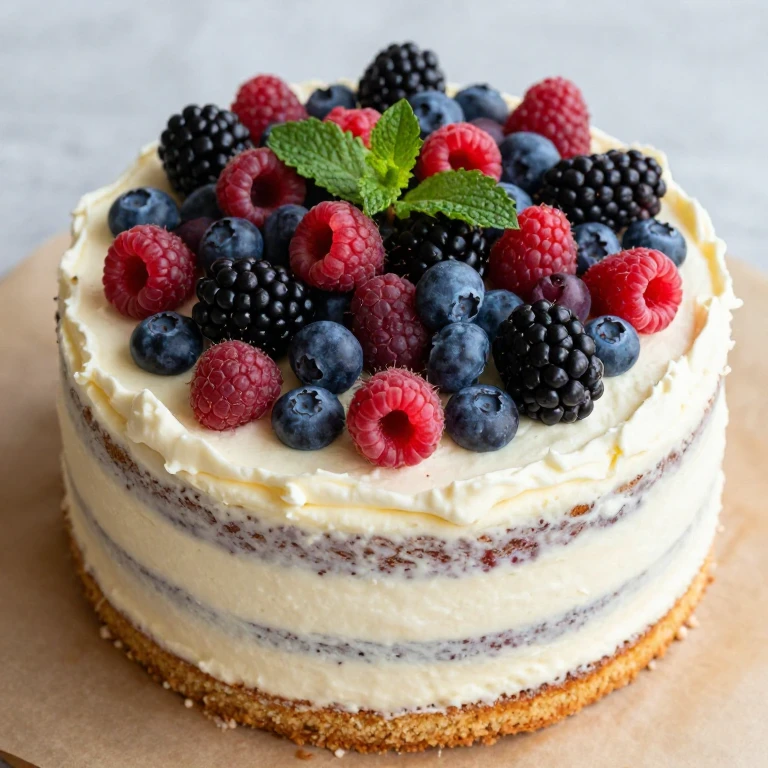
I love the modern, unfussy vibe of a naked or semi-naked cake paired with fresh berries and a few herb sprigs. It reads elegant, requires no piping, and actually looks better when it’s not overly polished.
Ingredients
- 1.5 cups American buttercream (crumb coat and thin filling only)
- 2 pre-baked layers
- 1 cup simple syrup
- 2 cups fresh mixed berries (raspberries, blueberries, blackberries)
- Fresh mint or basil sprigs
- Offset spatula
- Cake strips and boards
- Parchment paper for transport
Instructions
- Brush cake layers with simple syrup and stack with a thin buttercream filling (about 1/4 inch).
- Apply a light crumb coat to the sides and top, leaving some cake visible—this is intentional, not a mistake.
- Chill for 20 minutes until the crumb coat is set.
- Arrange fresh berries in a loose cluster across the top center of the cake, filling in gaps with herb sprigs.
- Transport on a sturdy board lined with parchment; the berries will shift slightly but that adds to the organic look.
- Serve within 4 hours of final assembly to keep berries fresh and the cake at optimal temperature.
Whirl Factor: Minimal frosting and fresh fruit create a modern, garden-inspired contrast; the unfussy approach is intentional and reads sophisticated.
Make-Ahead Note: Bake and chill layers up to 1 day ahead. Assemble with crumb coat up to 4 hours before service. Add berries and herbs no more than 2 hours before serving to preserve freshness and prevent them from releasing excess moisture.
10. Rustic Buttercream with Sprinkle Border
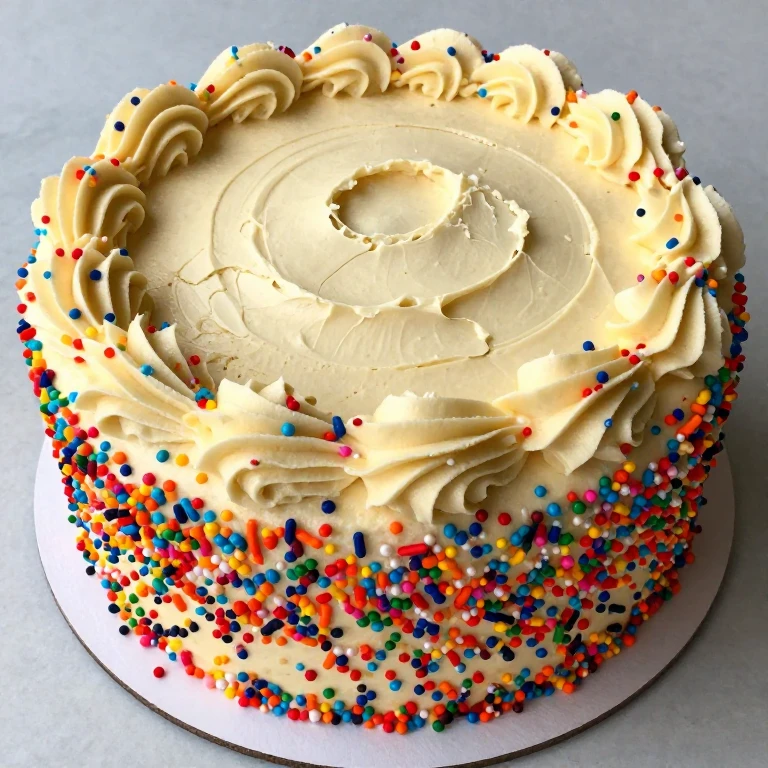
This design is my go-to when I want something that looks great but forgives uneven frosting. A loose, textured buttercream finish plus a sprinkle border hides imperfections and reads modern and fun.
Ingredients
- 2.5 cups American buttercream
- 1 cup rainbow sprinkles or pearl nonpareils
- 2 pre-baked layers
- 1 cup simple syrup
- Offset spatula
- Small bowl for sprinkles
- Cake strips and boards
Instructions
- Brush cake layers with simple syrup and stack with a thin buttercream filling.
- Apply buttercream to the top and sides in broad, loose strokes—don’t aim for smoothness; the texture is the design.
- Chill for 15 minutes until the frosting is just set but still slightly soft.
- Pour sprinkles into a shallow bowl and press the sides of the cake into the sprinkles, rotating to coat evenly around the perimeter.
- Pipe or spoon a border of buttercream around the top edge and base, then add sprinkles to those areas as well.
- Chill until service; the buttercream sets hard and the sprinkles won’t shift or fall.
Whirl Factor: Textured frosting plus sprinkle border creates a modern, playful finish that reads intentional rather than imperfect; the design is forgiving and fun.
Make-Ahead Note: Bake layers up to 2 days ahead. Prepare buttercream 1 day ahead. Frost and add sprinkles up to 8 hours before service. Keep refrigerated; the sprinkles adhere beautifully and won’t shift or soften.
FAQ
What’s the best buttercream formula for wedding sheet cakes?
I use Swiss meringue buttercream for dinner party and Dinner Party cakes because it’s stable, doesn’t weep in warm rooms, and pipes beautifully. American buttercream (butter, powdered sugar, vanilla) works perfectly for Weeknight and Family-Friendly designs where you want speed and simplicity. For Meal Prep cakes that need to hold for days, Swiss meringue is my first choice—it’s less prone to breaking down during transport and long chilling periods. Both formulas hold their shape through piping and chilling, but Swiss meringue stays firmer longer if your event space is warm.
How far ahead can I bake the layers?
I bake sheet cake layers up to 3 days ahead, wrap them tightly in plastic wrap, and freeze them. Frozen layers are actually easier to work with—they’re more stable and less likely to crumble during filling and frosting. Thaw them in the refrigerator for 2–3 hours before assembly, or work with them still slightly cold; the cold crumb is less fragile than room-temperature cake. If you’re baking 1–2 days ahead, you can refrigerate wrapped layers instead of freezing; they’ll keep perfectly and thaw faster.
When should I frost the cake—how much advance time is ideal?
For Weeknight designs, frost up to 8 hours before service. For Dinner Party cakes, I frost 1 day ahead and chill overnight; the frosting actually sets more cleanly with extra time, and piped details look sharper. For Meal Prep designs, frost 1–2 days ahead—the longer chilling actually improves stability and transport-readiness. Family-Friendly naked cakes should be assembled closer to service (within 4 hours) to keep berries fresh. The general rule: buttercream cakes improve with chilling time and hold beautifully for 2–3 days refrigerated, as long as you keep them tightly covered to prevent drying.
How do I transport a frosted sheet cake safely?
I place the frosted cake on a sturdy cake board (at least 1/2 inch thick) and secure it with non-slip matting or a damp kitchen towel underneath so it won’t slide during transport. Keep the cake in a cake box if possible, or cover it loosely with plastic wrap (don’t let the wrap touch the frosting). Transport in a cool car, never in direct sunlight or a hot trunk. If you’re traveling more than 30 minutes, keep the cake in a cooler with a cold pack nearby (not touching the box). Chill the cake completely before transport; a firm, cold frosting is far more forgiving than warm buttercream.
Can I make these designs with a different frosting—like cream cheese or ermine?
Cream cheese frosting works beautifully for most of these designs, though it’s slightly softer than buttercream and more prone to weeping in warm rooms. I’d skip cream cheese for Meal Prep cakes that need to hold for days. Ermine frosting (cooked flour and butter) is stable and gorgeous, but it requires more skill and planning. If you want to use cream cheese, stick with Weeknight or Dinner Party designs where you’re not prepping far ahead, and keep the cake refrigerated until 15 minutes before cutting. For the most reliable results across all occasions, Swiss meringue buttercream is your best bet.
How do I cut the cake neatly into portions?
I use a long serrated knife dipped in hot water and wiped clean between each cut. For a 9×13-inch sheet cake, I cut it into 12 equal portions (4 columns by 3 rows) or 15 portions (5 columns by 3 rows) depending on crowd size. Dip and wipe the knife after every cut to prevent frosting buildup. If the frosting is very soft, chill the cake for 15 minutes before cutting. A cake server or offset spatula helps you lift each piece cleanly without dragging frosting. If you’re serving many guests, cut the cake into portions before the event and cover each piece loosely with plastic wrap; they’ll stay fresh and you’ll avoid the mess of cutting at the table.