
Birthday sheet cakes are the ultimate high-impact dessert moment—they feed a crowd, look stunning on the table, and taste incredible when you nail the flavor and finish. I’ve learned that the real magic isn’t just in the cake itself; it’s in the design that makes a boy’s birthday feel personal and celebratory. Over the years, I’ve built a collection of sheet cake designs that balance bold visual impact with genuinely achievable piping and decorating techniques. These aren’t fussy, multi-day projects—they’re designs you can execute in an afternoon, even if you’re new to cake decorating. We’ve organized these by design style and theme, so you can pick the one that matches your boy’s personality and your comfort level in the kitchen.
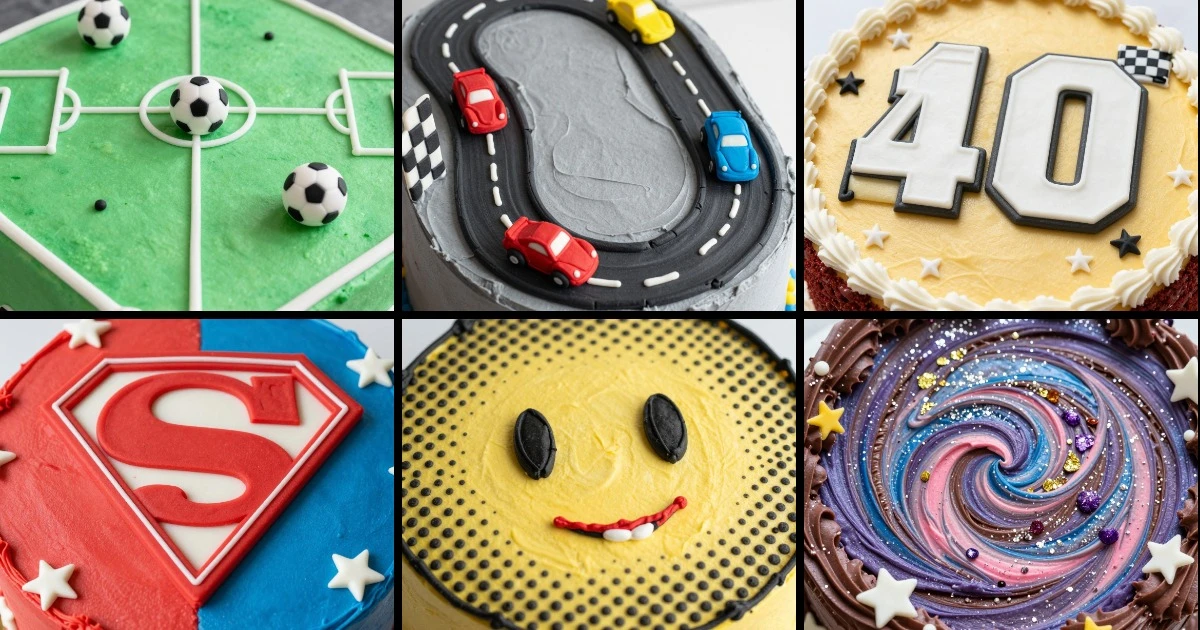
Sports & Action Theme Birthday Sheet Cake Designs
Sports themes hit different when they’re executed with clean lines and confident color blocking. These designs work whether he’s into soccer, basketball, baseball, or just loves the energy of game day. The key is bold, readable shapes and a color palette that pops without needing intricate detail work.
1. Soccer Field Sheet Cake with Buttercream Goals
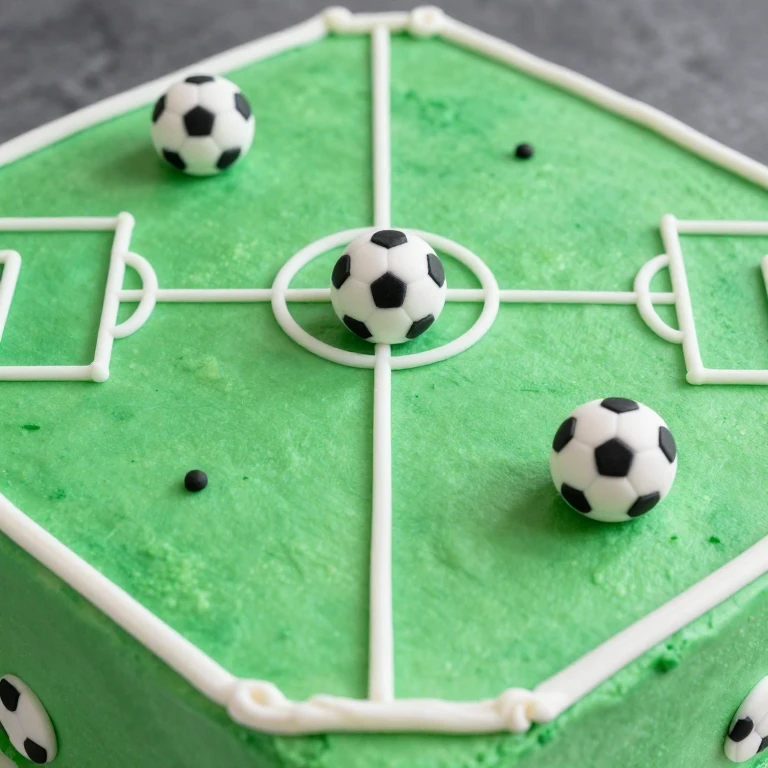
I’ve found that a soccer field design comes together fast when you commit to a green base and white piping lines. The field layout is pure geometry—two rectangles, center line, goal boxes—and the visual payoff is massive. Add a few fondant soccer balls or pipe buttercream ones for dimension.
Ingredients
- 1 box vanilla cake mix (plus ingredients per box)
- 1 cup unsalted butter, softened
- 4 cups powdered sugar
- 3 tablespoons whole milk
- 1 teaspoon vanilla extract
- 1 tablespoon cocoa powder (optional, for darker green)
- Gel food coloring (green, white, black)
- Piping bags and round tips (size 3 and 5)
- Fondant or modeling chocolate (optional, for soccer balls)
Instructions
- Bake the cake according to box directions in a 9×13 sheet pan. Cool completely on a wire rack.
- Make buttercream: cream butter and powdered sugar together for 3 minutes until light and fluffy. Add milk and vanilla, beat until smooth.
- Divide buttercream into three bowls. Tint one portion bright green (about 2 cups), leave one white (about 1.5 cups), and tint a small portion black for accents.
- Spread the green buttercream evenly across the cooled cake, creating a smooth playing field surface.
- Using a white piping bag fitted with a size 3 round tip, pipe the center line lengthwise down the middle of the cake.
- Pipe two rectangles on each end of the cake to represent the goal boxes, using straight lines and right angles.
- Add a small circle in the center of each goal box for the penalty spot.
- Pipe a border around the entire cake edge with white buttercream for a finished frame.
- If using fondant soccer balls, roll small black and white fondant spheres and place them on the field. Alternatively, pipe buttercream soccer balls using a black piping bag and round tip.
- Chill the cake for 30 minutes before serving to set the piping.
Whirl Factor: The contrast here is smooth green field against crisp white piping—clean geometry that reads as “soccer” instantly without needing fussy detail work.
Practical Tip: Chill your piping bags and tips in the freezer for 10 minutes before starting. Cold tools give you sharper, more controlled lines on the buttercream.
Storage: Cover loosely with plastic wrap and refrigerate for up to 2 days. The buttercream holds beautifully, and the piping lines stay sharp in the cold.
2. Basketball Court Sheet Cake with Edible Markers
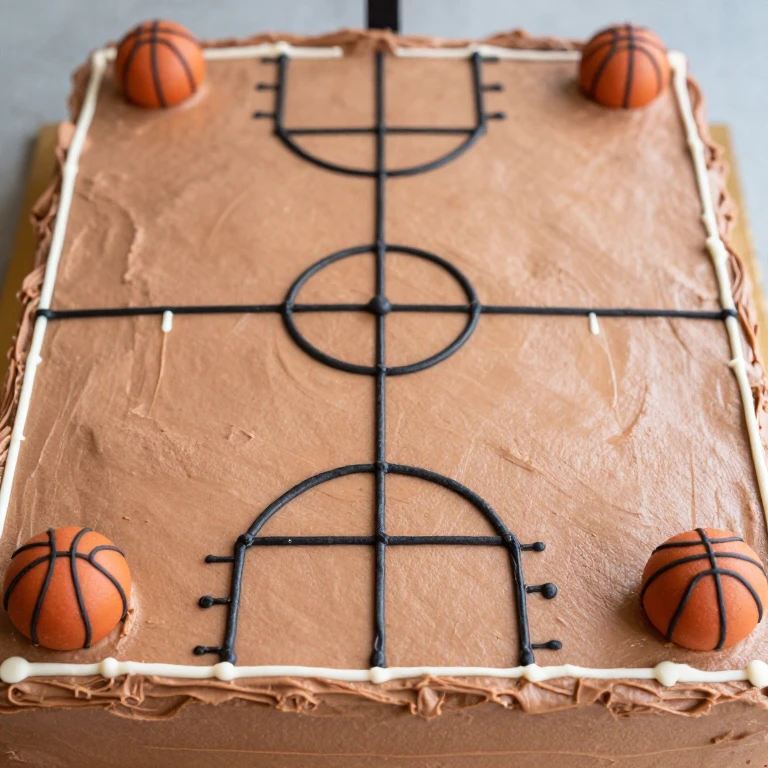
Basketball courts are deceptively simple to execute, and edible food markers make the fine details pop without any piping pressure. I love this design because it looks professional but requires zero decorating experience.
Ingredients
- 1 box chocolate cake mix (plus ingredients per box)
- ¾ cup unsalted butter, softened
- 3 cups powdered sugar
- 2 tablespoons cocoa powder
- 2 tablespoons whole milk
- 1 teaspoon vanilla extract
- Gel food coloring (orange)
- Edible food markers (black, white)
- Fondant or store-bought candy basketballs (optional)
Instructions
- Bake chocolate cake in a 9×13 sheet pan according to package directions. Allow to cool completely.
- Prepare chocolate buttercream: beat softened butter until creamy, then add powdered sugar and cocoa powder. Mix in milk and vanilla until smooth.
- Tint the buttercream a warm orange-brown color by adding a small amount of orange gel coloring to the chocolate base.
- Spread buttercream evenly across the cooled cake in a smooth, even layer.
- Using a black edible food marker, draw the center line lengthwise down the middle of the cake.
- Draw the free-throw lane (rectangle) on each end, then add the three-point line arc above each lane.
- Add the center circle and center dot where the center line meets the middle of the cake.
- Use white edible marker to add hash marks along the baseline and sideline for court detail.
- Place fondant or candy basketballs on the court, or draw them with the black marker for a flat design.
- Let the markers dry for 5 minutes before transport or serving.
Whirl Factor: Edible markers cut through the chocolate base with crisp black and white lines—no piping required, maximum court authenticity.
Practical Tip: Test your edible markers on a small piece of frosting first. Some markers bleed slightly if the frosting is too soft, so chill the cake for 20 minutes before drawing.
Storage: Keep refrigerated, covered loosely with plastic wrap, for up to 3 days. The frosting and marker lines hold perfectly cold.
3. Baseball Diamond Sheet Cake with Fondant Players
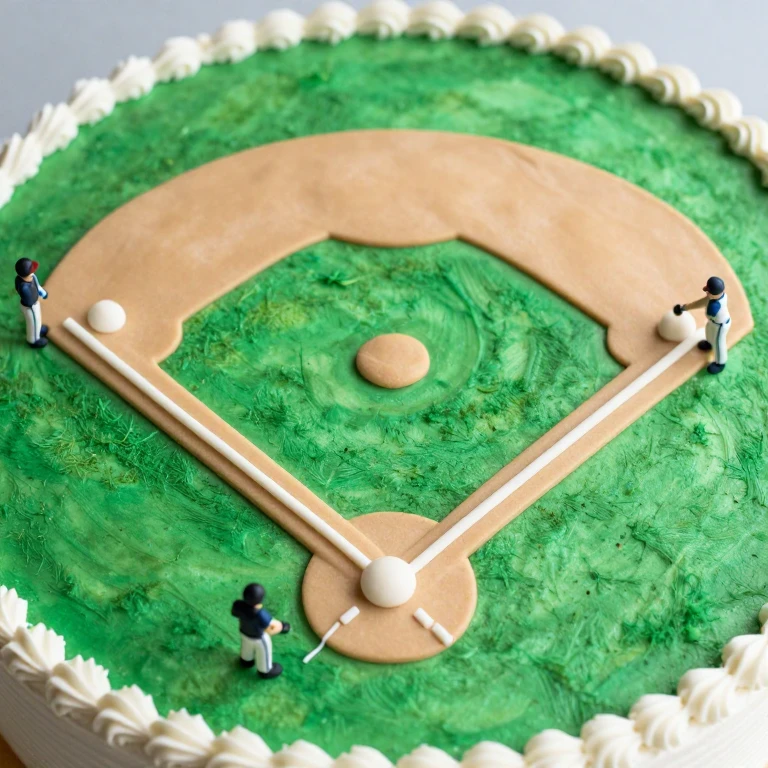
A baseball diamond gives you four clear quadrants to work with, and the geometric layout is forgiving even if your piping isn’t perfect. I add small fondant figures at each base for character and personality.
Ingredients
- 1 box vanilla cake mix (plus ingredients per box)
- 1 cup unsalted butter, softened
- 4 cups powdered sugar
- 3 tablespoons whole milk
- 1 teaspoon vanilla extract
- Gel food coloring (grass green, tan, white)
- Piping bags and round tips (size 3)
- Fondant in skin tone, white, and team colors
- Small fondant tools or toothpicks
Instructions
- Bake vanilla cake in a 9×13 sheet pan according to box directions. Cool completely on a wire rack.
- Prepare vanilla buttercream: cream butter and powdered sugar for 3 minutes, add milk and vanilla, and beat until smooth.
- Divide buttercream into two portions: one large portion tinted grass green (about 3 cups) and one portion tinted tan or light brown (about 1 cup).
- Spread the green buttercream across the entire cake to represent the outfield.
- Using an offset spatula or back of a spoon, create a tan diamond shape in the center by spreading the tan buttercream in a rotated square pattern (home plate, first base, second base, third base).
- Using a white piping bag fitted with a size 3 round tip, pipe the baselines connecting each base in straight lines.
- Pipe a small circle at home plate, first base, second base, and third base as base markers.
- While frosting is still soft, press small fondant figures (you can shape these into simple standing shapes or use pre-made fondant toppers) at each base and near home plate.
- Pipe a white border around the entire cake edge for a finished frame.
- Chill for 30 minutes before serving.
Whirl Factor: The tan diamond pops against the green field, and fondant figures add a playful 3D element that makes the design feel alive.
Practical Tip: Roll fondant figures ahead of time and let them firm up on parchment paper for 2 hours. They’ll hold their shape better when you press them into the frosting.
Storage: Refrigerate, loosely covered, for up to 2 days. Fondant figures stay firm and the buttercream holds its shape beautifully.
Race Track & Speed Theme Birthday Sheet Cake Designs
Race track designs bring high-octane energy to the cake table. These themes work for cars, motorcycles, or just pure speed-obsessed kids. The circular or winding track format creates natural visual flow, and you can layer fondant or buttercream cars for dynamic movement.
4. Race Track Sheet Cake with Buttercream Cars
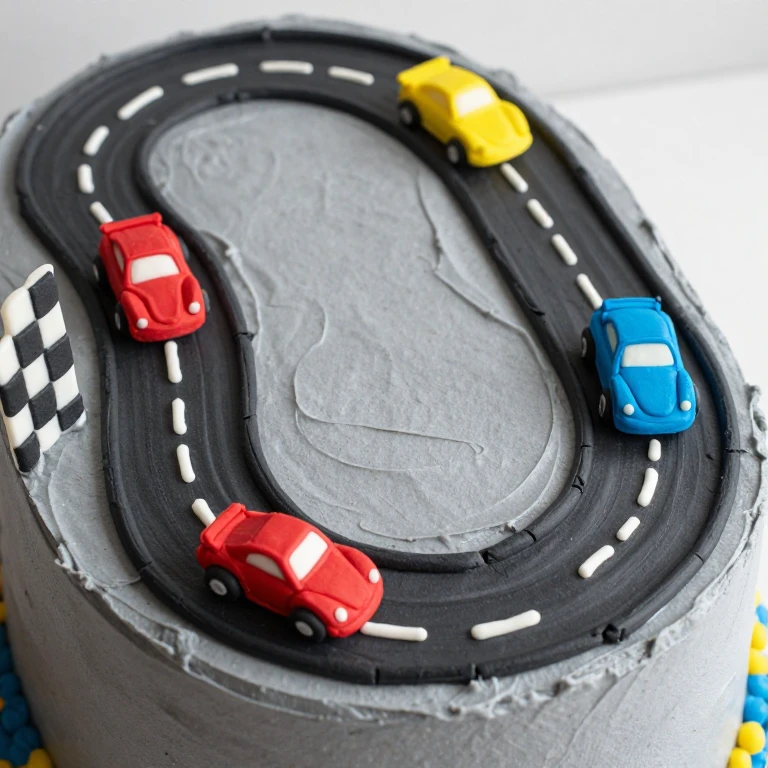
I’ve made this design dozens of times, and it never fails to get excited reactions. The track is a simple oval piped in one color, and the cars are either fondant toppers or piped buttercream shapes that you position at different points around the track.
Ingredients
- 1 box chocolate cake mix (plus ingredients per box)
- ¾ cup unsalted butter, softened
- 3 cups powdered sugar
- 2 tablespoons cocoa powder
- 2 tablespoons whole milk
- 1 teaspoon vanilla extract
- Gel food coloring (gray, black, red, yellow, white)
- Piping bags and round tips (sizes 3 and 5)
- Fondant in bright colors (optional, for cars)
Instructions
- Bake chocolate cake in a 9×13 sheet pan. Cool completely.
- Prepare chocolate buttercream: beat butter, add powdered sugar and cocoa powder, then milk and vanilla until smooth.
- Tint buttercream gray by mixing a small amount of black gel coloring into the chocolate base.
- Spread gray buttercream evenly across the cooled cake to represent asphalt.
- Using a black piping bag fitted with a size 5 round tip, pipe a thick oval or circular track around the perimeter of the cake, leaving about 1 inch from the edges.
- Pipe white dashed lines down the center of the track using a white piping bag and size 3 tip for lane markers.
- Tint additional small portions of buttercream in bright colors (red, yellow, blue) for the cars.
- Using a small piping bag or offset spatula, create simple buttercream car shapes (rectangles with small circles for wheels) positioned around the track at different points, as if racing.
- Add a checkered flag design in one corner using alternating black and white piping, or place a fondant flag topper.
- Chill for 30 minutes before serving.
Whirl Factor: Gray asphalt base with black track lines and bright buttercream cars racing around the perimeter—the movement is built into the design itself.
Practical Tip: Pipe the track outline first, then add the cars. This gives you a clear reference for placement and keeps the design balanced.
Storage: Cover loosely and refrigerate for up to 2 days. Buttercream cars hold their shape perfectly cold.
5. Drag Strip Sheet Cake with Flame Details
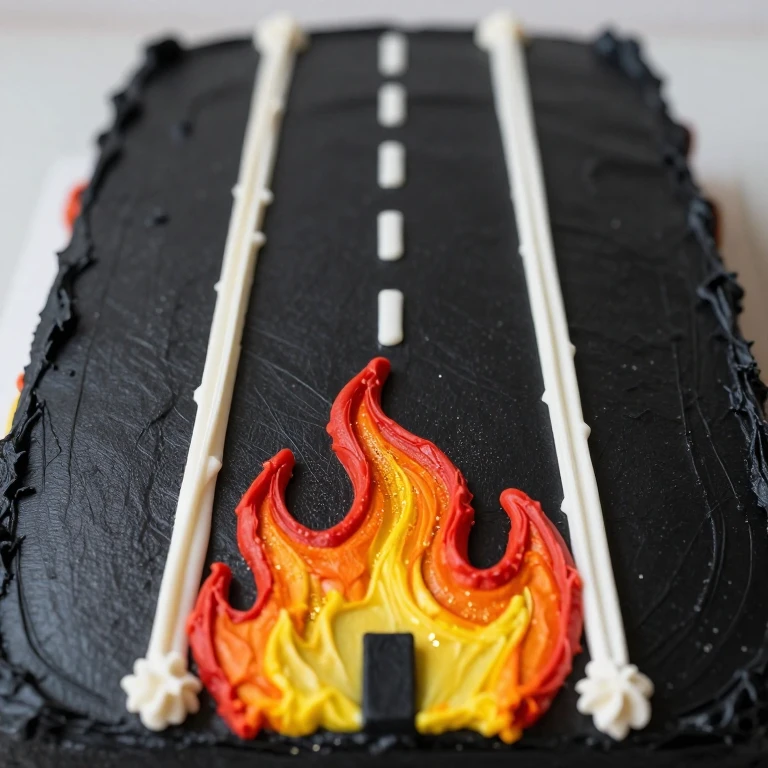
Drag strips are pure visual drama—straight lines, bold colors, and flames that scream speed. This design is easier than it looks because you’re working with straight lines and simple flame shapes.
Ingredients
- 1 box yellow cake mix (plus ingredients per box)
- 1 cup unsalted butter, softened
- 4 cups powdered sugar
- 3 tablespoons whole milk
- 1 teaspoon vanilla extract
- Gel food coloring (black, red, orange, yellow, white)
- Piping bags and round tips (sizes 3 and 5)
- Edible glitter or luster dust (optional, for shimmer)
Instructions
- Bake yellow cake in a 9×13 sheet pan according to package directions. Cool completely.
- Prepare vanilla buttercream: cream butter and powdered sugar for 3 minutes, add milk and vanilla, and beat until smooth.
- Tint buttercream black for the drag strip base (about 2.5 cups).
- Spread black buttercream evenly across the cooled cake.
- Using a white piping bag fitted with a size 5 round tip, pipe two thick parallel lines lengthwise down the center of the cake to represent the lane dividers.
- Add white dashed lines along the sides of the cake to represent the track edge markings.
- Using piping bags tinted red, orange, and yellow, create flame shapes starting from the bottom center of the cake and rising upward. Pipe teardrop or pointed shapes that overlap slightly to create a flame effect.
- Add a small black rectangle at the bottom center to represent the starting line or finish line marker.
- Dust the flame area with edible glitter or luster dust for extra shimmer and dimension.
- Chill for 30 minutes before serving.
Whirl Factor: Black drag strip with white lane markers and graduated red-orange-yellow flames rising from the base—pure high-octane visual impact.
Practical Tip: Chill your piping bags for 10 minutes before piping the flames. Cold buttercream holds sharper peaks and more defined flame shapes.
Storage: Refrigerate, loosely covered, for up to 2 days. Piping and glitter hold beautifully.
6. Racecar Number Sheet Cake with Bold Typography
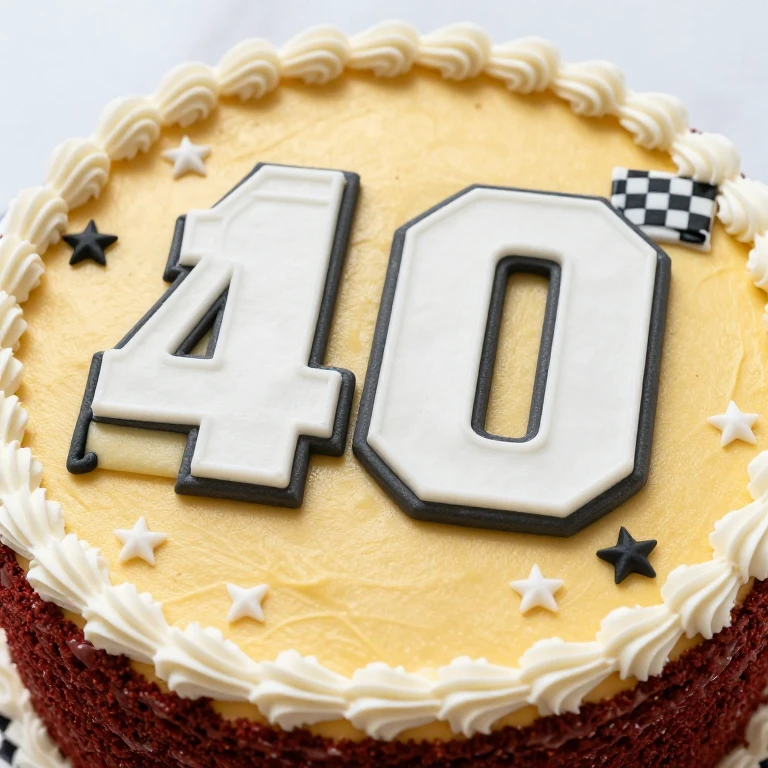
Sometimes the simplest designs hit hardest. A giant race car number on a bold background is instantly recognizable and feels personal to the birthday boy. I use buttercream piping or fondant cutouts for maximum readability.
Ingredients
- 1 box red velvet cake mix (plus ingredients per box)
- 1 cup unsalted butter, softened
- 4 cups powdered sugar
- 3 tablespoons whole milk
- 1 teaspoon vanilla extract
- Gel food coloring (white, black, yellow)
- Piping bags and large round tips (size 6 or 7)
- Fondant in white and black (optional, for number cutouts)
- Edible markers (optional)
Instructions
- Bake red velvet cake in a 9×13 sheet pan according to package directions. Cool completely.
- Prepare vanilla buttercream: cream butter and powdered sugar for 3 minutes, add milk and vanilla, and beat until smooth.
- Reserve about 1 cup of white buttercream for piping. Tint the remaining buttercream a deep yellow or gold color.
- Spread the yellow buttercream evenly across the cooled cake in a smooth layer.
- Using a white piping bag fitted with a large round tip (size 6 or 7), pipe the birthday boy’s race car number in the center of the cake. Make the numbers large and bold—they should be immediately readable from across a room.
- Pipe a white border around the entire cake edge to frame the design.
- Add small piping details around the number, such as checkered flags or small stars, using black and white buttercream.
- Alternatively, cut the number from white fondant and lay it on top of the yellow base for a cleaner, more graphic look.
- Chill for 30 minutes before serving.
Whirl Factor: Red velvet cake base with bold yellow frosting and a giant white number creates a high-contrast, graphic design that reads as “race car” instantly.
Practical Tip: Sketch the number lightly on the frosting with a toothpick first to ensure placement. This gives you a guide without making permanent marks.
Storage: Refrigerate, loosely covered, for up to 2 days. Buttercream numbers hold their shape perfectly.
Comic & Character Theme Birthday Sheet Cake Designs
Superhero and comic book themes bring cartoon energy to the table. These designs work best with bold color blocking, action lines, and simple character shapes. You’re not aiming for photorealism—you’re creating a comic book aesthetic that’s fun and graphic.
7. Comic Book Burst Sheet Cake with Action Words
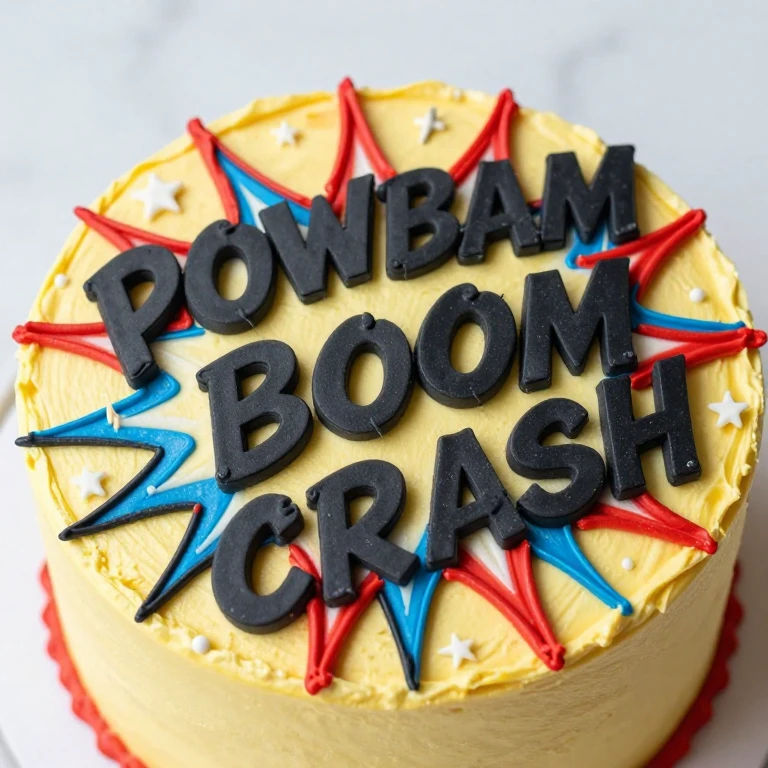
I love this design because it’s pure energy. You’re creating radiating lines that burst from the center, then adding comic book sound effect words (POW, BAM, BOOM) in bold piping or with edible markers. The effect is dynamic and celebratory without requiring any realistic drawing skills.
Ingredients
- 1 box vanilla cake mix (plus ingredients per box)
- 1 cup unsalted butter, softened
- 4 cups powdered sugar
- 3 tablespoons whole milk
- 1 teaspoon vanilla extract
- Gel food coloring (bright yellow, red, blue, black, white)
- Piping bags and round tips (sizes 3 and 5)
- Edible food markers (black, white)
Instructions
- Bake vanilla cake in a 9×13 sheet pan according to box directions. Cool completely.
- Prepare vanilla buttercream: cream butter and powdered sugar for 3 minutes, add milk and vanilla, and beat until smooth.
- Divide buttercream into portions and tint them bright yellow (about 2 cups), red (about 1 cup), and blue (about 1 cup). Keep some white for accents.
- Spread yellow buttercream across the entire cake as the base.
- Using a red piping bag fitted with a size 5 round tip, pipe thick radiating lines from the center of the cake outward toward all four corners and edges, creating a burst or explosion effect. These lines should be bold and evenly spaced.
- Fill some of the burst sections with blue piping to create alternating color blocks within the burst pattern.
- Using a black piping bag and size 3 tip, pipe bold block letters spelling out comic book action words (POW, BAM, BOOM, CRASH) in various locations on the cake. Make the letters thick and graphic.
- Add small white piping accents around the letters for emphasis, such as small stars or motion lines.
- Use black edible marker to outline some of the burst lines for extra definition and pop.
- Chill for 30 minutes before serving.
Whirl Factor: Yellow base with red and blue radiating burst lines plus bold black action words creates a graphic comic book explosion effect—pure visual excitement.
Practical Tip: Pipe the burst lines first, then add the action words on top. This ensures the words are readable and centered without competing with the background pattern.
Storage: Refrigerate, loosely covered, for up to 2 days. Piping holds sharp and colors stay vibrant.
8. Superhero Shield Sheet Cake with Fondant Logo
A shield design is instantly recognizable as superhero territory. You create a large shield shape in the center of the cake, then add a bold initial or logo inside. This design feels personalized and powerful without being complicated.
Ingredients
- 1 box chocolate cake mix (plus ingredients per box)
- ¾ cup unsalted butter, softened
- 3 cups powdered sugar
- 2 tablespoons cocoa powder
- 2 tablespoons whole milk
- 1 teaspoon vanilla extract
- Gel food coloring (red, blue, yellow, white, black)
- Piping bags and round tips (sizes 3 and 5)
- Fondant in red, blue, and white
- Fondant tools or small knife
Instructions
- Bake chocolate cake in a 9×13 sheet pan according to package directions. Cool completely.
- Prepare chocolate buttercream: beat butter, add powdered sugar and cocoa powder, then milk and vanilla until smooth.
- Divide buttercream into portions and tint one red (about 1.5 cups), one blue (about 1.5 cups), and keep some chocolate as is (about 1 cup).
- Spread red buttercream evenly across half of the cake (left side) and blue buttercream across the other half (right side) to create a two-color background.
- Roll out red fondant and cut a large shield shape (approximately 6 inches tall and 5 inches wide) using a fondant cutter or by hand with a small knife. The shield should have a pointed bottom and rounded top.
- Place the fondant shield in the center of the cake where the red and blue sections meet.
- Roll out white fondant and cut or shape the birthday boy’s initial or a superhero symbol (lightning bolt, star, etc.). Make it bold and simple.
- Press the white fondant initial onto the center of the red shield.
- Using a white piping bag fitted with a size 5 round tip, pipe a white border around the shield to frame it and make it pop off the background.
- Pipe white stars or accent shapes in the corners of the cake for added detail.
- Chill for 30 minutes before serving.
Whirl Factor: Split red and blue background with a bold fondant shield in the center—the contrast and symmetry scream superhero power.
Practical Tip: Make the fondant shield ahead of time (up to 3 days) and let it firm up completely. It will hold its shape better when you place it on the frosting.
Storage: Refrigerate, loosely covered, for up to 2 days. Fondant shield stays firm and colors stay vibrant.
9. Comic Book Halftone Dot Sheet Cake with Character Face

Halftone dots are the classic comic book texture—they’re surprisingly easy to create with piping and they instantly read as “comic book” to anyone who sees them. I combine this with a simple character face or mask in the center for personality.
Ingredients
- 1 box vanilla cake mix (plus ingredients per box)
- 1 cup unsalted butter, softened
- 4 cups powdered sugar
- 3 tablespoons whole milk
- 1 teaspoon vanilla extract
- Gel food coloring (bright yellow, black, white, red)
- Piping bags and round tips (sizes 2 and 4)
- Fondant in black and white (optional, for mask)
Instructions
- Bake vanilla cake in a 9×13 sheet pan according to box directions. Cool completely.
- Prepare vanilla buttercream: cream butter and powdered sugar for 3 minutes, add milk and vanilla, and beat until smooth.
- Tint buttercream bright yellow (about 3.5 cups) and reserve some white for piping.
- Spread yellow buttercream evenly across the cooled cake.
- Using a black piping bag fitted with a size 4 round tip, create halftone dots across the entire cake surface. Start at the top and work downward, creating rows of dots that are evenly spaced (about ½ inch apart). Vary the pressure slightly so some dots are larger and some are smaller—this creates the authentic halftone effect.
- In the center of the cake, create a simple character face or mask shape using black piping. This can be as simple as two oval eyes and a curved mouth, or a more complex mask shape.
- Use white piping to add highlights to the eyes and mouth, creating dimension and expression.
- Add a red piping accent (such as a mouth or accent stripe) for color pop.
- Chill for 30 minutes before serving.
Whirl Factor: Yellow base covered in black halftone dots with a bold character face in the center—pure comic book aesthetic that’s instantly recognizable.
Practical Tip: Practice your dot pattern on parchment paper first. Once you get the rhythm, the piping goes fast and looks more uniform.
Storage: Refrigerate, loosely covered, for up to 2 days. Piping holds sharp and the halftone effect stays crisp.
Galaxy & Space Theme Birthday Sheet Cake Designs
Space themes bring wonder and imagination to the cake table. These designs work with swirls, splatters, and layered colors that create depth and movement. The beauty of a galaxy design is that imperfect swirls actually look more authentic—they mimic real nebulae and cosmic clouds.
10. Galaxy Swirl Sheet Cake with Edible Glitter Stars
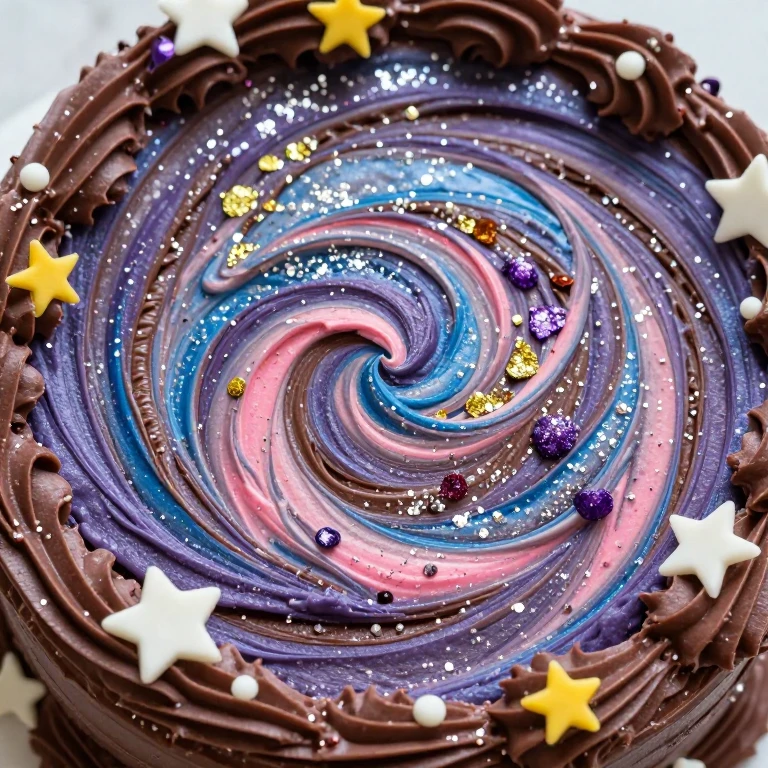
This is my go-to design when I want maximum visual impact with minimal technical skill required. Swirled colors, edible glitter, and fondant stars create a dreamy, cosmic effect that feels elevated but is genuinely simple to execute.
Ingredients
- 1 box chocolate cake mix (plus ingredients per box)
- ¾ cup unsalted butter, softened
- 3 cups powdered sugar
- 2 tablespoons cocoa powder
- 2 tablespoons whole milk
- 1 teaspoon vanilla extract
- Gel food coloring (purple, blue, pink, white, black)
- Offset spatula or butter knife
- Edible glitter in silver, gold, and purple
- Fondant in white and yellow (optional, for stars)
- Star-shaped fondant cutter (optional)
Instructions
- Bake chocolate cake in a 9×13 sheet pan according to package directions. Cool completely.
- Prepare chocolate buttercream: beat butter, add powdered sugar and cocoa powder, then milk and vanilla until smooth.
- Divide buttercream into four portions. Keep one portion chocolate (about 1 cup), and tint the others purple (about 1 cup), blue (about 1 cup), and pink (about ½ cup). Reserve a small amount of white.
- Spread the chocolate buttercream as a base layer across the entire cooled cake.
- Using an offset spatula, dollop the purple, blue, and pink buttercream in random sections across the cake, leaving some chocolate visible between the colors.
- Using the offset spatula, gently swirl the colors together by dragging the spatula through the buttercream in curved, flowing motions. Don’t overwork it—some color separation is beautiful and authentic to galaxy aesthetics.
- While the frosting is still soft, sprinkle edible glitter across the entire cake surface. Use silver glitter generously, then add pops of gold and purple glitter for variation.
- If using fondant stars, roll out white and yellow fondant and cut star shapes using a small star cutter. Press them gently into the frosting at various points across the cake.
- Pipe small white buttercream dots to represent distant stars, using a piping bag fitted with a size 2 round tip.
- Chill for 30 minutes before serving to set the glitter and secure the fondant stars.
Whirl Factor: Swirled purple, blue, and pink buttercream base with chocolate undertones, layered with silver and gold edible glitter and fondant stars—a dreamy, dimensional cosmos that feels magical.
Practical Tip: Don’t overthink the swirls. Real galaxies are chaotic and beautiful—wonky swirls actually look more authentic than perfectly uniform ones. Embrace the imperfection.
Storage: Refrigerate, loosely covered, for up to 2 days. Glitter adheres beautifully to cold frosting, and fondant stars hold firm. The swirled effect actually looks sharper when cold.
When to Choose Each Style
- Sports & Action Themes: Choose these if your boy is obsessed with a specific sport or team. Soccer fields, basketball courts, and baseball diamonds feel personal and celebratory without requiring artistic detail work. These designs work best for kids aged 5-12 who have clear athletic interests.
- Race Track & Speed Themes: Go here if he loves cars, motorcycles, or anything fast. Drag strips and race tracks appeal to kids who are into competition and adrenaline. These designs scale well for larger gatherings because the bold lines and bright colors read from a distance.
- Comic & Character Themes: Pick these if he’s into superheroes, comic books, or cartoon characters. Shields, burst designs, and halftone dots feel age-appropriate for kids 6-14 and let you customize the design with his favorite character or initial.
- Galaxy & Space Themes: Select this if he loves space, science fiction, or anything mysterious and dreamy. Galaxy designs work for a wide age range (5-18) and feel sophisticated enough for older kids while still being playful for younger ones. They’re also the most forgiving design style if you’re new to cake decorating.
FAQ
Can I make these cakes the day before the party?
Absolutely. I always bake sheet cakes the day before and frost them in the morning of the party. The cake actually stays moister and the frosting sets more firmly when you have this timeline. Keep the finished cake covered loosely with plastic wrap in the refrigerator. Most of these designs hold beautifully for 24 hours, and piping lines stay sharp when the cake is cold. Just remove it from the refrigerator about 30 minutes before serving so the cake reaches a pleasant eating temperature.
What’s the best way to transport a decorated sheet cake?
For any of these designs, keep the cake in the pan and refrigerate it until 30 minutes before transport. Use a sturdy, flat surface in your vehicle (not the trunk). If you’re traveling more than 15 minutes, keep a cooler in the car with ice packs to maintain temperature. For designs with delicate piping (like the soccer field or basketball court), avoid placing anything on top of the cake, and drive smoothly to prevent shifting. I always keep extra piping bags and buttercream in my car in case I need to touch up any lines after transport.
Which design is easiest for a beginner cake decorator?
The Galaxy Swirl design is genuinely the most forgiving because swirls don’t need to be perfect—imperfection is actually more authentic. The Drag Strip and Comic Book Burst designs are also beginner-friendly because they rely on straight lines and bold shapes rather than fine detail work. If you’re new to piping, start with these three, practice on parchment paper first, and chill your piping bags before you start. The cold tools give you much more control.
Can I use store-bought frosting instead of homemade buttercream?
Yes, store-bought frosting works for all of these designs. I use it when I’m short on time. The main difference is that homemade buttercream pipes slightly crisper lines and holds color more vibrantly, but store-bought frosting is absolutely reliable and gets the job done. If you use store-bought, chill it for 20 minutes before piping to improve consistency and line sharpness. Tint it with gel food coloring (not liquid, which can make it too soft) for the best color payoff.
What if I mess up the piping or design?
Embrace it. Seriously. This is a kids’ birthday cake, not a wedding cake. If a piping line goes wonky, cover it with a star or a dot. If colors blend in an unintended way, call it a “galaxy effect” and move on. Kids notice enthusiasm and personality way more than technical perfection. I’ve had the “messiest” cakes get the biggest reactions because they felt homemade and full of effort. Keep extra buttercream on hand so you can pipe over mistakes, and remember that a few imperfections actually make the cake feel more genuine and celebratory.
How do I choose between buttercream piping and fondant details?
Buttercream piping is faster, more forgiving, and tastes better—go this route if you’re short on time or new to decorating. Fondant details (like shields, numbers, or stars) look more graphic and polished—use these if you want a cleaner, more professional finish and don’t mind working with fondant. For most of these designs, I combine both: buttercream base and piping, with a few fondant accents for visual impact. This gives you the best of both worlds.
Conclusion
These ten designs prove that bold, high-impact birthday cakes don’t require pastry school credentials—they require confidence and a clear vision. Pick the design that matches your boy’s personality, gather your piping bags, and commit to the color palette. Chill your tools, trust the process, and remember that the imperfections are part of the charm. Save this post, bookmark your favorite design, and bake something that makes his birthday unforgettable.