
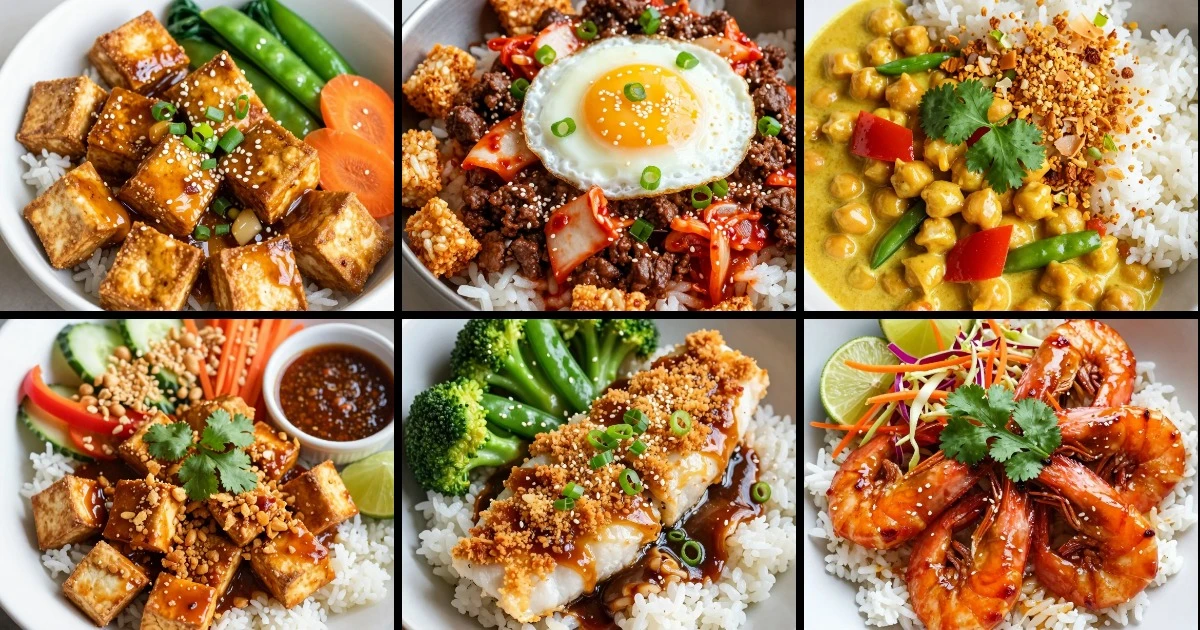
I’ve found that weeknight dinner doesn’t have to mean takeout or sad leftovers. The secret? A killer rice bowl built on speed and bold flavor. With microwavable rice doing the heavy lifting, ready-to-use proteins, and 5-minute sauces that pack real punch, you can have a restaurant-quality bowl on the table in 30 minutes flat. I’m talking crispy-edged proteins, bright fresh herbs, crunchy vegetables, and sauces that make you want to scrape the bottom of the bowl. These aren’t plain rice-and-protein situations—each one has a clear twist that transforms simple ingredients into something you’ll actually crave.
What I love most about rice bowls is their flexibility. You can meal-prep components on Sunday and build different bowls all week, or throw one together on a Tuesday night when everyone’s hungry and tired. They work for beginners because the formula is forgiving, and they work for busy families because speed is built into the method. Below, I’ve mapped out 12 bowls that cover every craving: umami-forward, bright and fresh, spicy, creamy, smoky, and more.
What You’ll Find in This List
This collection spans flavor profiles, protein options, and skill levels—all ready in 30 minutes or less. You’ll find soy-ginger bowls with crispy tofu, peanut-lime chicken with a texture pop, teriyaki shrimp with sesame crunch, and even a kimchi-beef situation that’ll ruin you for regular rice bowls. Some lean on rotisserie chicken for true weeknight ease, others use quick-seared proteins for more control. Every bowl has a defined Whirl Factor: a specific twist and texture contrast that makes it memorable.
- Fast proteins: rotisserie chicken, seared shrimp, ground beef, crispy tofu, canned salmon
- 5-minute sauces: teriyaki, peanut-lime, chili-garlic, miso-butter, ginger-soy
- Texture builders: toasted sesame seeds, crispy fried onions, crushed peanuts, crispy chickpeas
- Fresh finishes: cilantro, scallions, lime, pickled vegetables, micro herbs
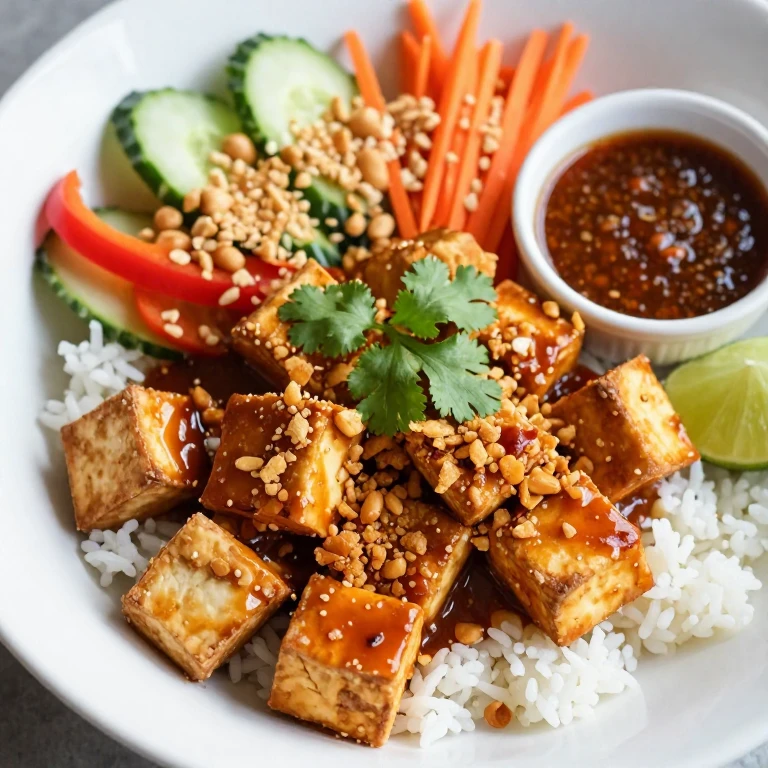
1. Crispy Tofu Ginger-Soy Bowl
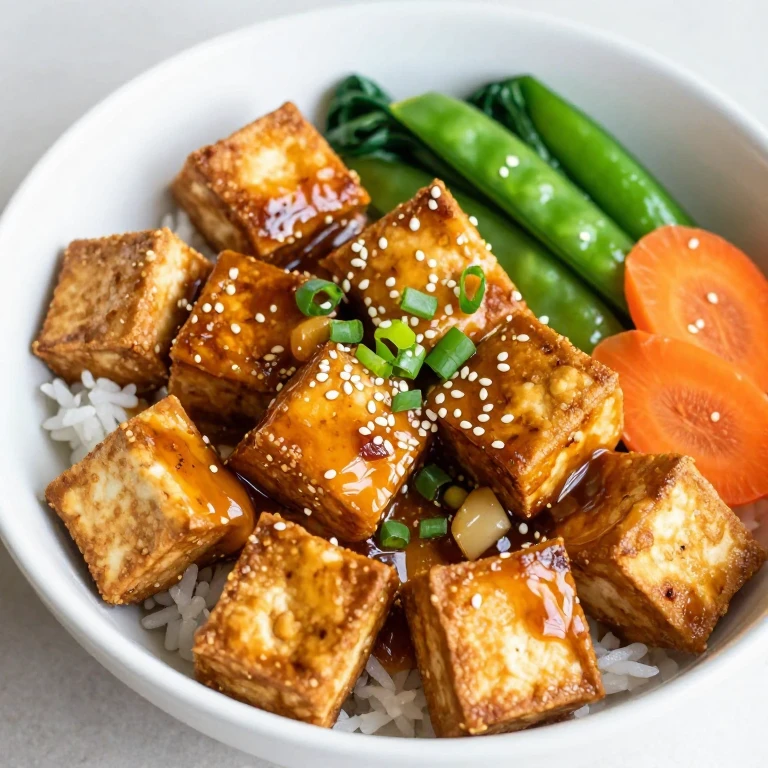
This bowl is my go-to when I want maximum texture contrast and zero guilt. Press-free tofu gets pan-fried until the edges are shattered-crispy, then tossed in a ginger-soy glaze that hits umami and heat at once. The Whirl Factor here is the contrast between the creamy tofu center and the caramelized, crackling exterior—plus a 2-minute ginger-soy sauce that tastes like you simmered it for hours. Perfect for a weeknight when you want something bold but plant-forward.
The flavor is deep, gingery, and just spicy enough to wake you up without overwhelming the tofu’s subtle sweetness.
Best for: Vegetarian weeknights, meal-prep friendly, beginner-accessible.
Ingredients
- 14 oz extra-firm tofu, pressed and cubed
- 2 cups cooked rice (microwavable preferred)
- 3 tbsp soy sauce
- 1 tbsp rice vinegar
- 1 tbsp honey
- 1 tbsp grated fresh ginger
- 2 cloves garlic, minced
- 1 tbsp sesame oil
- 2 cups mixed vegetables (bok choy, snap peas, carrots)
- Sesame seeds and scallions for garnish
Instructions
- Heat 2 tbsp neutral oil in a large skillet over medium-high heat until it shimmers. Add tofu cubes in a single layer and don’t move them—let them sit 3-4 minutes until the bottoms turn golden and crispy.
- Toss gently and cook another 3-4 minutes until most sides are caramelized. You’ll know it’s ready when the edges look shattered.
- Whisk soy sauce, rice vinegar, honey, ginger, garlic, and sesame oil in a small bowl. Pour over the tofu and toss for 1 minute until the sauce coats and reduces slightly.
- Warm rice in a microwave (2 minutes) while you quickly sauté vegetables in a separate pan with a pinch of salt until just tender-crisp, about 3 minutes.
- Divide rice among bowls, top with crispy tofu, vegetables, sesame seeds, and scallions.
The biggest failure mode here is not pressing your tofu thoroughly—wet tofu won’t crisp. If you’re short on time, buy pre-pressed tofu blocks. The caramelization is non-negotiable; it’s what makes this bowl special. If your edges aren’t browning, your heat isn’t high enough or your pan is crowded. Give the tofu room and patience.
Make-ahead tip: Press and cube tofu the morning of, store in a sealed container in the fridge. The sauce keeps 5 days refrigerated. Assemble the bowl fresh, but you can sauté vegetables ahead and reheat gently.
2. Peanut-Lime Chicken with Crispy Chickpeas
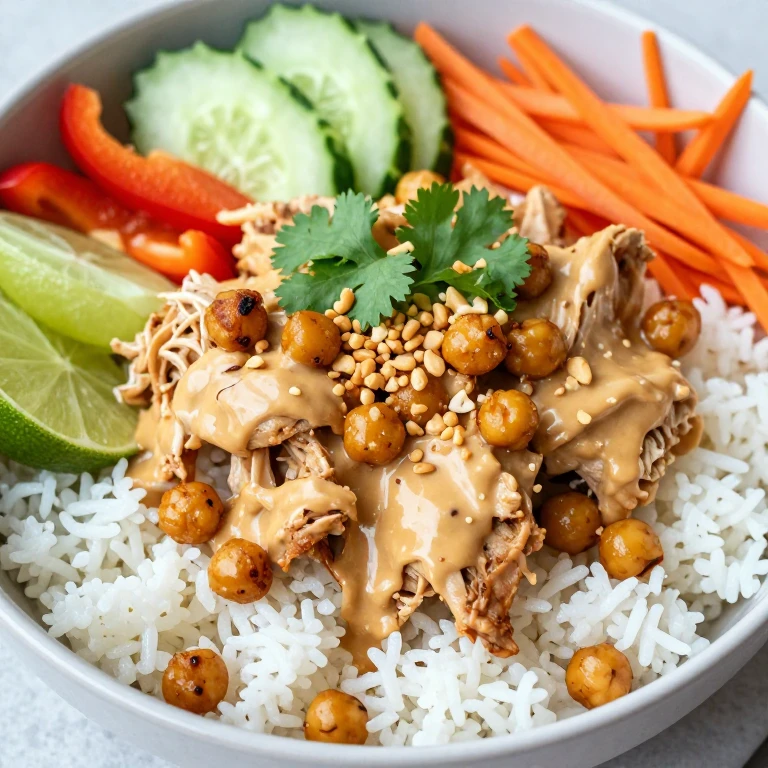
When I want a bowl that feels indulgent but comes together in 20 minutes, this is it. Rotisserie chicken gets shredded and tossed in a peanut-lime sauce that’s creamy, tangy, and alive with flavor. The Whirl Factor is the crispy roasted chickpeas scattered on top—they add protein, crunch, and a nutty depth that makes the whole bowl feel more substantial. This is the bowl I make when friends drop by unexpectedly because it looks fancy but requires zero advanced planning.
The flavor is rich and nutty with bright lime cutting through, and the texture is all soft-creamy-crunchy.
Best for: Busy weeknights, crowd-pleasing, makes great leftovers.
Ingredients
- 2 cups shredded rotisserie chicken
- 1 can (15 oz) chickpeas, drained and dried
- 2 cups cooked rice
- ½ cup natural peanut butter
- 3 tbsp lime juice
- 2 tbsp soy sauce
- 1 tbsp honey
- 1 tbsp sesame oil
- 2 cups mixed vegetables (cucumber, bell pepper, shredded carrots)
- Cilantro, lime wedges, crushed peanuts for garnish
Instructions
- Toss dried chickpeas with 1 tbsp oil and a pinch of salt. Spread on a sheet pan and roast at 400°F for 12-15 minutes, shaking halfway, until they’re golden and crispy. They’ll continue to crisp as they cool.
- While chickpeas roast, whisk peanut butter, lime juice, soy sauce, honey, and sesame oil in a bowl. Add 2-3 tbsp warm water to reach a pourable sauce consistency.
- Shred rotisserie chicken and toss gently with the peanut sauce until evenly coated.
- Warm rice and arrange in bowls. Top with sauced chicken, fresh vegetables, crispy chickpeas, cilantro, and crushed peanuts.
The peanut sauce can break if your peanut butter is too thick—that’s why I add water gradually. If it seizes, whisk in a little more warm water or a splash of lime juice to bring it back. The chickpeas are your texture anchor; don’t skip the roasting step or they’ll be mealy.
Make-ahead tip: Roast chickpeas up to 3 days ahead and store in an airtight container. The peanut sauce keeps 5 days refrigerated. Shred chicken fresh or use store-bought rotisserie chicken. Assemble bowls just before eating so chickpeas stay crispy.
3. Teriyaki Shrimp with Sesame Crunch
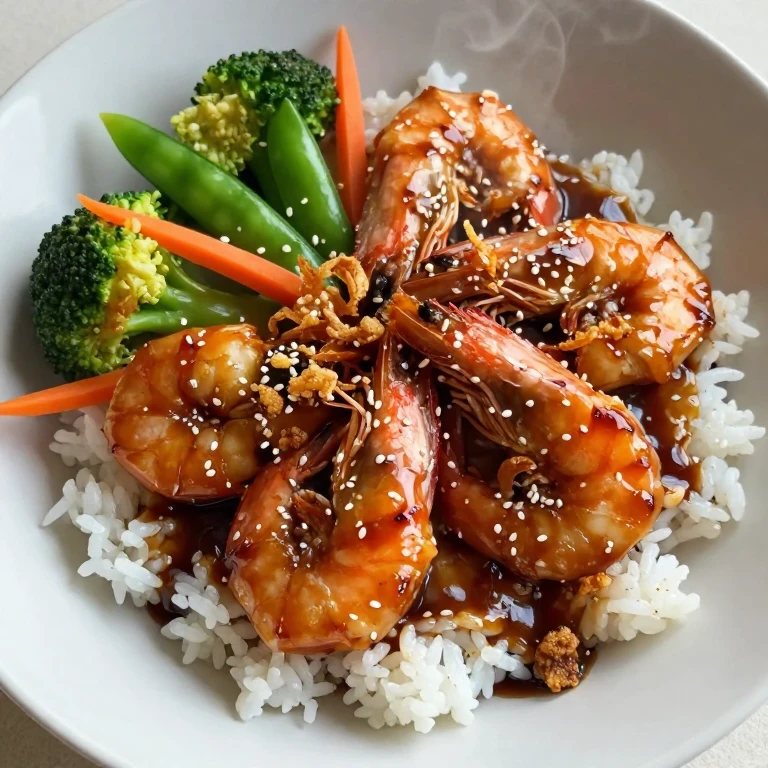
This bowl is my answer to expensive takeout. Large shrimp get seared in 3 minutes flat, then glazed in a teriyaki sauce that’s both sweet and deep. The Whirl Factor is the toasted sesame seeds and crispy fried onions layered on top—they add visual pop and a texture contrast that makes every bite interesting. I always keep frozen shrimp on hand because they thaw in cold water in 10 minutes, making this one of my fastest options.
The flavor is umami-forward, slightly sweet, with a sesame-nutty finish and real textural excitement.
Best for: Quick dinners, seafood lovers, impressive enough for guests.
Ingredients
- 1 lb large shrimp, peeled and deveined
- 2 cups cooked rice
- ⅓ cup soy sauce
- 3 tbsp mirin (or honey)
- 1 tbsp rice vinegar
- 2 cloves garlic, minced
- 1 tsp grated ginger
- 1 tbsp sesame oil
- 2 cups mixed vegetables (broccoli, snap peas, shredded carrot)
- Toasted sesame seeds and crispy fried onions for garnish
Instructions
- Whisk soy sauce, mirin, rice vinegar, garlic, and ginger in a small bowl. Set aside.
- Heat 1 tbsp oil in a large skillet over high heat until it just begins to smoke. Add shrimp in a single layer and sear for 1-2 minutes per side until they turn opaque and the edges are slightly caramelized. Don’t overcrowd the pan.
- Pour teriyaki sauce into the pan and tilt to coat the shrimp. Let it bubble for 30 seconds until the sauce reduces and coats each shrimp with a glossy glaze.
- Warm rice and sauté vegetables in a separate pan with a pinch of salt until just tender, about 3-4 minutes.
- Divide rice among bowls, top with glazed shrimp, vegetables, sesame seeds, and crispy onions.
Shrimp overcook in seconds—the moment they turn opaque and curl slightly, they’re done. Overcooked shrimp become rubbery and no sauce can fix that. If you’re nervous, pull them off heat when they’re 80% opaque and let the residual heat finish them. The glaze should be glossy and thick, not soupy; if it’s too thin, simmer it for another 30 seconds before plating.
Make-ahead tip: Thaw frozen shrimp in the fridge overnight or in cold water for 10 minutes. The teriyaki sauce keeps 1 week refrigerated. Cook shrimp fresh just before serving—they don’t reheat well. Vegetables can be prepped and stored separately.
4. Kimchi Beef with Crispy Rice
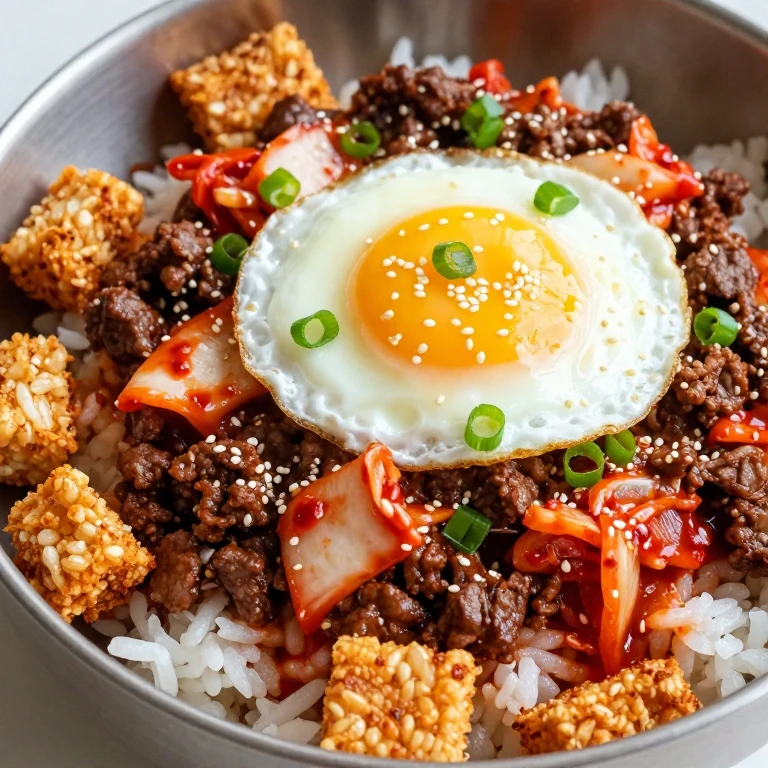
I developed this bowl during a late-night craving for something spicy, umami-packed, and indulgent. Ground beef gets cooked until it’s deeply browned and caramelized, then mixed with kimchi and a quick sauce that brings everything into focus. The Whirl Factor is the crispy rice layer underneath—I press the rice into the pan to create a crunchy, golden base that contrasts with the soft, spicy beef. This is the bowl that converts people who think rice bowls are boring.
The flavor is spicy, funky, deeply savory, with a slight fermented edge and a satisfying crispy-soft textural play.
Best for: Spice lovers, weeknight indulgence, leftover rice rescue.
Ingredients
- 1 lb ground beef (80/20)
- 2 cups cooked rice
- 1 cup kimchi, chopped
- 3 tbsp gochujang (Korean chili paste)
- 2 tbsp soy sauce
- 1 tbsp sesame oil
- 1 tbsp honey
- 3 cloves garlic, minced
- 2 scallions, sliced
- 1 egg (optional, for topping)
- Toasted sesame seeds for garnish
Instructions
- Heat 1 tbsp oil in a large skillet over medium-high heat. Add ground beef and cook, breaking it apart with a spoon, until it’s deeply browned and caramelized, 6-7 minutes. Drain excess fat if needed.
- Add garlic and cook for 30 seconds until fragrant. Stir in gochujang, soy sauce, sesame oil, honey, and kimchi. Toss to combine and let it cook for 2 minutes so the flavors meld.
- Press cooked rice into a separate oiled skillet over medium-high heat in an even layer. Let it sit undisturbed for 3-4 minutes until the bottom is golden and crispy, then break into chunks.
- Top the crispy rice with the beef-kimchi mixture, scallions, sesame seeds, and a fried egg if desired.
The caramelization of the beef is crucial—don’t rush it or stir constantly. Let it sit in the pan for 2-3 minutes at a time so it develops a deep brown crust. If your gochujang is very spicy, start with less and taste as you go. The crispy rice layer is what makes this special; don’t skip it even if you’re short on time.
Make-ahead tip: Cook the beef-kimchi mixture up to 3 days ahead and reheat gently. The crispy rice is best made fresh, but you can prep and portion cooked rice ahead. Store everything separately and assemble just before serving.
5. Lemon-Garlic Salmon with Herb Crunch
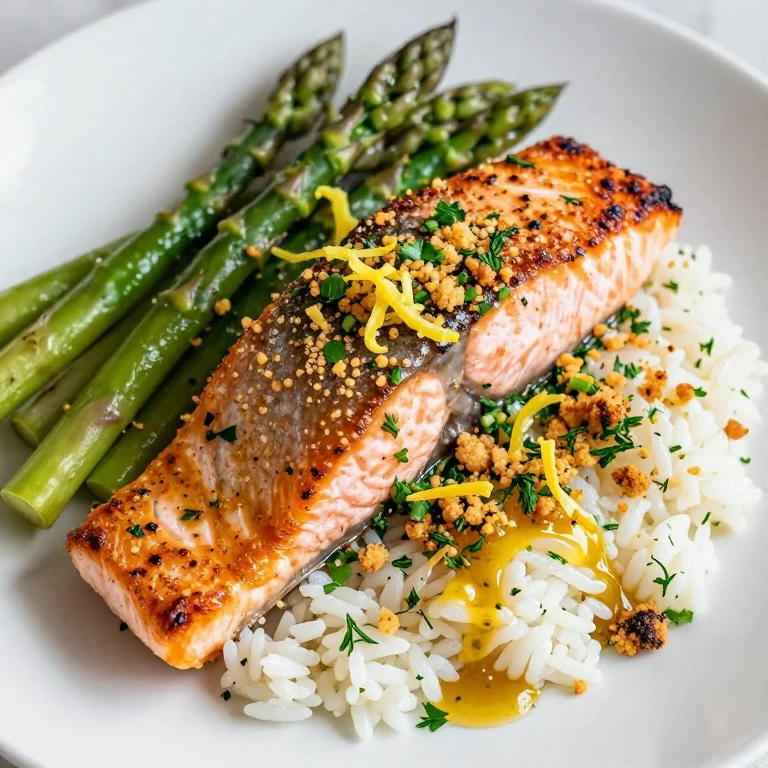
This is the bowl I make when I want something that feels restaurant-quality but takes less time than ordering delivery. Salmon gets seared skin-side down until the skin is shattered-crispy, then finished with a bright lemon-garlic butter that pools around the fish. The Whirl Factor is the herb-panko crumble scattered on top—toasted breadcrumbs mixed with fresh herbs and lemon zest add a crispy, aromatic finish that elevates the whole bowl. I love this one because it’s elegant enough for company but simple enough for a Tuesday.
The flavor is bright, buttery, herbaceous, with crispy skin providing textural contrast and a subtle briny depth from the salmon.
Best for: Weeknight elegance, seafood lovers, meal-prep friendly.
Ingredients
- 2 salmon fillets (5-6 oz each)
- 2 cups cooked rice
- 3 tbsp panko breadcrumbs
- 2 tbsp fresh parsley, chopped
- 1 tbsp fresh dill, chopped
- Zest of 1 lemon
- 4 tbsp butter
- 4 cloves garlic, minced
- Juice of 1 lemon
- 2 cups mixed vegetables (asparagus, green beans, or zucchini)
- Salt and pepper to taste
Instructions
- Heat 1 tbsp oil in a skillet over medium-high heat. Place salmon skin-side down and cook undisturbed for 4-5 minutes until the skin is crispy and the fish is cooked halfway through. Flip gently and cook another 2 minutes until just cooked through.
- Toast panko in a dry skillet over medium heat for 2-3 minutes, stirring often, until golden. Mix with parsley, dill, and lemon zest. Set aside.
- In the same skillet, melt butter over medium heat. Add garlic and cook for 30 seconds until fragrant. Remove from heat and stir in lemon juice.
- Sauté vegetables separately with salt and pepper until tender-crisp, about 4 minutes.
- Divide rice among bowls, top with salmon, vegetables, herb-panko crumble, and drizzle with lemon-garlic butter.
The salmon skin is your textural anchor—don’t skip the skin-side-down sear. If the skin sticks, don’t force it; let it cook longer until it releases naturally. The herb crumble should be toasted until fragrant but not burned; keep stirring. If you’re using frozen salmon, thaw it in the fridge overnight for best results.
Make-ahead tip: The herb-panko crumble keeps 3 days in an airtight container. Cook salmon fresh just before serving. Vegetables can be prepped ahead. Assemble bowls fresh so the herb crumble stays crispy.
6. Thai Curry Chickpea with Coconut Crunch
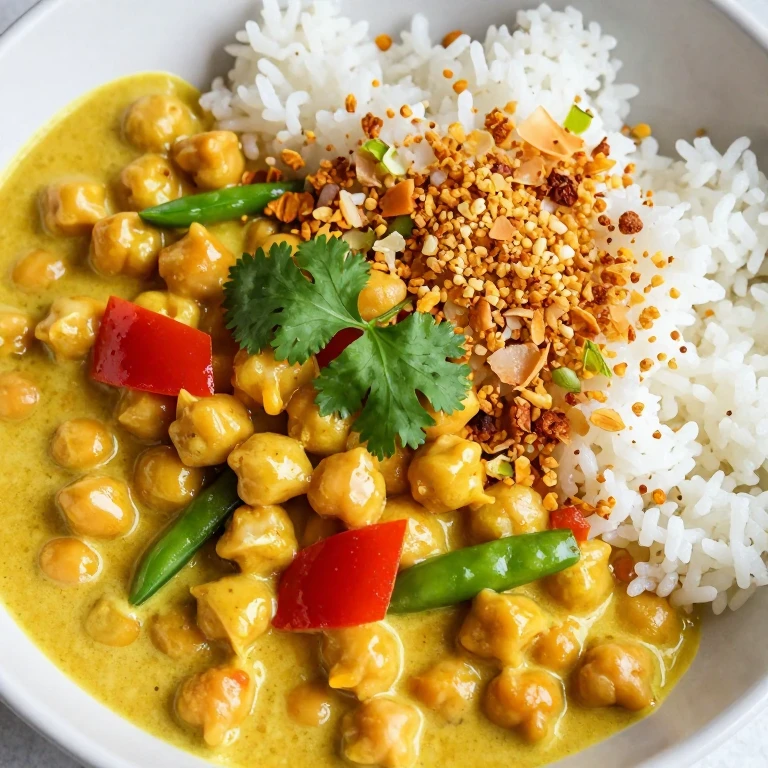
When I want something creamy and aromatic but completely plant-based, this bowl delivers every time. Chickpeas get simmered in a quick coconut curry that’s rich, warming, and deeply flavorful. The Whirl Factor is the coconut-lime granola scattered on top—toasted coconut flakes mixed with lime zest and a pinch of salt add a sweet-salty crunch that contrasts beautifully with the soft, spiced chickpeas. This is the bowl that makes vegetarians and meat-eaters equally happy.
The flavor is aromatic, creamy, warm with a bright citrus finish, and the texture is soft-creamy-crunchy in every bite.
Best for: Vegetarian dinners, coconut lovers, meal-prep champions.
Ingredients
- 2 cans (15 oz each) chickpeas, drained
- 2 cups cooked rice
- 1 can (14 oz) coconut milk
- 2 tbsp red curry paste
- 1 tbsp lime juice
- 1 tbsp fish sauce (or soy sauce for vegan)
- 1 tbsp honey
- 1 cup diced bell pepper and snap peas
- ½ cup unsweetened coconut flakes
- Zest of 1 lime and cilantro for garnish
Instructions
- Toast coconut flakes in a dry skillet over medium heat for 2-3 minutes, stirring constantly, until golden and fragrant. Mix with lime zest and a pinch of salt. Set aside.
- In the same skillet, whisk coconut milk and curry paste over medium heat until smooth, about 1 minute. Add chickpeas, lime juice, fish sauce, and honey.
- Simmer for 5 minutes, stirring occasionally, until the sauce reduces slightly and coats the chickpeas.
- Add diced vegetables and cook for another 2-3 minutes until just tender.
- Divide rice among bowls, top with curry chickpeas, coconut-lime granola, and fresh cilantro.
Red curry paste varies in heat—start with 1 tbsp and add more if you like more spice. The coconut milk should reduce slightly so it coats the chickpeas rather than pooling; if it’s too thin, simmer longer. The toasted coconut is essential for texture contrast; don’t skip it even if you’re short on time.
Make-ahead tip: The curry keeps 4 days refrigerated and actually tastes better the next day as flavors meld. The toasted coconut stays crispy for 3 days in an airtight container. Assemble bowls fresh so the granola doesn’t get soggy.
7. Soy-Ginger Chicken with Crispy Garlic
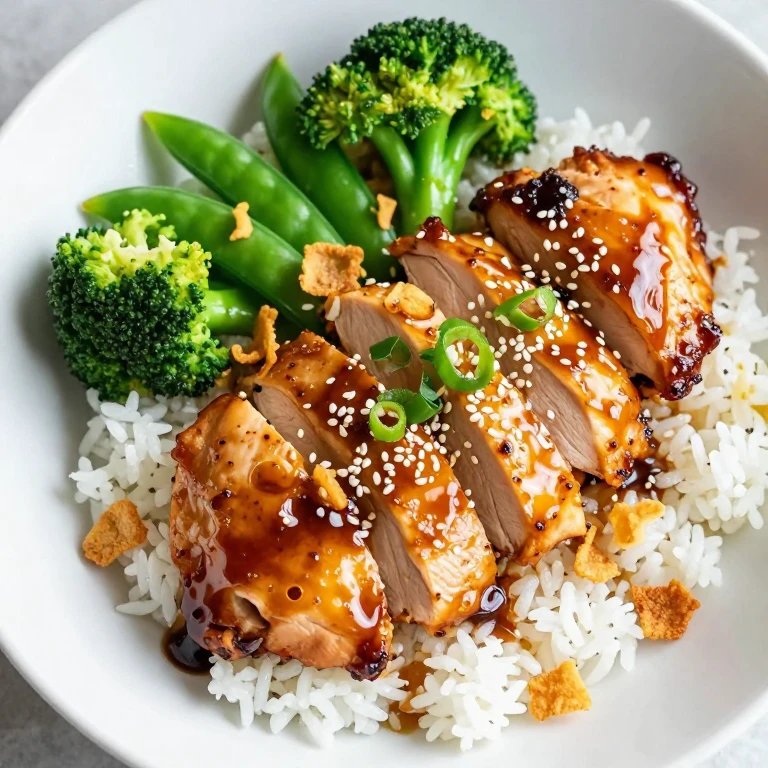
This bowl is pure comfort with a serious flavor upgrade. Thin-sliced chicken breast gets cooked quickly over high heat until the edges are caramelized, then tossed in a glossy soy-ginger sauce that’s both sweet and savory. The Whirl Factor is the crispy garlic chips scattered on top—they add a golden, aromatic crunch that transforms the whole bowl from simple to special. I make this at least twice a month because it’s fast, it’s forgiving, and everyone asks for seconds.
The flavor is savory-sweet, deeply gingery, with aromatic garlic oil and a silky sauce coating every grain of rice.
Best for: Weeknight staple, beginner-friendly, crowd-pleaser.
Ingredients
- 1 lb chicken breast, thinly sliced
- 2 cups cooked rice
- ⅓ cup soy sauce
- 2 tbsp rice vinegar
- 1 tbsp honey
- 1 tbsp grated fresh ginger
- 6 cloves garlic, thinly sliced
- 1 tbsp sesame oil
- 2 cups mixed vegetables (bok choy, broccoli, snap peas)
- Scallions and sesame seeds for garnish
Instructions
- Heat 2 tbsp oil in a large skillet over high heat until shimmering. Add chicken in a single layer and cook undisturbed for 2 minutes until the bottom is golden. Toss and cook another 2-3 minutes until cooked through with caramelized edges.
- Remove chicken to a plate. In the same skillet, heat 2 tbsp oil over medium heat. Add sliced garlic and cook, stirring constantly, for 1-2 minutes until golden and crispy. Pour the garlic oil into a small bowl and set aside.
- Whisk soy sauce, rice vinegar, honey, and ginger in a bowl. Pour into the skillet and bring to a simmer. Return chicken to the pan and toss for 1 minute until coated in the glossy sauce.
- Sauté vegetables in a separate pan with a pinch of salt until tender-crisp, about 3-4 minutes.
- Divide rice among bowls, top with sauced chicken, vegetables, crispy garlic chips, and drizzle with the garlic oil. Garnish with scallions and sesame seeds.
Slice your chicken uniformly so it cooks evenly—thicker pieces will dry out while thinner ones are still cooking. The garlic chips are your finishing touch; watch them closely as they go from golden to burned in seconds. If they’re browning too fast, lower the heat slightly. Don’t skip the crispy garlic oil; it’s the soul of this bowl.
Make-ahead tip: Slice chicken and store in the fridge up to 1 day ahead. The soy-ginger sauce keeps 5 days refrigerated. Make crispy garlic fresh just before serving so it stays crispy. Vegetables can be prepped ahead.
8. Chili-Garlic Tofu with Peanut Crumble
I created this bowl for nights when I want something spicy and satisfying without any animal products. Tofu gets pressed and pan-fried until the edges are shattered and golden, then tossed in a quick chili-garlic sauce that’s hot, garlicky, and slightly sweet. The Whirl Factor is the crushed peanut crumble mixed with crispy fried shallots—it adds protein, crunch, and a subtle richness that makes the whole bowl feel indulgent. This is the bowl that proves plant-based doesn’t mean boring.
The flavor is spicy-garlicky with a slight sweetness, deeply savory, and the texture is creamy-crispy in every spoonful.
Best for: Vegetarian dinners, spice lovers, vegan-friendly.
Ingredients
- 14 oz extra-firm tofu, pressed and cubed
- 2 cups cooked rice
- 3 tbsp chili-garlic sauce (like sambal oelek)
- 2 tbsp soy sauce
- 1 tbsp lime juice
- 1 tbsp honey
- 1 tbsp sesame oil
- ½ cup roasted peanuts, crushed
- ¼ cup crispy fried shallots
- 2 cups mixed vegetables (cucumber, bell pepper, shredded carrot)
- Cilantro and lime wedges for garnish
Instructions
- Heat 2 tbsp neutral oil in a large skillet over medium-high heat until shimmering. Add tofu cubes in a single layer and cook undisturbed for 3-4 minutes until the bottoms are golden and crispy.
- Toss gently and cook another 3-4 minutes until most sides are caramelized and the edges look shattered.
- Whisk chili-garlic sauce, soy sauce, lime juice, honey, and sesame oil in a small bowl. Pour over the tofu and toss for 1 minute until the sauce coats evenly and reduces slightly.
- Mix crushed peanuts with crispy fried shallots in a small bowl.
- Divide rice among bowls, top with spiced tofu, fresh vegetables, and peanut-shallot crumble. Garnish with cilantro and lime wedges.
The chili-garlic sauce can be very spicy depending on the brand—start with less and taste as you go. If the sauce is too thick, thin it with a splash of water. The tofu needs high heat and patience to crisp properly; don’t crowd the pan or stir too frequently. The peanut crumble is your textural anchor; don’t skip it even if you’re in a rush.
Make-ahead tip: Press and cube tofu the morning of, store in the fridge. The chili-garlic sauce keeps 1 week refrigerated. Make the peanut crumble fresh just before serving so it stays crispy. Assemble bowls fresh for best texture.
9. Miso-Butter Cod with Breadcrumb Crust
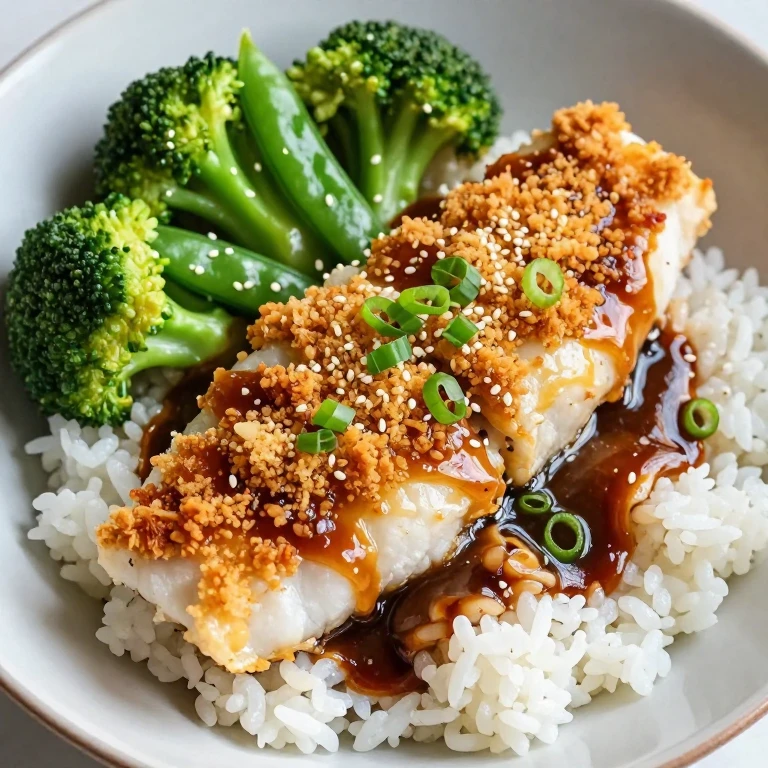
This bowl feels fancy enough for a dinner party but comes together in under 30 minutes. Cod gets topped with a miso-butter mixture and a crispy panko crust, then baked until the fish is flaky and the topping is golden. The Whirl Factor is the contrast between the delicate, buttery fish and the crispy, umami-packed breadcrumb topping—it’s textural excitement on a plate. I make this when I want to impress without spending hours in the kitchen.
The flavor is umami-forward, buttery, with a crispy-savory top and a delicate, flaky fish interior.
Best for: Elegant weeknight dinners, seafood lovers, beginner-friendly.
Ingredients
- 2 cod fillets (5-6 oz each)
- 2 cups cooked rice
- 3 tbsp panko breadcrumbs
- 2 tbsp miso paste (white or red)
- 2 tbsp butter, softened
- 1 tbsp soy sauce
- 1 tbsp honey
- 1 tbsp sesame oil
- 2 cups mixed vegetables (broccoli, snap peas, or green beans)
- Scallions and sesame seeds for garnish
Instructions
- Preheat oven to 400°F. Mix miso paste, softened butter, soy sauce, and honey in a small bowl until smooth.
- Place cod fillets on a parchment-lined sheet pan. Spread the miso-butter mixture evenly over each fillet. Top with panko breadcrumbs.
- Bake for 10-12 minutes until the fish is opaque and flakes easily with a fork, and the breadcrumb topping is golden.
- While fish bakes, sauté vegetables in a skillet with 1 tbsp sesame oil and a pinch of salt until tender-crisp, about 4 minutes. Warm rice.
- Divide rice among bowls, top with miso-butter cod, vegetables, scallions, and sesame seeds.
Don’t overbake the cod or it will dry out—it’s done the moment it flakes easily. The miso-butter topping should be golden and crispy, not burned; if it’s browning too fast, lower the oven temperature by 25°F. If you can’t find cod, halibut or sea bass work beautifully.
Make-ahead tip: The miso-butter mixture keeps 5 days refrigerated. Prepare cod up to 4 hours ahead and bake fresh just before serving. Vegetables can be prepped ahead. Assemble bowls fresh so the breadcrumb crust stays crispy.
10. Sriracha-Honey Shrimp with Lime Slaw
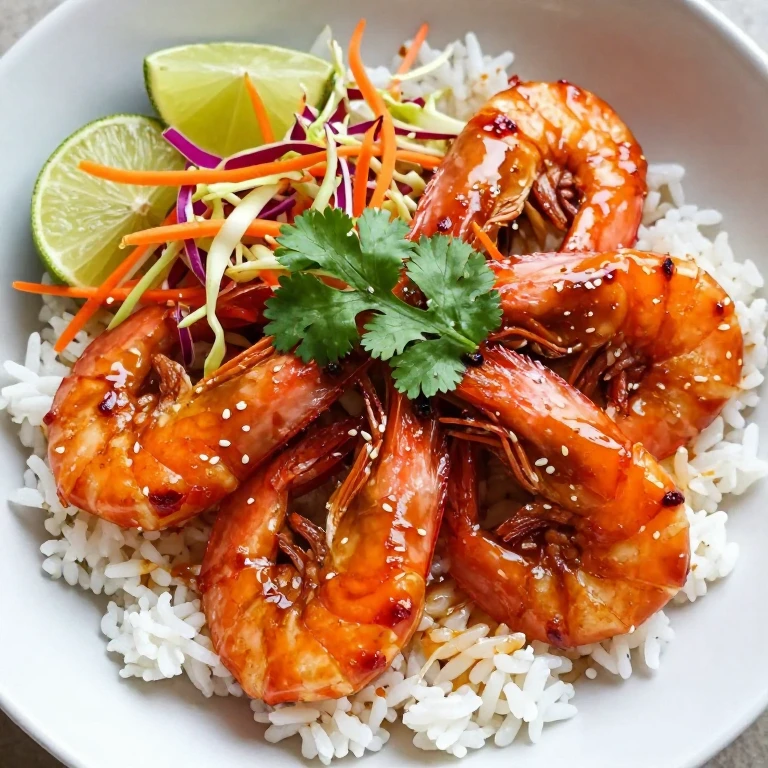
This bowl is my answer to cravings for something spicy, tangy, and bright. Shrimp gets coated in a quick sriracha-honey glaze and seared until the edges are caramelized, then served over a crunchy lime slaw that adds freshness and textural contrast. The Whirl Factor is the interplay between the hot-sweet glaze and the cool, acidic slaw—it’s a flavor and texture play that makes every bite interesting. I make this when I want something that feels restaurant-quality but takes less than 20 minutes.
The flavor is spicy-sweet with bright lime and crisp cabbage providing freshness and crunch.
Best for: Spice lovers, quick dinners, light and fresh.
Ingredients
- 1 lb large shrimp, peeled and deveined
- 2 cups cooked rice
- 3 tbsp sriracha
- 2 tbsp honey
- 1 tbsp soy sauce
- 1 tbsp lime juice
- 2 cups shredded cabbage (red or green)
- 1 carrot, shredded
- 2 tbsp rice vinegar
- 1 tbsp sesame oil
- Cilantro and lime wedges for garnish
Instructions
- Toss shredded cabbage and carrot with rice vinegar, 1 tbsp sesame oil, and a pinch of salt. Set aside for the slaw.
- Whisk sriracha, honey, soy sauce, and lime juice in a small bowl.
- Heat 1 tbsp oil in a large skillet over high heat until shimmering. Add shrimp in a single layer and sear for 1-2 minutes per side until opaque and caramelized at the edges.
- Pour sriracha-honey glaze into the pan and toss shrimp for 30 seconds until coated and the sauce reduces slightly.
- Divide rice among bowls, top with glazed shrimp, lime slaw, cilantro, and lime wedges.
The lime slaw should be dressed at least 5 minutes before serving so the cabbage softens slightly and absorbs the vinegar flavor. Shrimp overcook instantly—pull them off heat when they’re just opaque and let the residual heat finish them. The sriracha-honey glaze should be glossy and thick; if it’s too thin, let it reduce for another 30 seconds.
Make-ahead tip: Make the lime slaw up to 4 hours ahead and store in the fridge. The sriracha-honey glaze keeps 1 week refrigerated. Cook shrimp fresh just before serving. Assemble bowls fresh so the slaw stays crispy.
11. Harissa Chicken with Yogurt Drizzle
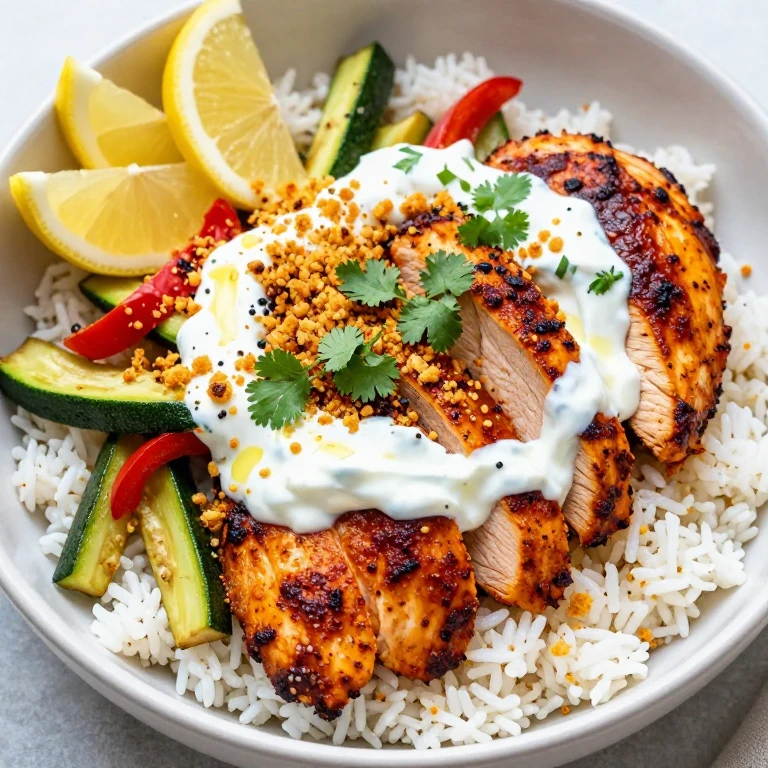
I developed this bowl when I wanted something warm and spiced but with cooling contrast. Chicken gets coated in a harissa paste and pan-fried until the edges are caramelized and deeply flavored, then finished with a cool yogurt drizzle that balances the heat. The Whirl Factor is the temperature and flavor contrast—hot, spiced chicken against cool, tangy yogurt—plus crispy breadcrumbs for textural pop. This is the bowl that makes you feel like you’re eating something sophisticated but took almost no time.
The flavor is warm, spiced, slightly smoky, with cool yogurt and crispy breadcrumbs providing textural contrast.
Best for: Spice lovers, elegant weeknights, impressive for guests.
Ingredients
- 1 lb chicken breast, thinly sliced
- 2 cups cooked rice
- 2 tbsp harissa paste
- 1 tbsp olive oil
- 1 tbsp honey
- ½ cup Greek yogurt
- 1 tbsp lemon juice
- 2 tbsp panko breadcrumbs, toasted
- 2 cups mixed vegetables (zucchini, bell pepper, or eggplant)
- Cilantro and lemon wedges for garnish
Instructions
- Mix harissa paste with olive oil and honey in a small bowl. Coat chicken slices evenly with the harissa mixture.
- Heat 1 tbsp oil in a large skillet over medium-high heat. Add coated chicken and cook for 2-3 minutes per side until cooked through with caramelized edges.
- Toast panko in a dry skillet over medium heat for 2-3 minutes, stirring often, until golden and fragrant.
- Sauté vegetables separately with a pinch of salt until tender, about 4-5 minutes.
- Whisk Greek yogurt with lemon juice and a pinch of salt. Divide rice among bowls, top with harissa chicken, vegetables, and drizzle generously with lemon yogurt. Sprinkle with toasted panko and cilantro.
Harissa varies in heat depending on the brand—start with less and add more if you like more spice. The yogurt drizzle should be loose enough to drizzle; thin it with a little water if needed. The toasted panko is your textural anchor; don’t skip it even if you’re short on time. Toast it fresh so it stays crispy.
Make-ahead tip: Coat chicken with harissa up to 4 hours ahead and cook fresh just before serving. The lemon yogurt keeps 3 days refrigerated. The toasted panko stays crispy for 1 day in an airtight container. Assemble bowls fresh so the breadcrumbs stay crispy.
12. Cilantro-Lime Chicken with Black Bean Crunch
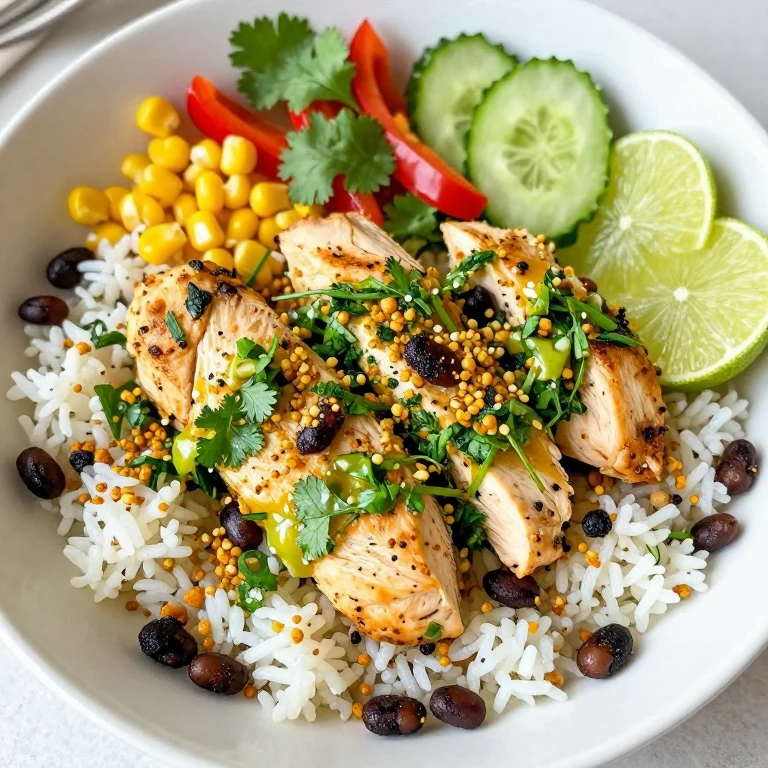
This is the bowl I make when I want something bright, fresh, and completely satisfying. Chicken gets cooked quickly and tossed in a cilantro-lime dressing that’s herbaceous and alive, then topped with crispy roasted black beans that add protein and textural contrast. The Whirl Factor is the interplay between soft, juicy chicken and crunchy beans—plus a fresh cilantro-lime finish that makes the whole bowl feel vibrant. I make this at least once a week because it’s fast, it’s flexible, and it tastes like summer even in winter.
The flavor is bright, herbaceous, with lime and cilantro singing through, and the texture is soft-creamy-crunchy in every bite.
Best for: Weeknight staple, fresh and light, beginner-friendly.
Ingredients
- 1 lb chicken breast, diced
- 2 cups cooked rice
- 1 can (15 oz) black beans, drained and dried
- ¼ cup fresh cilantro, chopped
- Zest and juice of 2 limes
- 3 tbsp olive oil
- 2 cloves garlic, minced
- 1 tbsp honey
- 2 cups mixed vegetables (corn, bell pepper, cucumber)
- Lime wedges and cilantro for garnish
Instructions
- Toss drained black beans with 1 tbsp oil and a pinch of salt. Spread on a sheet pan and roast at 400°F for 12-15 minutes, shaking halfway, until they’re golden and crispy.
- Whisk cilantro, lime zest, lime juice, olive oil, garlic, and honey in a bowl to make the cilantro-lime dressing.
- Heat 1 tbsp oil in a large skillet over medium-high heat. Add diced chicken and cook, stirring occasionally, for 6-7 minutes until cooked through with golden edges.
- Toss warm chicken with the cilantro-lime dressing until evenly coated.
- Divide rice among bowls, top with cilantro-lime chicken, fresh vegetables, crispy black beans, and garnish with lime wedges and fresh cilantro.
Dice your chicken uniformly so it cooks evenly—smaller pieces cook faster but can dry out if overcooked. The cilantro-lime dressing is best made fresh so the cilantro stays bright green; if you’re making it ahead, add the cilantro just before serving. The roasted black beans are your textural anchor; don’t skip the roasting step or they’ll be mealy.
Make-ahead tip: Roast black beans up to 3 days ahead and store in an airtight container. The cilantro-lime dressing keeps 2 days refrigerated (add cilantro fresh just before serving). Cook chicken fresh or use store-bought rotisserie chicken, shredded. Assemble bowls fresh so the black beans stay crispy.
How to Choose the Right One
If you’re looking for maximum speed, go straight to the Peanut-Lime Chicken or Soy-Ginger Chicken—both come together in 20 minutes flat using rotisserie chicken or quick-seared proteins. If you want something elegant enough for company, try the Lemon-Garlic Salmon or Miso-Butter Cod; both feel restaurant-quality but take less time than ordering delivery. For spice lovers, the Kimchi Beef, Chili-Garlic Tofu, Sriracha-Honey Shrimp, and Harissa Chicken all deliver heat with flavor. If you’re vegetarian or plant-based, the Crispy Tofu Ginger-Soy, Thai Curry Chickpea, and Chili-Garlic Tofu are your go-tos. For meal-prep champions who want to cook once and eat all week, the Peanut-Lime Chicken, Cilantro-Lime Chicken, and Teriyaki Shrimp all store beautifully and reheat gently. If you’re new to rice bowls and want something forgiving, start with the Soy-Ginger Chicken or Cilantro-Lime Chicken—both are beginner-friendly and nearly impossible to mess up.
FAQ
Can I make these bowls ahead for meal prep?
Absolutely. Most of these bowls store beautifully in the fridge for 3-4 days. I recommend storing components separately: cooked rice, cooked protein, sauce, and fresh toppings in separate containers. Assemble fresh just before eating so crispy elements stay crispy and fresh herbs stay bright. The exception is bowls with fresh herbs like the Cilantro-Lime Chicken—the cilantro is best added fresh, though the chicken and lime dressing keep well.
What’s the best way to reheat a rice bowl?
If you’ve stored components separately, warm the rice and protein gently in the microwave (1-2 minutes) and assemble with fresh vegetables and toppings. If you’ve stored the whole bowl together, reheat gently in the microwave at 50% power for 1-2 minutes so nothing dries out. Never reheat crispy elements like tofu, shrimp, or roasted chickpeas—they’ll lose their crunch. Crispy toppings are always best made fresh.
Can I use canned or leftover rice instead of microwavable packets?
Yes. Any cooked rice works beautifully. If you’re using leftover rice, fluff it gently with a fork and warm it in the microwave for 1-2 minutes before assembling. Leftover rice is actually ideal for the Kimchi Beef bowl because you can press it into the pan to create that signature crispy layer. Just make sure your leftover rice isn’t clumpy; if it is, break it up with your fingers before cooking.
Which bowl is best for beginners?
The Soy-Ginger Chicken with Crispy Garlic or Cilantro-Lime Chicken are your best bets. Both use simple techniques (pan-searing and tossing with sauce), forgiving proteins, and straightforward flavor profiles. The Peanut-Lime Chicken with Crispy Chickpeas is also beginner-friendly because rotisserie chicken removes the guesswork. All three are nearly impossible to mess up and taste delicious even if you’re still learning.
What if I don’t have all the vegetables listed?
Use what you have. These bowls are incredibly flexible. Any raw or cooked vegetable works—cucumbers, bell peppers, snap peas, broccoli, carrots, cabbage, zucchini, corn, green beans. The key is mixing textures: some raw and crisp, some cooked and tender. If you’re short on time, pre-cut vegetables from the grocery store are a total game-changer.
Can I double these recipes for a crowd?
Yes, all of these scale beautifully. Double or triple the protein and sauce, cook in batches if needed, and set up a bowl bar where everyone assembles their own with their choice of toppings. This is actually my go-to move for entertaining because it feels special but requires minimal last-minute cooking. People love customizing their own bowls.
Are any of these bowls naturally gluten-free?
Most are, with simple swaps. Use tamari instead of soy sauce, skip the panko breadcrumbs or use a gluten-free version, and check your curry paste and harissa for gluten. The Crispy Tofu Ginger-Soy, Thai Curry Chickpea, Chili-Garlic Tofu, and Cilantro-Lime Chicken are naturally gluten-free if you make those swaps. Always double-check ingredient labels because gluten hides in sauces and pastes.