
There’s a moment in every salad-maker’s life when you realize that bright, crisp acidity can transform a bowl from forgettable to crave-worthy. For me, that moment came when I started keeping a jar of pickled red onions in my fridge. Not as a condiment afterthought, but as the anchor—the element that lifts greens, grain bowls, and chopped salads into something with real backbone.
Pickled red onions are the kind of simple prep that pays dividends all week. They’re sharp, they’re colorful, they add texture contrast, and they take maybe ten minutes of hands-on time. This recipe uses apple cider vinegar for that signature sweet-tart punch, and I’ve built it around a refrigerator method so you’re not fussing with water baths or canning equipment.
What Makes This Dish Special
The core twist here is the balance between the vinegar’s bite and a touch of sweetness—enough to make these onions sing in a salad, but not so much that they tip into candy territory. I use apple cider vinegar specifically because its natural complexity adds depth that plain white vinegar can’t match.
The texture contrast is equally important. Raw red onions are fibrous and dense. Pickling softens them just enough to make them tender without turning them into mush. You get a crisp, yielding bite that holds its color and doesn’t bleed into your greens the moment it hits the bowl.
What makes this method repeatable is the ratio: it’s simple enough to scale up or down, and the jar keeps for weeks in the fridge. Once you make a batch, you’ll find yourself adding these to everything—salads, tacos, grain bowls, roasted vegetables, even grilled fish.
Flavor Profile Breakdown
These pickled onions work in layers. The base is the raw onion’s natural sharpness, mellowed slightly by the pickling process but still present. The mid-palate is where the apple cider vinegar comes in—it’s tart and slightly fruity, with a warmth that feels more refined than distilled vinegar. The finish is a gentle sweetness from the sugar and the onion’s own natural sugars rising to the surface. Salt anchors everything, bringing all three layers into focus without making the jar taste briny.
Ingredient Highlights
Red onions are the obvious star, and I choose them specifically for their color stability and mild sweetness compared to yellow onions. When pickled, they stay vibrant and don’t fade the way some vegetables do.
Apple cider vinegar is non-negotiable here. Its acidity is slightly lower than white vinegar (around 5% versus 5-7%), which means it’s less harsh and more forgiving if you’re new to pickling. If you only have white vinegar on hand, use it, but reduce the amount by about 10% and taste as you go.
Sugar balances the vinegar’s bite. I use regular granulated sugar because it dissolves quickly in the hot brine, but you can swap in honey or maple syrup for a different flavor direction—just know that honey adds floral notes and maple adds earthiness. The amount stays the same by volume.
Water is the vehicle for everything. I use filtered water because tap water can sometimes add mineral notes that muddy the brine, but it’s not critical. The salt is kosher salt, which dissolves evenly and doesn’t contain anti-caking agents that can cloud the jar.
Whirl Hook
Here’s the high-payoff move: a simple apple cider vinegar brine transforms raw red onions into a bright, sweet-tart condiment that lifts any salad from flat to crave-worthy. The texture contrast is the key—pickled onions stay crisp and yielding, adding backbone to greens without the rawness of fresh onions. Make a batch once, and you’ll use it all week.
Flavor Spin
The core twist is the balance between vinegar’s bite and a touch of sweetness. Apple cider vinegar’s natural complexity adds depth that plain vinegar can’t match. That sweet-tart punch is what makes these onions work in salads, bowls, and as a condiment on everything from tacos to grilled fish. It’s not candy-sweet, but it’s not aggressively sour either—it’s the middle ground where flavor actually happens.
Whirl Factor
Texture contrast is everything here. Raw red onions are fibrous and dense. Pickling softens them just enough to make them tender without turning them into mush. You get a crisp, yielding bite that holds its vibrant color and doesn’t bleed into your greens. That textural shift—from raw sharpness to pickled tenderness—is what makes these onions different from just slicing a raw onion onto your plate.
Cooking Walkthrough
Ingredients:
- 3 medium red onions, thinly sliced (about 4 cups)
- 1 cup apple cider vinegar
- 1 cup filtered water
- 2 tablespoons granulated sugar
- 1 tablespoon kosher salt
- 3-4 sprigs fresh dill (optional)
- 1 teaspoon whole peppercorns (optional)
- 2-3 garlic cloves, sliced (optional)
Steps:
1. Slice the onions. Cut red onions in half lengthwise, then slice them into thin half-moons about 1/8-inch thick. The thinner the slice, the faster they’ll pickle and the more evenly they’ll soften. I use a sharp knife or a mandoline for consistency, but a regular cutting board works fine—just take your time so the slices are uniform.
2. Bring the brine to a boil. In a small saucepan, combine apple cider vinegar, water, sugar, and salt. Bring to a rolling boil over medium-high heat, stirring occasionally to make sure the sugar and salt dissolve completely. This takes about 3-4 minutes. You’ll know it’s ready when you see steam rising and the liquid is visibly moving.
3. Pack the jar. While the brine heats, place sliced onions in a clean glass jar. If you’re using dill, peppercorns, or garlic, toss them in with the onions. A quart-sized mason jar holds about 4 cups of sliced onions comfortably, but you can use any glass container with a tight lid.
4. Pour the hot brine. Once the brine is boiling, carefully pour it over the onions, making sure they’re completely submerged. If any onions float above the liquid, push them down gently with a spoon or chopstick—they need to stay in the brine to pickle evenly.
5. Cool and refrigerate. Let the jar sit at room temperature for about 30 minutes until the brine cools slightly, then cover and refrigerate. The onions are technically ready to eat after 2 hours, but they develop better flavor if you wait overnight. They’ll keep in the fridge for 3-4 weeks, though the color will gradually fade and the flavor will mellow slightly.
Chef Notes
- I always taste the brine before pouring it over the onions. A quick dip of a spoon tells me if I need more salt or vinegar—trust your palate, not just the recipe.
- In my kitchen, I use filtered water because tap water can sometimes add mineral notes that cloud the brine. It’s a small detail, but it keeps the jar looking as good as it tastes.
- When I’m making these for meal prep, I slice extra onions and keep them in the fridge raw. That way, I can pickle a fresh batch mid-week without starting from scratch.
- I’ve found that slightly thicker onion slices (closer to 1/4-inch) hold their texture better if you’re planning to keep the jar for more than two weeks. Thinner slices soften beautifully in the first week but can get mushy after that.
- The brine is reusable once—after you’ve eaten most of the onions, you can add a fresh batch of raw onions to the leftover brine and refrigerate. The second batch will be ready in about 4 hours and will taste slightly softer than the first.
Whirl Finish
Serve pickled red onions straight from the jar, or drain them slightly before adding to salads so the extra brine doesn’t make your greens soggy. A drizzle of good olive oil over the top of the jar before serving adds richness and helps preserve the onions. Store in an airtight glass jar in the refrigerator for up to 4 weeks. The color will fade slightly over time, but the flavor stays sharp and bright for the first 2-3 weeks.
Texture & Taste Expectations
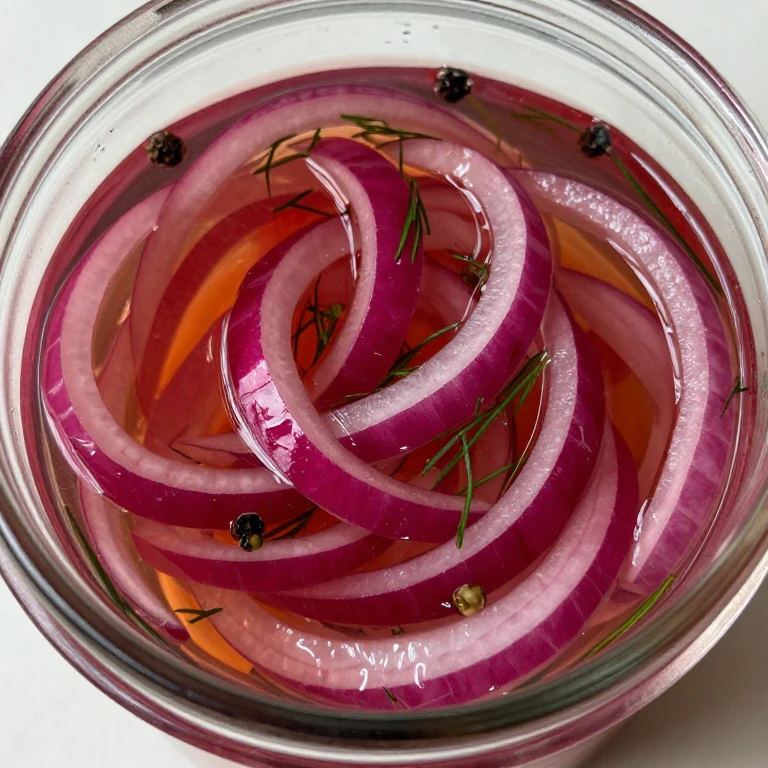
Finished pickled red onions should be bright magenta (or slightly faded if they’ve been in the jar for a week), with a tender but still-crisp bite. When you pick one up with a fork, it should yield slightly but not fall apart. The flavor should hit you as tart first, then sweet, with the onion’s natural sharpness still present underneath. There should be no mushiness, no bitterness, and no harsh vinegar bite that makes you wince—if any of those things happen, your brine was either too strong or the onions sat too long.
Spin Options
Maple-Ginger Version: Replace the sugar with 2 tablespoons maple syrup and add 4-5 thin slices of fresh ginger to the jar. This version leans earthy and warm, perfect for grain bowls with roasted vegetables or alongside pork.
Citrus-Dill Version: Add the zest of one lemon and one lime to the brine along with 4-5 sprigs fresh dill. The citrus adds brightness and pairs beautifully with fish or chicken salads.
Spiced Version: Add 1 teaspoon whole cumin seeds, 1/2 teaspoon whole coriander seeds, and 2-3 dried red chiles to the brine. This version works beautifully with Mexican-inspired salads, tacos, or grain bowls with black beans.
Customization Ideas
- Sweetness level: If you prefer less sweet, reduce sugar to 1 tablespoon. If you like them sweeter, go up to 3 tablespoons. Taste the brine before pouring to check.
- Vinegar swaps: Red wine vinegar gives earthier notes; white wine vinegar is crisper and more delicate. Rice vinegar works but adds a subtle sweetness that changes the profile. Stick with apple cider vinegar if you want the recipe as written.
- Add aromatics: Garlic slices, peppercorns, dill, and thyme all work beautifully. Add them to the jar before pouring the hot brine.
- Spice level: Fresh or dried chiles add heat. Start with one and taste after a few hours to see if you want more.
- Storage: These onions keep longer in the fridge than on the counter. Always store them in an airtight glass jar.
Pairing Ideas
These pickled onions are most at home on a simple green salad with creamy dressing—the sharp brine cuts through richness beautifully. I also love them on grain bowls with roasted vegetables and a tahini dressing, where they add textural contrast and bright acidity. For something unexpected, try them on a composed salad with warm roasted beets, goat cheese, and walnuts—the sweet earthiness of the beets and the creamy cheese balance the onions’ tartness perfectly. They’re equally good on tacos, alongside grilled fish, or scattered over avocado toast.
FAQ
Can I use white vinegar instead of apple cider vinegar?
Yes, but reduce the amount to 3/4 cup because white vinegar is stronger and more harsh. Apple cider vinegar has a softer, more complex acidity that’s more forgiving. If you only have white vinegar, taste the brine before pouring and adjust the salt or sugar if it feels too aggressive.
How long do pickled red onions last?
They’ll keep in the refrigerator for 3-4 weeks in an airtight glass jar. The color will fade gradually and the flavor will mellow slightly after the first week, but they stay edible and delicious for at least two weeks. After that, they’re still safe to eat but the texture softens more noticeably.
Can I reuse the brine?
Yes, once. After you’ve eaten most of the first batch of onions, add a fresh batch of raw onions to the leftover brine and refrigerate. The second batch will be ready in about 4 hours and will taste slightly softer than the first. After that, the brine loses too much flavor to be useful.
Do I have to use fresh dill and peppercorns?
No, they’re optional. The basic recipe works beautifully on its own. If you want to add aromatics, dill and peppercorns are my go-to because they don’t overpower the onions, but garlic, thyme, and whole spices like cumin or coriander all work well.
Why do my pickled onions taste too sour?
The brine is too strong. Either you used too much vinegar or the onions sat in the brine too long. For future batches, reduce the vinegar slightly or add another tablespoon of sugar to balance the acidity. If the onions are already made, you can drain them and rinse them briefly under cool water, then return them to a new, slightly sweeter brine.
Can I make these without a jar?
You can, but I don’t recommend it for storage. You can pickle onions in any container, but glass jars with tight-fitting lids keep them fresher longer and let you see the color. Plastic containers can absorb vinegar flavors and don’t seal as well.
Do I need to sterilize the jar?
For refrigerator pickles, no. Just use a clean jar with a tight-fitting lid. Because the brine is hot and the jar goes straight into the fridge, there’s no risk of bacterial growth. If you were canning these for shelf storage, you’d need to sterilize, but that’s a different process.
Pickled Red Onions Salad Recipe With ACV Brine
Ingredients
Method
- Cut red onions in half lengthwise, then slice them into thin half-moons about 1/8-inch thick. The thinner the slice, the faster they'll pickle and the more evenly they'll soften.
- In a small saucepan, combine apple cider vinegar, water, sugar, and salt. Bring to a rolling boil over medium-high heat, stirring occasionally to make sure the sugar and salt dissolve completely. This takes about 3-4 minutes.
- While the brine heats, place sliced onions in a clean glass jar. If you're using dill, peppercorns, or garlic, toss them in with the onions.
- Once the brine is boiling, carefully pour it over the onions, making sure they're completely submerged. Push any floating onions down gently with a spoon or chopstick.
- Let the jar sit at room temperature for about 30 minutes until the brine cools slightly, then cover and refrigerate. The onions are ready to eat after 2 hours, but they develop better flavor if you wait overnight.