
Quick pickled onions are the high-impact condiment that transforms tacos, burgers, and salads in minutes. I’ve found that this refrigerator method—a hot vinegar brine poured over thin onion slices—delivers crisp, tangy results in just 30 minutes, with zero canning equipment required. The beauty of this recipe is its flexibility: use red, white, or sweet onions depending on what you’re serving, and customize the brine with dill, peppercorns, or citrus zest for completely different flavor directions. Once you master the ratio, you’ll keep a jar in your fridge at all times because the payoff is immediate and the method is genuinely foolproof.
Why You’ll Love This
- Ready to eat in 30 minutes—no canning, no special equipment needed
- Works with any onion variety and keeps refrigerated for up to 3 weeks
- One-step brine ratio that scales easily for single servings or meal prep batches
- Transforms everyday tacos, sandwiches, and salads with crisp texture and bright acidity
- Customizable with herbs and spices to match your protein or cuisine style
- Budget-friendly condiment that costs pennies per jar
Ingredient Breakdown
Brine Base
- 1 cup white vinegar (or apple cider vinegar for deeper flavor)
- 1 cup water
- 1 tablespoon salt
- 1 tablespoon sugar
Onions & Aromatics
- 1 pound red, white, or sweet onions (about 3 medium onions)
- 1 teaspoon black peppercorns (optional but recommended)
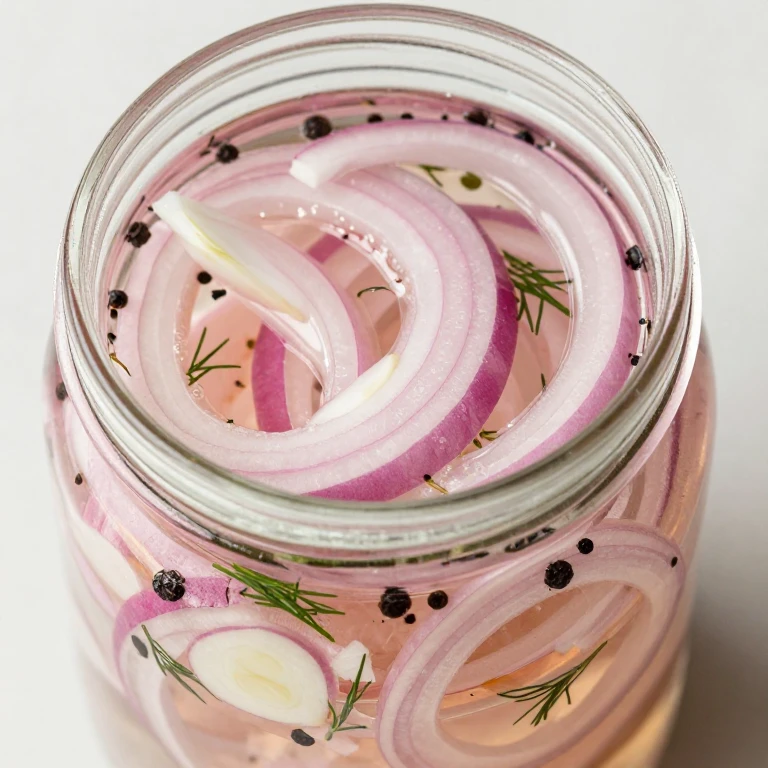
- 2-3 sprigs fresh dill or 1 teaspoon dried dill (optional)
- 2-3 garlic cloves, sliced (optional)
The core of this recipe is the 1:1 vinegar-to-water ratio with salt and sugar—this is your anchor. Everything else is optional customization. I always use fresh dill when I have it, but dried works just fine. The garlic and peppercorns add savory depth without overpowering the bright acidity.
Whirl Hook
The signature move here is the hot-brine-to-cold-onions contrast. Pouring boiling vinegar brine directly over raw, thinly sliced onions softens them just enough to absorb flavor while keeping them snappy and crisp. This texture contrast—tender but still with bite—is what makes these onions addictive on everything from tacos to charcuterie boards. The speed comes from skipping the cooking step entirely; the heat does the work for you.
Step-by-Step
- Slice your onions thinly (about 1/8 inch thick). I use a mandoline for speed, but a sharp knife works just fine—aim for consistent thickness so they pickle evenly.
- Place sliced onions in a clean glass jar or container. Pack them loosely; they don’t need to be compressed.
- In a small saucepan, combine vinegar, water, salt, and sugar. Bring to a boil over medium-high heat, stirring occasionally until salt and sugar dissolve completely (2-3 minutes).
- If using peppercorns, garlic, or dill, add them to the jar with the onions now.
- Carefully pour the hot brine over the onions, ensuring they’re fully submerged. If needed, nestle a small piece of parchment paper on top to keep onions below the liquid.
- Let cool to room temperature (about 15-20 minutes), then cover and refrigerate. Onions are ready to eat in 30 minutes but taste even better after 2-4 hours when flavors fully develop.
Visual Cooking Timeline
- 0:00 — Slice onions and add to jar with optional aromatics
- 0:05 — Combine vinegar, water, salt, and sugar in saucepan
- 0:08 — Bring brine to a boil, stir until salt and sugar dissolve
- 0:10 — Pour hot brine over onions in jar
- 0:30 — Cool to room temperature, cover, and refrigerate
- 0:35 — Ready to eat; flavor deepens over 2-4 hours
Whirl Factor
The texture contrast is crisp-tender—onions soften enough to absorb the bright vinegar and spice notes but never turn mushy. The flavor profile shifts based on your brine additions: straight vinegar and sugar gives you classic tangy brightness; add dill and peppercorns for savory depth; add citrus zest (lemon or lime) for seafood-friendly zing. This flexibility means one base recipe works for tacos, sandwiches, grain bowls, and charcuterie boards without any adjustment to the core method.
Spin Options
Spicy Version
Add 1-2 dried red chilies or 1/2 teaspoon red pepper flakes to the brine before heating. This adds heat and color without changing the timing or texture.
Citrus & Herb Version
Skip the dill and add zest from 1 lemon or lime plus 2-3 fresh thyme sprigs to the jar. Pour hot brine over top. This version pairs beautifully with fish tacos and ceviche.
Sweet & Spiced Version
Increase sugar to 2 tablespoons and add 1/4 teaspoon each of ground cinnamon and cloves to the brine. This version works with roasted vegetables and pulled pork.
Quick Tips
- Use a mandoline or vegetable slicer for perfectly thin, even slices—consistency matters for uniform pickling.
- Don’t skip the cooling step; letting the jar reach room temperature before refrigerating prevents condensation and keeps onions crisp.
- Make a double batch on Sunday; these keep for 3 weeks refrigerated and work on everything from breakfast scrambles to dinner sandwiches.
- If onions taste too vinegary, rinse them briefly before serving or use them in dishes with creamy elements (mayo, sour cream, avocado) that balance the acidity.
- Red onions will bleed color into the brine—this is normal and actually beautiful for presentation; the brine becomes a gorgeous pink.
Substitution Ideas
Red onions → White or sweet onions — White onions are milder and less sweet; sweet onions (Vidalia, Walla Walla) are more mellow. Cook time stays the same; flavor profile shifts from sharp to sweeter.
White vinegar → Apple cider vinegar — Adds subtle apple notes and deeper color. Use 1:1 ratio; no change to timing.
Dill → Tarragon or oregano — Tarragon brings anise notes (great for chicken); oregano adds Mediterranean depth. Use same amount (2-3 sprigs fresh or 1 teaspoon dried).
Fresh garlic → Garlic powder — Use 1/4 teaspoon garlic powder instead of fresh cloves if you prefer a subtler garlic note without texture.
Make-Ahead Options
Day Before: Make the full batch and refrigerate overnight. Flavor deepens significantly; onions are actually better after 12-24 hours. Store in a covered glass jar.
2 Hours Before: Slice onions and store in an airtight container. Make brine separately and keep at room temperature. Pour hot brine over onions just before serving or when you’re ready to eat. This works if you want maximum freshness and crunch.
Morning Of: Prepare the brine and let it cool completely, then store in a separate container. Slice onions just before serving and pour cold brine over top for the crispest texture. This method sacrifices some flavor absorption but maximizes crunch.
Do Not Make Ahead: Don’t slice onions more than 2 hours before pickling; they’ll start to oxidize and lose their bright color and crisp texture.
Whirl Finish
Serve these pickled onions on tacos, burgers, and sandwiches, or layer them into grain bowls and salads for instant brightness. They’re stunning on a charcuterie board next to cured meats and cheese. Store in a covered glass jar in the refrigerator for up to 3 weeks; the brine keeps them safe and the flavor actually improves over time. Use the leftover brine (once onions are gone) to pickle vegetables, add to vinaigrettes, or use as a cocktail mixer.
FAQ
Can I use this recipe with different onion varieties?
Absolutely. Red onions are sharpest and most colorful; white onions are milder and more neutral; sweet onions (Vidalia) are gentler and work beautifully with lighter proteins. The brine ratio stays the same regardless of variety.
How long do pickled onions keep?
Refrigerated in a covered glass jar, they’ll keep for 3-4 weeks. The flavor actually improves after 24 hours. If you notice any mold or off smell, discard immediately.
Do I need special equipment or canning supplies?
No. This is a quick refrigerator pickle, not a shelf-stable preserve. A clean glass jar, a saucepan, and a knife are all you need.
Can I make a larger batch?
Yes. The ratio is 1:1 vinegar to water plus 1 tablespoon each of salt and sugar per cup of brine. Double or triple as needed; the method stays identical.
What if my onions taste too vinegary?
Rinse them briefly before serving or use them in dishes with creamy elements (mayo, sour cream, cheese, avocado) that balance the acidity. You can also reduce vinegar to 3/4 cup and increase water to 1 1/4 cups for a milder version.
Can I use these onions in cooking, or should they stay raw?
They’re best served raw to preserve the crisp texture, but you can add them to warm dishes at the last moment (tacos, grain bowls, sandwiches). Don’t cook them in the brine or they’ll turn mushy.
What’s the difference between these and traditional fermented pickles?
These are quick vinegar pickles (ready in 30 minutes, shelf life in the fridge only). Fermented pickles use salt and time (days or weeks) to develop flavor and are shelf-stable. Both are delicious; this version is faster and requires no special knowledge.
Quick Pickled Onions Recipe for Any Onion Variety
Ingredients
Method
- Slice your onions thinly (about 1/8 inch thick). Use a mandoline for speed, but a sharp knife works just fine—aim for consistent thickness so they pickle evenly.
- Place sliced onions in a clean glass jar or container. Pack them loosely; they don't need to be compressed.
- In a small saucepan, combine vinegar, water, salt, and sugar. Bring to a boil over medium-high heat, stirring occasionally until salt and sugar dissolve completely (2-3 minutes).
- If using peppercorns, garlic, or dill, add them to the jar with the onions now.
- Carefully pour the hot brine over the onions, ensuring they're fully submerged. If needed, nestle a small piece of parchment paper on top to keep onions below the liquid.
- Let cool to room temperature (about 15-20 minutes), then cover and refrigerate. Onions are ready to eat in 30 minutes but taste even better after 2-4 hours when flavors fully develop.