
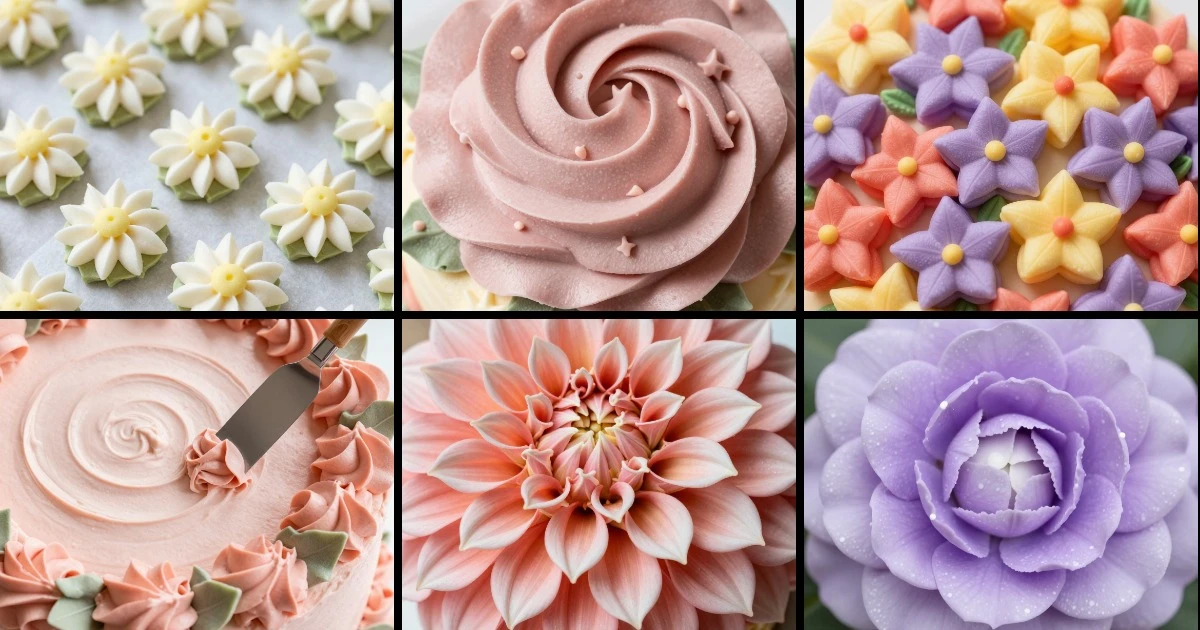
Whether you’re decorating a simple vanilla sheet cake for a weeknight celebration or creating an impressive garden of buttercream blooms for a dinner party showstopper, flower designs transform any cake into something memorable. I’ve found that the magic isn’t in complicated techniques—it’s in understanding a few core piping methods, mixing colors with intention, and practicing petal placement until your hand finds its rhythm. These 12 birthday sheet cake flower designs give you everything from beginner-friendly drop flowers to show-stopping rosettes and leafy borders. Each design builds on foundational piping skills, so you can start simple on a Tuesday and graduate to gallery-worthy cakes by the weekend.
Birthday Sheet Cake Flower Designs for Weeknight Celebrations
Weeknight cakes need speed and reliability. These three designs come together in under 30 minutes of active decorating time, using basic piping tips and color mixing you can master on your first try. Each one looks intentional and impressive without requiring a pastry degree.
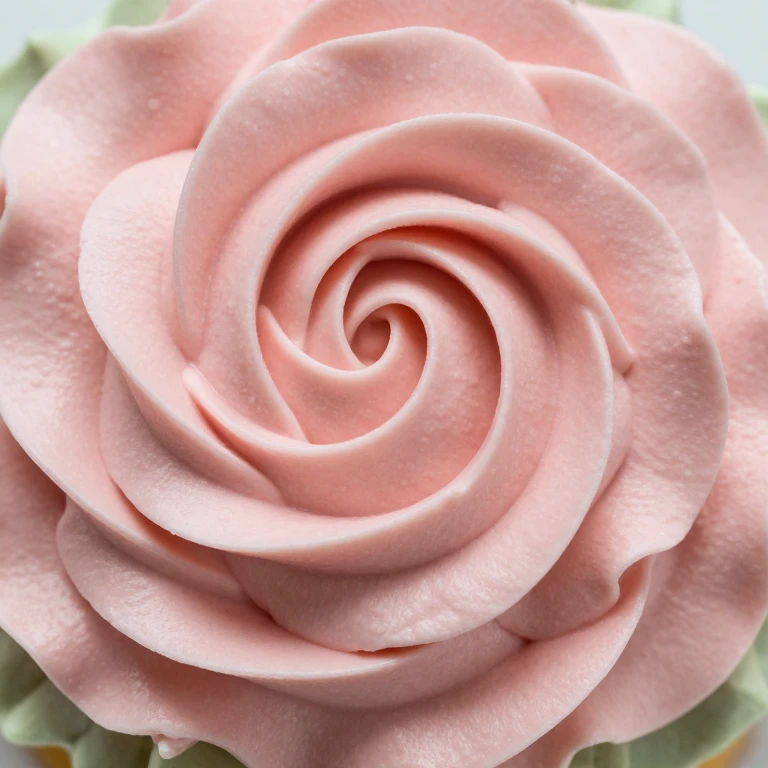
1. Classic Buttercream Rosettes

Rosettes are the workhorse of sheet cake decoration, and once you nail the wrist motion, you’ll pipe them everywhere. I use a standard star tip (Ateco 846 or Wilton 1M) and medium-consistency buttercream to create these dense, elegant flowers in about 10 seconds each. The texture contrast between the smooth cake and the ridged petals is exactly what makes this design sing.
Ingredients
- 2 cups unsalted butter, softened
- 4 cups powdered sugar
- 2 tablespoons heavy cream
- 1 teaspoon vanilla extract
- Food coloring (rose, blush, or cream)
- One 9×13-inch sheet cake, cooled
Instructions
- Beat butter on medium speed for 3 minutes until pale and fluffy.
- Gradually add powdered sugar in two batches, scraping bowl between additions.
- Add heavy cream and vanilla, beat until stiff peaks form (about 2 minutes).
- Divide buttercream into bowls and tint with food coloring to desired shades.
- Fit piping bag with star tip and fill with one color.
- Hold piping bag perpendicular to cake, squeeze while rotating bag counterclockwise in a tight spiral, release pressure, and pull away cleanly.
- Repeat across cake surface, spacing rosettes 2 inches apart for a full garden effect.
Weeknight tip: Pipe rosettes directly onto the frosted cake—no need to pipe onto parchment first. Total active time: 25 minutes for a full sheet cake.
Make-ahead note: Frost the cake base the morning of; pipe rosettes up to 4 hours before serving. Keep cake in a cool room (under 70°F) to prevent buttercream softening.
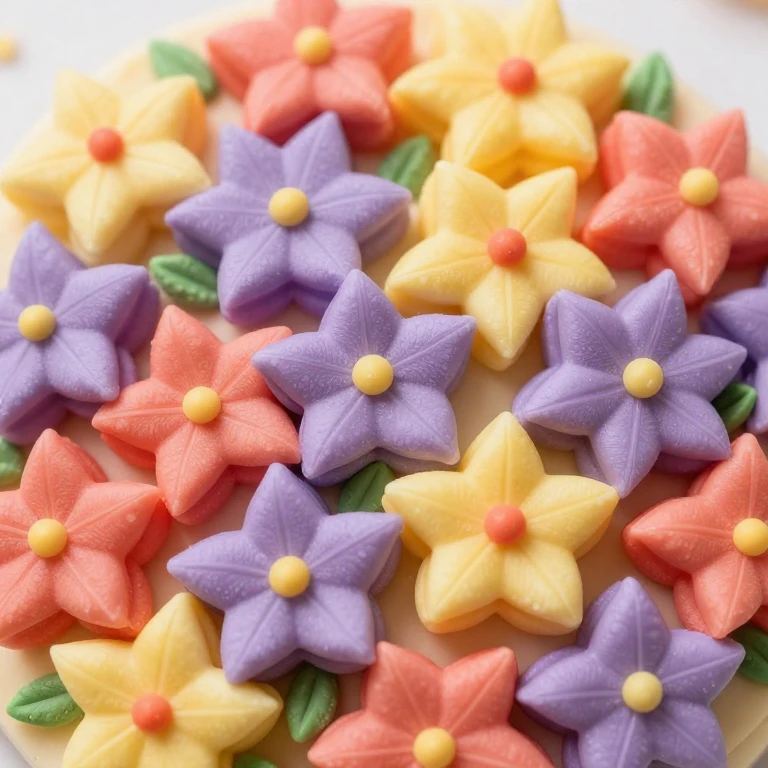
2. Drop Flower Clusters
Drop flowers are my secret for filling large cake areas quickly while maintaining visual interest. I use a small round tip (Wilton 2) and thin buttercream to pipe five petals in a circle, then add a contrasting center dot. Each flower takes about 8 seconds, making this design perfect for Tuesday-night cakes that still need to impress.
Ingredients
- 2 cups unsalted butter, softened
- 4 cups powdered sugar
- 1 tablespoon milk
- 1 teaspoon vanilla extract
- Food coloring (primary color + contrasting center color)
- One 9×13-inch sheet cake, frosted with crumb coat
Instructions
- Prepare buttercream as in recipe 1, dividing into two bowls for petal and center colors.
- Thin petal-color buttercream with milk until it flows freely from a piping bag but holds shape (test on parchment first).
- Fit piping bag with round tip and fill with petal color.
- Pipe five small dots in a circle (about 1 inch diameter), spacing dots ½ inch apart.
- Refill piping bag with center-color buttercream at full consistency.
- Pipe a single dot in the middle of each flower cluster.
- Scatter clusters across cake, leaving ½-inch breathing room between flowers.
Weeknight tip: Pipe 12-15 flowers per minute once you find your rhythm. This design covers a 9×13 cake in roughly 20 minutes.
Storage note: Keep decorated cake at room temperature for up to 6 hours; refrigerate beyond that for buttercream stability.
3. Simple Daisy Border

A clean border frames the cake and disguises any frosting imperfections along the edges. I pipe a row of simple five-petal daisies around the perimeter using a small petal tip (Wilton 103), creating a garden-gate effect that feels polished without fussy detail work.
Ingredients
- 2 cups unsalted butter, softened
- 4 cups powdered sugar
- 1 tablespoon heavy cream
- 1 teaspoon vanilla extract
- White and yellow food coloring
- One 9×13-inch sheet cake, fully frosted
Instructions
- Make buttercream following recipe 1 instructions.
- Divide buttercream: tint 1½ cups white, ½ cup yellow.
- Fit piping bag with petal tip and fill with white buttercream.
- Starting at one corner, pipe five petals radiating from a central point (each petal about ¾ inch long).
- Space daisies 1½ inches apart around cake perimeter.
- Refill piping bag with yellow buttercream and pipe a small dot center in each daisy.
Weeknight tip: Pipe the border first, then fill the cake center with rosettes or drop flowers. This creates a natural frame and guides your eye around the cake.
Storage note: This design holds beautifully at room temperature for 8 hours; refrigerate if your kitchen runs warm.
Birthday Sheet Cake Flower Designs for Dinner Party Impact
Dinner party cakes need to earn their moment on the table. These three designs incorporate multiple piping techniques and color layering, creating cakes that look like they came from a professional bakery. I build these with a mix of advance prep and last-minute assembly to keep stress low and impact high.
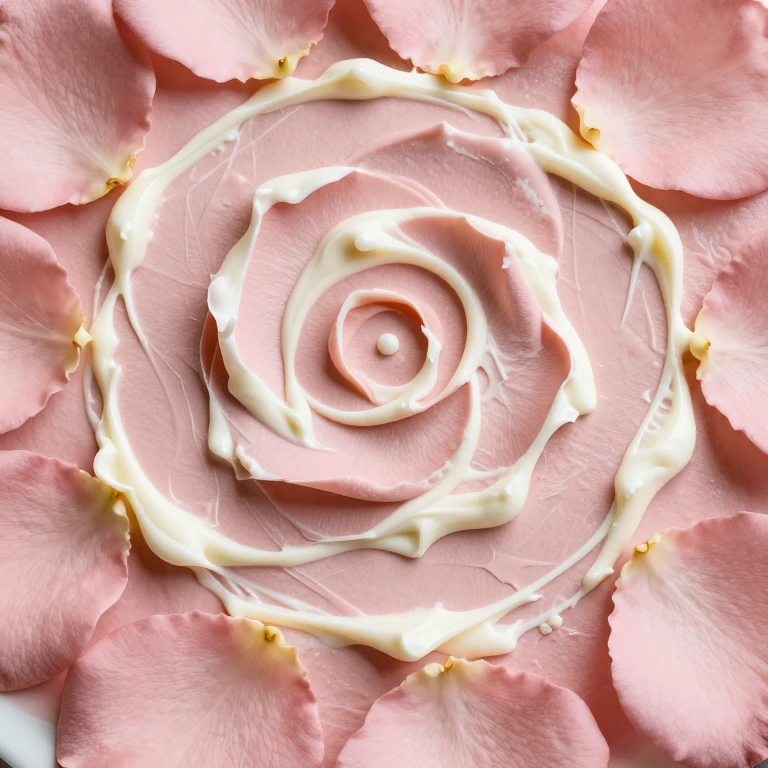
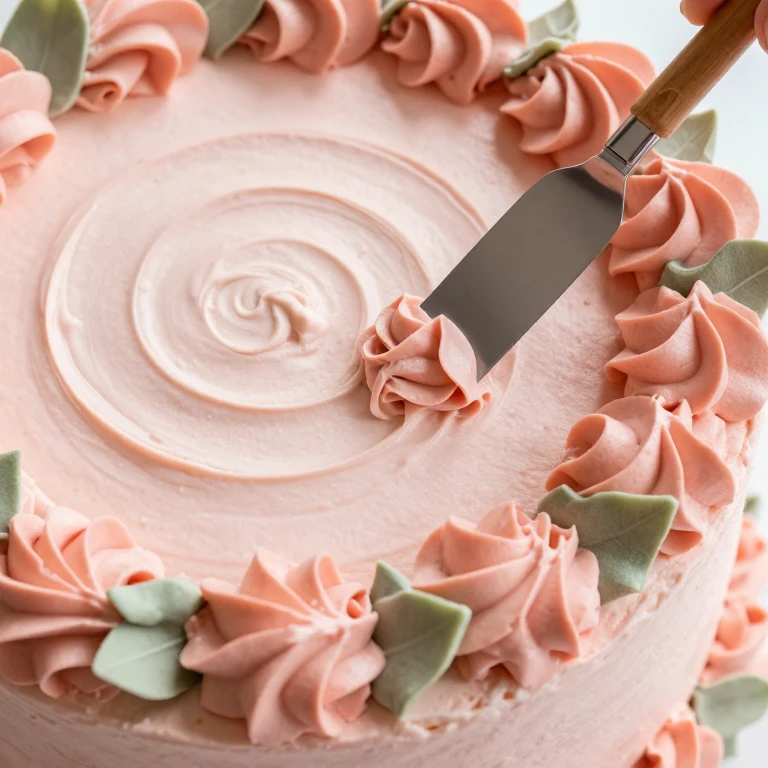
4. Palette Knife Petal Roses
This technique uses a small offset spatula to hand-sculpt petals directly onto the cake, creating organic, realistic roses that feel luxurious. I layer thin buttercream strokes to build dimension, and the result is a flower that photographs beautifully and tastes as good as it looks. This is my signature move for cakes that need to command attention.
Ingredients
- 2½ cups unsalted butter, softened
- 5 cups powdered sugar
- 2 tablespoons heavy cream
- 1½ teaspoons vanilla extract
- Food coloring (rose, blush, cream, sage green)
- One 9×13-inch sheet cake, frosted with smooth base layer
- Small offset spatula (3-inch blade)
Instructions
- Make buttercream following previous recipes, dividing into rose, blush, cream, and green.
- Tint rose color to deep pink; blush to pale pink; keep cream white; green to muted sage.
- Load small amount of rose buttercream onto offset spatula blade.
- Starting at cake surface, press spatula flat and drag upward in a curved stroke, twisting wrist slightly to create a petal shape.
- Overlap second petal slightly, pressing and dragging to create layered effect.
- Continue adding 5-7 petals per rose, alternating rose and blush colors for depth.
- Pipe small green leaves between roses using a leaf tip (Wilton 352).
Dinner party tip: Practice palette knife petals on parchment paper the day before. Each rose takes 2-3 minutes, so budget 30-40 minutes for a full cake.
Make-ahead note: Frost the cake base 1 day ahead; pipe palette knife roses up to 6 hours before serving. This design holds better when the base frosting has set firm.
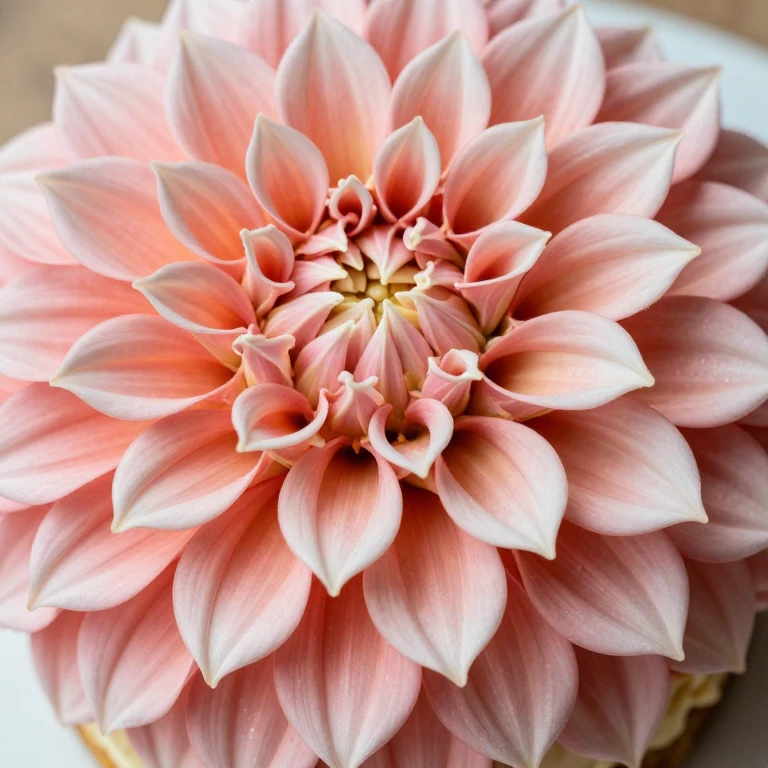
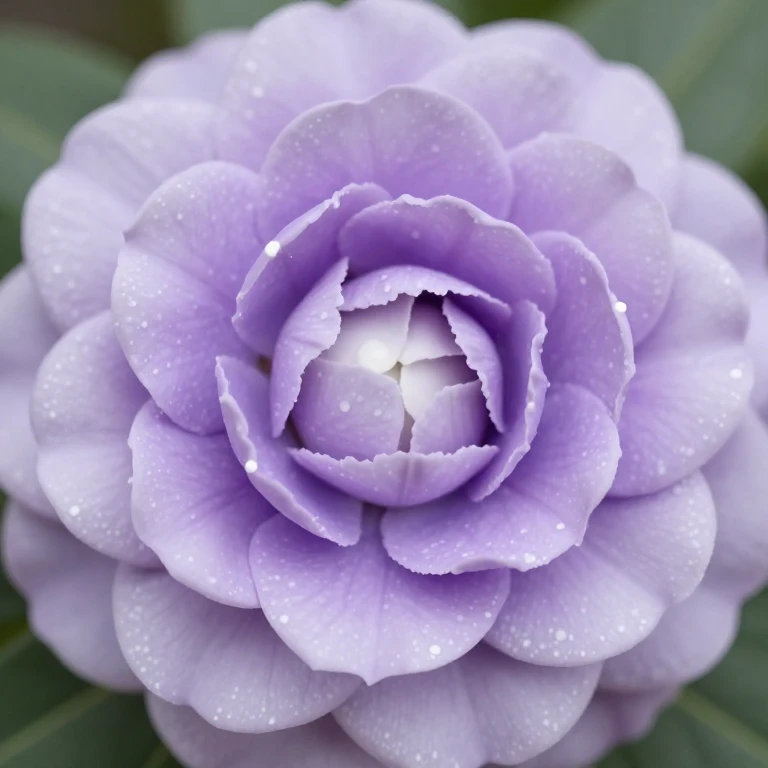
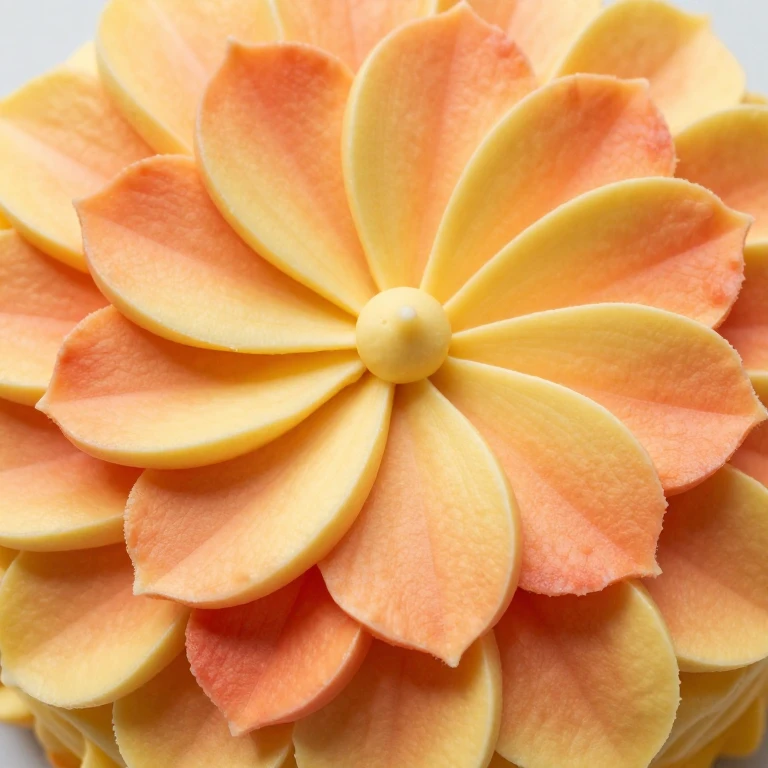
5. Piped Peony Blooms
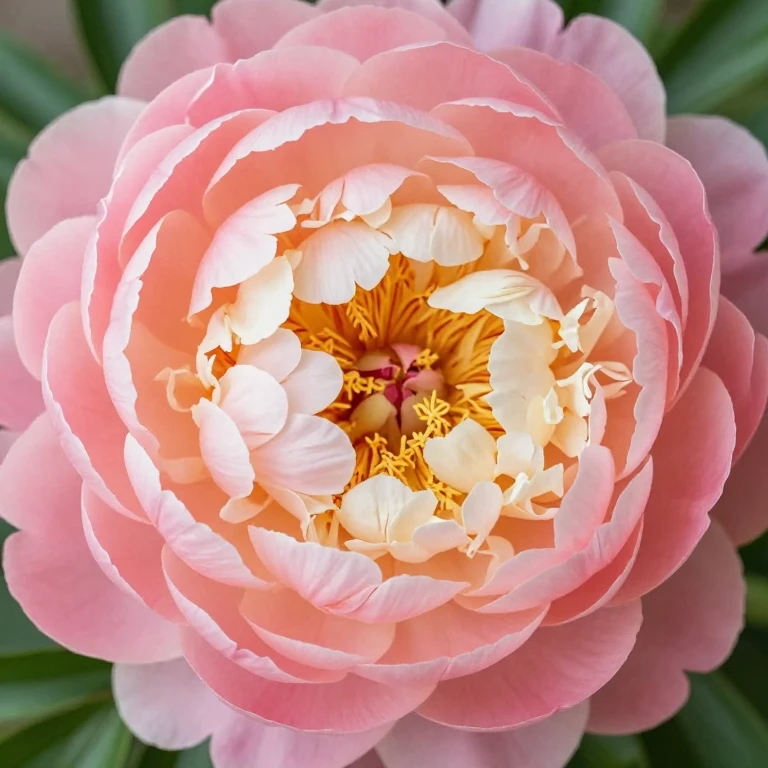
Peonies are the ultimate dinner party flower—layered, full, and undeniably romantic. I build these using a large petal tip (Wilton 104) and create multiple layers of petals, each slightly offset from the last. The result is a flower that looks almost too beautiful to eat, but the buttercream is silky and rich enough to justify every bite.
Ingredients
- 2½ cups unsalted butter, softened
- 5 cups powdered sugar
- 2 tablespoons heavy cream
- 1½ teaspoons vanilla extract
- Food coloring (mauve, blush, cream, green)
- One 9×13-inch sheet cake, frosted smooth
Instructions
- Prepare buttercream and tint: mauve for outer petals, blush for middle, cream for inner petals, green for leaves.
- Fit piping bag with large petal tip and fill with mauve buttercream.
- Pipe outer ring of 5-6 petals around a center point, each petal about 1¼ inches long.
- Refill piping bag with blush buttercream and pipe second ring of petals, slightly offset and overlapping first ring.
- Refill with cream buttercream and pipe final inner ring of smaller petals, creating a full, layered dome.
- Add green leaves at base using leaf tip.
- Repeat peony clusters across cake, spacing 3 inches apart for dramatic effect.
Dinner party tip: Peonies photograph beautifully from above. Arrange them in clusters of 3 for visual rhythm and impact.
Make-ahead note: Pipe peonies up to 8 hours ahead. The layered structure holds shape well and actually looks more defined as buttercream sets.
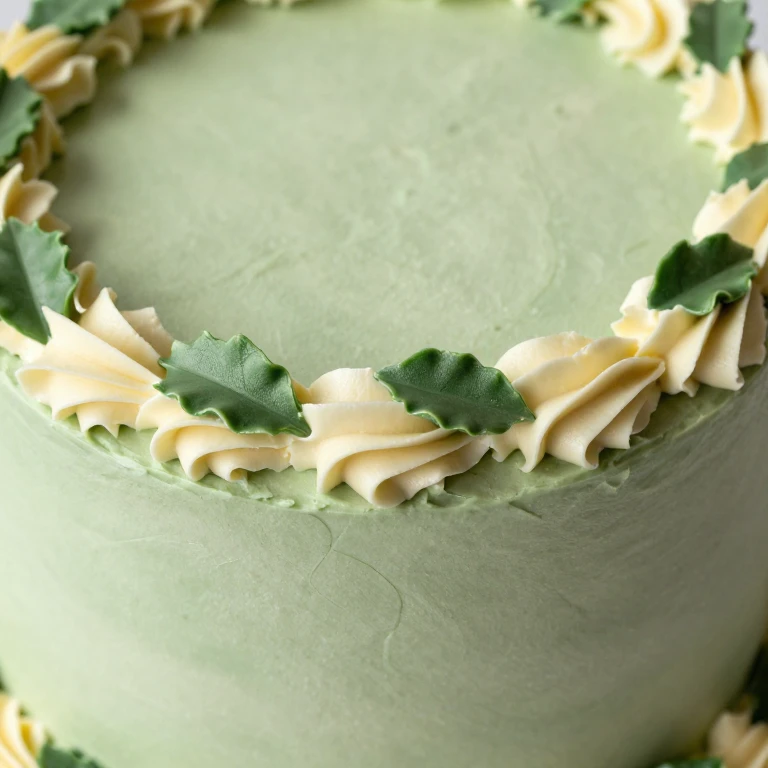
6. Leafy Garden Border with Piped Stems
This design combines piped flowers with a structured leafy border, creating the impression of a full garden growing around the cake edges. I use a leaf tip to create layered greenery, then pipe delicate stems connecting flowers and leaves. It’s sophisticated enough for a formal dinner yet still achievable with basic piping skills.
Ingredients
- 2 cups unsalted butter, softened
- 4 cups powdered sugar
- 1 tablespoon heavy cream
- 1 teaspoon vanilla extract
- Food coloring (sage green, blush, cream, pale yellow)
- One 9×13-inch sheet cake, frosted
Instructions
- Prepare buttercream and tint: sage green for leaves and stems, blush for flowers, cream for accents, pale yellow for centers.
- Fit piping bag with leaf tip (Wilton 352) and fill with sage green.
- Pipe a base row of overlapping leaves around cake perimeter, each leaf about ¾ inch long, angling leaves outward.
- Pipe second row of smaller leaves above first row, creating layered effect.
- Switch to round tip with blush buttercream and pipe small flower clusters between leaf groupings.
- Use thin piping tip with sage green to pipe delicate stems connecting leaves and flowers.
- Add pale yellow centers to flowers with round tip.
Dinner party tip: Work around the cake perimeter first, then fill the top with coordinating rosettes or drop flowers.
Make-ahead note: Pipe this border 4-6 hours ahead. The layered leaves protect the design and create a natural frame that looks intentional and polished.
Birthday Sheet Cake Flower Designs for Meal Prep and Batch Decorating
Meal prep for cakes means piping components ahead and assembling them strategically. These three designs break down into pre-piped elements that you can create during a dedicated decorating session, then apply to cakes throughout the week. This approach keeps quality consistent and stress minimal.
7. Pre-Piped Flower Transfers
I pipe flowers onto parchment paper, freeze them solid, then transfer them to cakes as needed. This method lets you batch-produce dozens of flowers during one focused session, then apply them to cakes fresh from the oven. It’s the ultimate make-ahead strategy for anyone decorating multiple cakes.
Ingredients
- 2 cups unsalted butter, softened
- 4 cups powdered sugar
- 1 tablespoon heavy cream
- 1 teaspoon vanilla extract
- Food coloring (multi-color palette)
- Parchment paper
- Sheet pans
Instructions
- Prepare buttercream and divide into 4-5 bowls, tinting each a different color.
- Line sheet pans with parchment paper.
- Fit piping bag with star tip and fill with first color.
- Pipe 20-30 rosettes onto parchment, spacing 1 inch apart.
- Repeat with remaining colors on separate pans, creating 100+ flowers total.
- Freeze all pans for at least 4 hours or up to 2 weeks.
- Peel frozen flowers from parchment and store in airtight container in freezer.
- Apply frozen flowers directly to frosted cakes 15-20 minutes before serving; they thaw to perfect consistency on the warm cake.
Meal prep tip: Dedicate one Sunday afternoon to piping 150+ flowers. You’ll have enough for 3-4 cakes throughout the week.
Storage note: Frozen piped flowers keep for 3 weeks in an airtight container. Apply directly to frosted cakes without thawing for best results.
8. Buttercream Flower Clusters on Crumb-Coated Bases
This design uses a crumb coat base that you prepare ahead, then add final piped flowers just before serving. The crumb coat stabilizes the cake and provides a clean canvas, while the fresh piping ensures flowers look vibrant and perfectly textured.
Ingredients
- 1 cup unsalted butter, softened
- 2 cups powdered sugar
- ½ tablespoon heavy cream
- ½ teaspoon vanilla extract
- Food coloring (coordinating palette)
- One 9×13-inch sheet cake
Instructions
- Prepare thin buttercream for crumb coat (slightly looser than standard consistency).
- Apply thin, even crumb coat to entire cake surface.
- Refrigerate crumb coat for at least 2 hours or up to 24 hours.
- When ready to decorate, prepare fresh buttercream in final colors.
- Fit piping bag with star tip and pipe rosette clusters across crumb-coated surface.
- Add drop flowers and leaf accents to fill gaps and create visual rhythm.
Meal prep tip: Crumb coat cakes on Sunday; pipe fresh flowers Wednesday or Thursday evening for Friday delivery or Saturday celebration.
Storage note: Crumb-coated cakes keep refrigerated for 2 days. Add final piping no more than 4 hours before serving to keep flowers fresh-looking.
9. Ombré Flower Gradient Design
This design uses a single flower shape piped in gradually shifting colors, creating an ombré gradient across the cake. I prepare buttercream in 4-5 tints of the same hue, then pipe flowers in sequence, creating a visual flow that feels intentional and modern.
Ingredients
- 2 cups unsalted butter, softened
- 4 cups powdered sugar
- 1 tablespoon heavy cream
- 1 teaspoon vanilla extract
- Food coloring (one base color in varying amounts)
- One 9×13-inch sheet cake, frosted with neutral base
Instructions
- Prepare buttercream and divide into 5 bowls.
- Tint first bowl with 1 drop color (palest shade), second with 2 drops (light), third with 3 drops (medium), fourth with 4 drops (deep), fifth with 5 drops (darkest).
- Fit piping bag with medium star tip.
- Starting at top left of cake, pipe first row of rosettes using palest shade.
- Move down cake, piping second row with light shade, continuing gradient progression.
- Finish bottom right with darkest shade, creating seamless ombré effect.
Meal prep tip: Mix all five color tints during one prep session, label piping bags, and refrigerate up to 2 days ahead.
Storage note: This design holds beautifully refrigerated for 3 days. The ombré effect actually deepens slightly as buttercream sets, creating richer color definition.
Birthday Sheet Cake Flower Designs for Family-Friendly Celebrations
Family cakes celebrate togetherness, so these designs prioritize approachability and flexibility. Kids can participate in the decorating, colors are cheerful and forgiving, and the techniques work even if piping isn’t perfectly precise. These are the designs I use when the goal is joy over perfection.
10. Rainbow Rosette Garden
Rainbow rosettes turn any cake into a celebration. I use the full spectrum of food coloring, piping each rosette in a different hue, and the result is joyful, kid-friendly, and impossible to mess up. Even slightly wonky rosettes look intentional in a rainbow arrangement.
Ingredients
- 2 cups unsalted butter, softened
- 4 cups powdered sugar
- 1 tablespoon heavy cream
- 1 teaspoon vanilla extract
- Food coloring (red, orange, yellow, green, blue, purple)
- One 9×13-inch sheet cake, frosted with smooth base
Instructions
- Prepare buttercream and divide into 6 bowls, tinting each a rainbow color.
- Fit piping bag with star tip.
- Fill bag with red buttercream and pipe 4-5 rosettes in one corner.
- Refill bag with orange and pipe 4-5 rosettes next to red section.
- Continue with yellow, green, blue, and purple, creating rainbow bands across cake.
- Fill any gaps with additional rosettes in favorite colors.
Family-friendly tip: Kids love choosing which color comes next. Let them help refill piping bags and decide placement—perfect for building cake-decorating confidence.
Storage note: Keep at room temperature for up to 8 hours. Colors stay vibrant and buttercream maintains perfect texture.
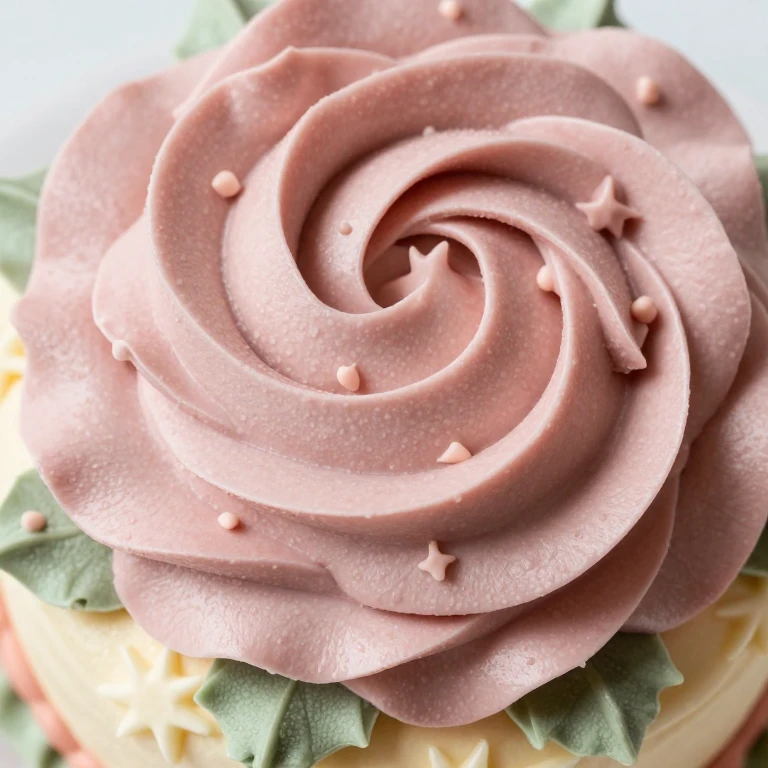
11. Sprinkle-Topped Piped Flowers
This design combines piped flowers with colorful sprinkles, adding texture and visual interest while keeping precision requirements minimal. I pipe simple rosettes, then immediately top with coordinating sprinkles before buttercream sets. It’s forgiving, fun, and always looks intentional.
Ingredients
- 2 cups unsalted butter, softened
- 4 cups powdered sugar
- 1 tablespoon heavy cream
- 1 teaspoon vanilla extract
- Food coloring (coordinating palette)
- Colorful sprinkles (jimmies or pearl sprinkles)
- One 9×13-inch sheet cake, frosted
Instructions
- Prepare buttercream and divide into 3-4 bowls, tinting coordinating colors.
- Fit piping bag with star tip and fill with first color.
- Pipe rosette on cake surface.
- Immediately sprinkle coordinating sprinkles over wet buttercream (work quickly before it sets).
- Pipe next rosette and repeat sprinkle process.
- Continue across cake, alternating colors and sprinkle types for visual variety.
Family-friendly tip: This is perfect for kids who want to help decorate. They can pipe rosettes while you add sprinkles, or vice versa.
Storage note: Sprinkles stay crisp at room temperature for up to 12 hours. Refrigeration can soften them, so keep this cake cool but not cold.
12. Simple Dot Flower Field
This design uses only a round piping tip and basic dots, arranged in flower patterns. No special techniques required—just consistent pressure and circular thinking. It’s the most accessible design in this collection, perfect for first-time cake decorators and young helpers.
Ingredients
- 1½ cups unsalted butter, softened
- 3 cups powdered sugar
- 1 tablespoon milk
- 1 teaspoon vanilla extract
- Food coloring (primary color + contrasting center color)
- One 9×13-inch sheet cake, frosted with smooth base
Instructions
- Prepare buttercream and divide into two bowls, tinting one color for petals, one for centers.
- Thin petal-color buttercream slightly with milk so it flows smoothly.
- Fit piping bag with small round tip (Wilton 2) and fill with petal color.
- Pipe five dots in a circle (about 1 inch diameter) to form flower base.
- Refill bag with center-color buttercream and pipe single dot in middle of each flower.
- Scatter flowers randomly across cake, filling roughly 60% of surface for garden-like effect.
- Add small green dots between flowers to suggest leaves.
Family-friendly tip: This design is genuinely easier than it looks. Kids as young as 8 can pipe consistent dots with minimal practice. It’s confidence-building and celebratory.
Storage note: Dot flowers hold perfectly at room temperature for 10 hours. The simple structure means no fussy details to worry about.
Frequently Asked Questions
What’s the easiest flower design for a beginner?
Start with simple drop flowers (recipe 2) or dot flowers (recipe 12). Both use basic round tips and require only consistent pressure. Practice on parchment paper for 10 minutes, then move to the cake. Once you’re comfortable, graduate to rosettes (recipe 1), which teach you wrist rotation—the foundation for almost every piped flower.
Can I mix buttercream colors ahead of time?
Absolutely. Mix and tint buttercream up to 2 days ahead, storing each color in an airtight container at room temperature. Before piping, give it a quick stir to restore consistency. If buttercream has separated slightly, add a teaspoon of milk and beat for 30 seconds.
How do I prevent piped flowers from getting squished?
Keep the cake in a cool room (under 70°F) while decorating, and avoid stacking decorated cakes directly on top of each other. If you must transport, use a cake carrier with tall clearance, or place parchment between layers. Buttercream flowers set firmer after 2-3 hours at room temperature.
What’s the best way to scale these designs for different cake sizes?
For a 8×8-inch cake, reduce flower count by 40%. For a 10×15-inch cake, increase by 25%. The flower size stays the same; you’re just adjusting spacing and density. Smaller cakes look best with 8-12 larger flowers; larger cakes benefit from 20-30 flowers of varying sizes.
Can I use these designs on layer cakes instead of sheet cakes?
Yes. These techniques work on any frosted surface. For layer cakes, focus piped flowers on the top and sides, leaving the top center clear if you’re adding a cake topper or message. The same buttercream recipes and piping tips apply.
How far ahead can I decorate a cake?
Fully decorated cakes keep at room temperature for 8-10 hours, refrigerated for 2-3 days. Buttercream flowers actually look more defined after 4-6 hours as the frosting sets. If decorating more than 24 hours ahead, refrigerate and bring to room temperature 1 hour before serving so buttercream softens to perfect texture.
What if my piping bag keeps clogging?
Buttercream consistency is key. It should be spreadable but hold stiff peaks when you lift the whisk. If too thick, add milk one teaspoon at a time. If too thin, refrigerate for 15 minutes. Also, ensure your piping tip is clean—even small buttercream bits can cause clogs. Fill the bag only halfway so you maintain control and pressure.