
There’s a moment in every baker’s life when a square cake arrives at the table and you realize it’s the one that stops the conversation. Not because of hype, but because of structure—cocoa layers that don’t crumble, strawberry buttercream that holds its shape, and a chocolate drip that slides down flat sides like it was meant to be there. That moment is what I’m after every time I build this cake.
This chocolate strawberry square layer cake is built on contrast: dark cocoa depth against bright berry sweetness, soft crumb against stable frosting, matte cocoa layers against a glossy chocolate finish. It’s the kind of cake that looks composed and modern on a plate, but the real story is in the method—how to level square cakes so corners don’t bulge, how to pipe a drip that actually stays where you put it, and how to make sure every slice holds its shape.
What Makes This Dish Special
Square cakes demand precision in ways round ones don’t. The corners catch heat differently. The edges set faster than the center. When you stack layers, gravity pulls harder on flat sides. I’ve learned to work with these physics, not against them.
This recipe uses a cocoa-forward cake base—rich enough to stand up to strawberry buttercream without getting lost, but tender enough that you don’t need a serrated knife to cut through. The strawberry element isn’t an afterthought; it’s a calculated contrast. I’m using a Swiss meringue buttercream tinted and flavored with freeze-dried strawberry powder and a touch of fresh strawberry purée. This keeps the frosting stable at room temperature while delivering real berry flavor that doesn’t fade.
The chocolate drip is where texture contrast becomes visual. A thin, pourable ganache applied to a chilled cake creates that clean line between frosting and finish. On a square cake with flat sides, this drip becomes a defining detail—it frames the cake and signals that you know what you’re doing.
Flavor Profile Breakdown
The base is cocoa-forward and slightly bitter, grounded by espresso powder that deepens chocolate without adding coffee flavor. Vanilla and a pinch of salt sharpen the cocoa rather than sweeten it. When you bite into the crumb, you get chocolate first, then a subtle warmth from the cocoa butter.
The strawberry buttercream sits in the middle—bright, slightly tart, creamy. Freeze-dried strawberry powder contributes concentrated berry flavor without adding moisture that would destabilize the frosting. A small amount of fresh strawberry purée adds depth and a whisper of tartness that prevents the frosting from tasting one-note sweet.
The chocolate drip on top is thin and glossy, not thick or fudgy. It’s meant to contrast against the matte cocoa cake and the pale pink frosting—a visual finish that also adds a final layer of chocolate richness without overwhelming the strawberry balance.
Ingredient Highlights
The cocoa powder here matters. I use Dutch-processed cocoa because it’s darker and slightly less acidic than natural cocoa—it gives the cake a polished, modern look and a deeper chocolate note. If you only have natural cocoa on hand, use it, but expect a slightly brighter, more acidic chocolate flavor and a darker crumb color.
Freeze-dried strawberries are the quiet MVP. They’re shelf-stable, concentrated in flavor, and they don’t add water to the buttercream. If you can’t find them, fresh strawberry purée works, but you’ll need to reduce the liquid elsewhere in the frosting (use slightly less milk) to keep the consistency stable. Skip the fresh berries as a 1:1 swap—they’ll make your frosting weep.
The chocolate for the drip should be real chocolate—not chocolate chips, which contain stabilizers that make drips thick and dull. I use a 60% cacao dark chocolate melted with a small amount of coconut oil or cocoa butter. This keeps the ganache fluid and glossy without being greasy.
Whirl Hook
This cake is built for stability and visual impact. Square layers, strawberry buttercream that holds its shape, and a chocolate drip that stays put. The texture contrast—tender cocoa crumb, creamy frosting, glossy ganache—is where this cake earns its place on the table.
Flavor Spin
Cocoa depth meets strawberry brightness. The espresso in the cake amplifies chocolate without adding coffee flavor. The strawberry buttercream cuts through richness with tartness and fresh berry notes. The chocolate drip adds a final layer of cocoa richness that frames the whole composition.
Whirl Factor
The texture contrast is the engine here: tender, open crumb against stable frosting against a thin, glossy ganache drip. On a square cake, this contrast becomes structural—each layer supports the next, and the flat sides showcase the drip without distraction. This is a cake that looks intentional because the method is intentional.
Cooking Walkthrough
Ingredients
- For the Cake:
- 1 3/4 cups all-purpose flour
- 3/4 cup Dutch-processed cocoa powder
- 1 1/2 teaspoons baking soda
- 1/2 teaspoon baking powder
- 1/2 teaspoon fine sea salt
- 1 teaspoon espresso powder
- 3/4 cup unsalted butter, softened
- 1 3/4 cups granulated sugar
- 3 large eggs, room temperature
- 2 teaspoons vanilla extract
- 3/4 cup sour cream, room temperature
- 3/4 cup hot water
- For the Strawberry Buttercream:
- 10 ounces unsalted butter, softened
- 3 cups powdered sugar
- 3 tablespoons freeze-dried strawberry powder
- 2 tablespoons fresh strawberry purée
- 1/4 teaspoon fine sea salt
- 1 tablespoon heavy cream (if needed)
- For the Chocolate Drip:
- 4 ounces dark chocolate (60% cacao), chopped
- 2 tablespoons coconut oil or cocoa butter
- Pinch of fine sea salt
- For Assembly:
- Fresh strawberries for garnish (optional)
Cake Method
Step 1: Prepare the pans and oven. Heat your oven to 350°F. Line two 8-inch square cake pans with parchment paper, pressing it into the corners. Lightly butter the parchment. This step matters—parchment prevents sticking and makes leveling easier later.
Step 2: Combine dry ingredients. In a medium bowl, whisk together flour, cocoa powder, baking soda, baking powder, salt, and espresso powder. The espresso powder should be fully incorporated—break up any lumps with the back of a spoon. Set aside.
Step 3: Cream butter and sugar. In a large bowl, beat softened butter and sugar together for 3-4 minutes on medium speed until the mixture is pale and fluffy. This step incorporates air, which helps the cake rise evenly. Scrape the sides and bottom of the bowl halfway through.
Step 4: Add eggs and vanilla. Add eggs one at a time, beating well after each addition. Pour in vanilla and mix until combined. The mixture should look smooth and slightly thick, not curdled.
Step 5: Alternate wet and dry ingredients. Add one-third of the dry mixture to the butter mixture and beat on low speed until just combined. Pour in half the sour cream and mix until combined. Repeat: add half the remaining dry mixture, the remaining sour cream, then the last of the dry mixture. Mix until just combined after each addition—overmixing develops gluten and toughens the cake.
Step 6: Add hot water. Pour in the hot water and stir gently until the batter is smooth. The batter will be thin—this is correct. It creates a tender, open crumb that won’t crack when you level the layers.
Step 7: Divide and bake. Divide batter evenly between the prepared pans. Tap each pan gently on the counter to release air bubbles. Bake for 28-32 minutes, until a toothpick inserted in the center comes out with a few moist crumbs. The edges should pull slightly away from the sides of the pan.
Step 8: Cool completely. Let cakes cool in the pans for 15 minutes, then turn out onto wire racks. Cool completely to room temperature before leveling—warm cake is fragile.
Leveling the Layers
Step 9: Level the cakes. Once cool, use a serrated knife or cake leveler to remove the domed top from each square cake. Place the cake on a turntable or flat surface. Hold the knife parallel to the work surface and slowly rotate the cake toward the blade, letting the blade do the work. Aim for a 1/4-inch cut. You want a flat top, not a paper-thin shaving. Save the scraps—they’re useful for filling gaps later if needed.
Strawberry Buttercream
Step 10: Prepare the buttercream base. In a large bowl, beat softened butter on medium speed for 2 minutes until pale and creamy. Gradually add powdered sugar, one cup at a time, beating on low speed to avoid a sugar cloud. Once all sugar is incorporated, increase speed to medium-high and beat for 2-3 minutes until light and fluffy.
Step 11: Add strawberry flavor. Whisk freeze-dried strawberry powder and fresh strawberry purée together in a small bowl to break up any lumps. Add to the buttercream along with salt. Beat on medium speed for 1-2 minutes until the color is even and the flavor is fully incorporated. The buttercream should be pale pink and smell distinctly of strawberry.
Step 12: Adjust consistency. If the buttercream is too thick to pipe, add heavy cream one tablespoon at a time. If it’s too soft, chill for 10 minutes and beat again. You want a consistency that holds a peak but spreads smoothly.
Assembly
Step 13: Create a crumb coat. Place the first cake layer on a turntable or cake board. Using an offset spatula, spread a thin layer of buttercream (about 1/8 inch) over the top. This is the crumb coat—it seals in crumbs and prevents them from mixing into the final frosting layer. Chill for 15 minutes until set.
Step 14: Add the full frosting layer. Spread a thicker layer of buttercream (about 1/2 inch) over the crumb coat. Use the offset spatula to level the top and smooth the sides. Place the second cake layer on top, pressing gently to set it in place.
Step 15: Frost the outside. Spread a thin crumb coat over the top and sides of the assembled cake. Chill for 15 minutes. Apply the final frosting layer, smoothing the top and sides with the offset spatula. For square cakes, take extra time to smooth the corners—this is where bulging happens. Work slowly and keep your spatula warm (dip it in hot water and wipe dry between passes).
Step 16: Chill before dripping. Refrigerate the frosted cake for at least 30 minutes. A chilled cake is more stable and allows the drip to set cleanly without running off.
Chocolate Drip
Step 17: Prepare the ganache. Place chopped chocolate and coconut oil in a heatproof bowl. Heat cream or milk (2 tablespoons) in a small saucepan until steaming. Pour over chocolate and let sit for 1 minute. Stir until smooth and glossy. Add salt. Let cool for 3-5 minutes until the ganache reaches a pourable consistency—it should flow slowly, not run. If it’s too thick, warm it gently. If it’s too thin, let it cool a bit more.
Step 18: Apply the drip. Remove the chilled cake from the refrigerator. Using a spoon or squeeze bottle, apply ganache to the top edge of the cake, letting it drip down the sides. Work around the perimeter. For a square cake, the drips look best when they’re even and reach about halfway down the sides. Chill for 10 minutes to set the drip.
Chef Notes
- I always level my cake layers while they’re completely cool. A warm cake crumbles and tears. If you’re in a hurry, place cooled cakes in the freezer for 20 minutes before leveling—the cold makes the crumb firm and cuts cleaner.
- In my kitchen, I use a bench scraper, not a knife, to frost the sides of square cakes. The flat edge gives me more control over the corners and prevents bulging. Dip it in hot water between passes and wipe it dry.
- Freeze-dried strawberry powder is a game-changer for buttercream. It gives you concentrated flavor without adding moisture. I buy it from specialty baking suppliers or online. If you’re substituting fresh strawberry purée, strain it through a fine sieve first to remove excess liquid.
- The chocolate drip sets faster on a cold cake. If your kitchen is warm, keep the cake in the refrigerator until you’re ready to drip, then return it immediately after. This prevents the drip from sliding off.
- I always test my ganache consistency on a small plate first. A tiny drip tells you if it’s the right thickness before you commit to the whole cake.
Spin Options
Variation 1: Chocolate-Only Cake Skip the strawberry buttercream and make a chocolate buttercream instead. Use the same base recipe but swap the freeze-dried strawberry powder for 2 tablespoons of Dutch-processed cocoa powder and reduce the fresh strawberry purée to 1 tablespoon of heavy cream. The drip stays the same. This version is richer and less bright, perfect if you want to lean into chocolate depth.
Variation 2: Raspberry Buttercream Substitute freeze-dried raspberry powder for freeze-dried strawberry powder in a 1:1 ratio. Raspberry is slightly more tart and pairs beautifully with dark chocolate. The color will be deeper pink, almost mauve. Fresh raspberry purée can replace strawberry purée in the same amount.
Variation 3: Whipped Cream Frosting If you prefer a lighter texture, make a stabilized whipped cream frosting instead. Whip 2 cups heavy cream to soft peaks, then fold in 1/4 cup powdered sugar, 2 tablespoons freeze-dried strawberry powder, and 1/4 teaspoon salt. This frosting is airier and less rich, though it won’t hold as long at room temperature. Use it the day you assemble the cake.
Texture & Taste Expectations
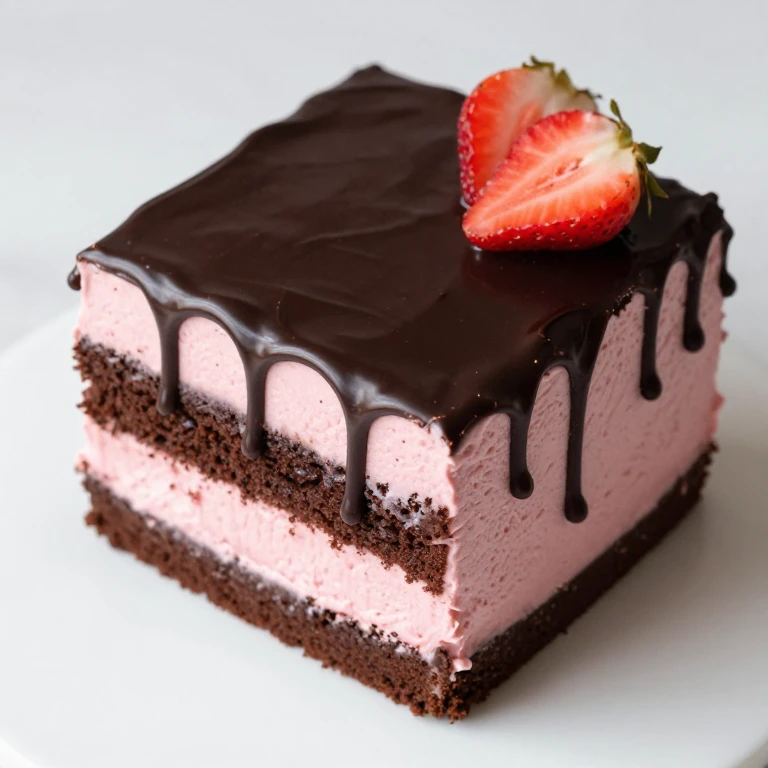
When you slice this cake, you’ll see distinct layers: dark cocoa cake, pale pink frosting, then another layer of cocoa, all topped with a glossy chocolate drip. The crumb is tender and slightly open, not dense. The frosting is creamy and stable, holding its shape on the plate. The chocolate drip adds a thin, glossy finish that contrasts against the matte cocoa and soft pink. On the palate, cocoa comes first, then strawberry sweetness and tartness, then a final hit of chocolate from the drip. The texture progression is soft, then creamy, then a slight snap from the chocolate.
Customization Ideas
- Dairy-Free: Use dairy-free butter for the buttercream and coconut cream (the thick part from a can of full-fat coconut milk) in place of heavy cream for consistency. The drip can use coconut oil in place of cocoa butter. The result will be slightly less stable and richer-tasting, but it works.
- Gluten-Free: Substitute a 1:1 gluten-free flour blend for the all-purpose flour. The cake will be slightly denser and may need an extra minute in the oven. Check for doneness at 30 minutes rather than 28.
- Different Fruit: Blackberry, raspberry, or even passion fruit powder can replace strawberry powder in the buttercream. Use the same amount and adjust tartness to taste with a pinch more salt if needed.
- Add Fresh Berries: Arrange fresh strawberries on top of the frosting before adding the drip for visual impact. Press them gently into the frosting so they stay put.
- Coffee Buttercream: Add 1 teaspoon of instant espresso powder to the buttercream base for a mocha-inspired version. Skip the strawberry element or reduce it to 1 tablespoon of powder for a subtle berry undertone.
Pairing Ideas
This cake pairs beautifully with a simple espresso or a cold glass of milk—the cocoa and strawberry both benefit from the contrast. For a more elevated pairing, serve with a dry rosé or a light Pinot Noir; the acidity in the wine echoes the tartness of the strawberry buttercream. If you’re serving this at brunch, pair it with fresh whipped cream on the side and a fruit salad to echo the strawberry theme without repeating it.
Whirl Finish
Store the frosted, assembled cake in the refrigerator, covered loosely with plastic wrap or under a cake dome, for up to 3 days. The cocoa cake stays moist, and the buttercream holds its shape. The chocolate drip may soften slightly at room temperature, so keep the cake chilled until serving. If you’ve added fresh strawberries on top, eat within 24 hours for the best texture. You can freeze the unfrosted cake layers for up to 2 weeks, wrapped tightly in plastic wrap. Thaw at room temperature before frosting and assembling.
FAQ
Can I make this cake in round pans instead of square?
Yes, but the visual impact changes. Use two 8-inch round pans and bake for 30-35 minutes. You’ll lose the modern, architectural look that square layers provide, and the drip will run differently on curved sides. The flavor and texture remain the same.
Why does my buttercream look grainy?
Grainy buttercream usually means the sugar didn’t fully dissolve or the butter was too cold. Make sure your butter is softened (about 65-70°F) before you start, and beat the sugar in gradually. If it’s already grainy, warm the bowl gently over a pot of hot water while beating, or chill it for 10 minutes and beat again.
How do I prevent the chocolate drip from sliding off?
The cake must be chilled before you drip, and the ganache must be the right consistency. Too warm, and it runs. Too thick, and it doesn’t drip at all. Test on a small plate first. If it’s sliding off, let the ganache cool for another minute or two before applying.
Can I make the buttercream ahead of time?
Yes. Make it up to 3 days ahead and store it in an airtight container in the refrigerator. Before using, let it come to room temperature and beat it for 1-2 minutes to restore the fluffy texture. If it’s still soft after beating, chill it for 10 minutes and beat again.
What’s the difference between freeze-dried strawberry powder and fresh strawberry purée?
Freeze-dried powder is shelf-stable, concentrated in flavor, and adds no moisture to the buttercream. Fresh purée adds water, which can soften the frosting. I use both in this recipe for flavor depth and slight tartness. If you only have one, use freeze-dried powder for stability or fresh purée with less heavy cream to compensate for the moisture.
How do I get clean, even slices?
Use a long, thin-bladed knife dipped in hot water and wiped dry between cuts. A warm knife slides through frosting cleanly without dragging. For the cleanest edges, chill the cake for at least 1 hour before slicing.
Can I skip the crumb coat?
I don’t recommend it. The crumb coat seals in loose crumbs and prevents them from mixing into the final frosting layer, which makes the cake look polished. It takes 15 minutes and makes a visible difference in the final appearance.
Chocolate Strawberry Square Layer Cake With Drip
Ingredients
Method
- Heat oven to 350°F. Line two 8-inch square cake pans with parchment paper, pressing it into the corners. Lightly butter the parchment.
- In a medium bowl, whisk together flour, cocoa powder, baking soda, baking powder, salt, and espresso powder. Break up any lumps with the back of a spoon. Set aside.
- In a large bowl, beat softened butter and sugar together for 3-4 minutes on medium speed until pale and fluffy. Scrape the sides and bottom of the bowl halfway through.
- Add eggs one at a time, beating well after each addition. Pour in vanilla and mix until combined.
- Add one-third of the dry mixture to the butter mixture and beat on low speed until just combined. Pour in half the sour cream and mix until combined. Repeat: add half the remaining dry mixture, the remaining sour cream, then the last of the dry mixture. Mix until just combined after each addition.
- Pour in hot water and stir gently until the batter is smooth.
- Divide batter evenly between the prepared pans. Tap each pan gently on the counter to release air bubbles. Bake for 28-32 minutes, until a toothpick inserted in the center comes out with a few moist crumbs.
- Let cakes cool in the pans for 15 minutes, then turn out onto wire racks. Cool completely to room temperature before leveling.
- Once cool, use a serrated knife or cake leveler to remove the domed top from each square cake. Place the cake on a turntable or flat surface. Hold the knife parallel to the work surface and slowly rotate the cake toward the blade. Aim for a 1/4-inch cut.
- In a large bowl, beat softened butter on medium speed for 2 minutes until pale and creamy. Gradually add powdered sugar, one cup at a time, beating on low speed. Once all sugar is incorporated, increase speed to medium-high and beat for 2-3 minutes until light and fluffy.
- Whisk freeze-dried strawberry powder and fresh strawberry purée together in a small bowl. Add to the buttercream along with salt. Beat on medium speed for 1-2 minutes until the color is even and the flavor is fully incorporated.
- If the buttercream is too thick to pipe, add heavy cream one tablespoon at a time. If it's too soft, chill for 10 minutes and beat again.
- Place the first cake layer on a turntable or cake board. Using an offset spatula, spread a thin layer of buttercream (about 1/8 inch) over the top. Chill for 15 minutes until set.
- Spread a thicker layer of buttercream (about 1/2 inch) over the crumb coat. Use the offset spatula to level the top and smooth the sides. Place the second cake layer on top, pressing gently to set it in place.
- Spread a thin crumb coat over the top and sides of the assembled cake. Chill for 15 minutes. Apply the final frosting layer, smoothing the top and sides with the offset spatula. Take extra time to smooth the corners. Work slowly and keep your spatula warm.
- Refrigerate the frosted cake for at least 30 minutes.
- Place chopped chocolate and coconut oil in a heatproof bowl. Heat 2 tablespoons cream in a small saucepan until steaming. Pour over chocolate and let sit for 1 minute. Stir until smooth and glossy. Add salt. Let cool for 3-5 minutes until the ganache reaches a pourable consistency.
- Remove the chilled cake from the refrigerator. Using a spoon or squeeze bottle, apply ganache to the top edge of the cake, letting it drip down the sides. Work around the perimeter. Chill for 10 minutes to set the drip.