
Whether you’re decorating a weeknight sheet cake or impressing guests at a dinner party, strawberry cakes deserve more than a simple swirl. I’ve found that adding hand-drawn elements—stencils, piped outlines, buttercream transfers—transforms a basic cake into something that feels intentional and modern. The beauty of these techniques is that they work across every occasion: a quick Tuesday dessert, a showstopping centerpiece, a batch-prepped layer for the freezer, or a kid-friendly project that builds confidence in the kitchen. What ties them together is one core idea: bold, purposeful decoration that actually tastes as good as it looks.
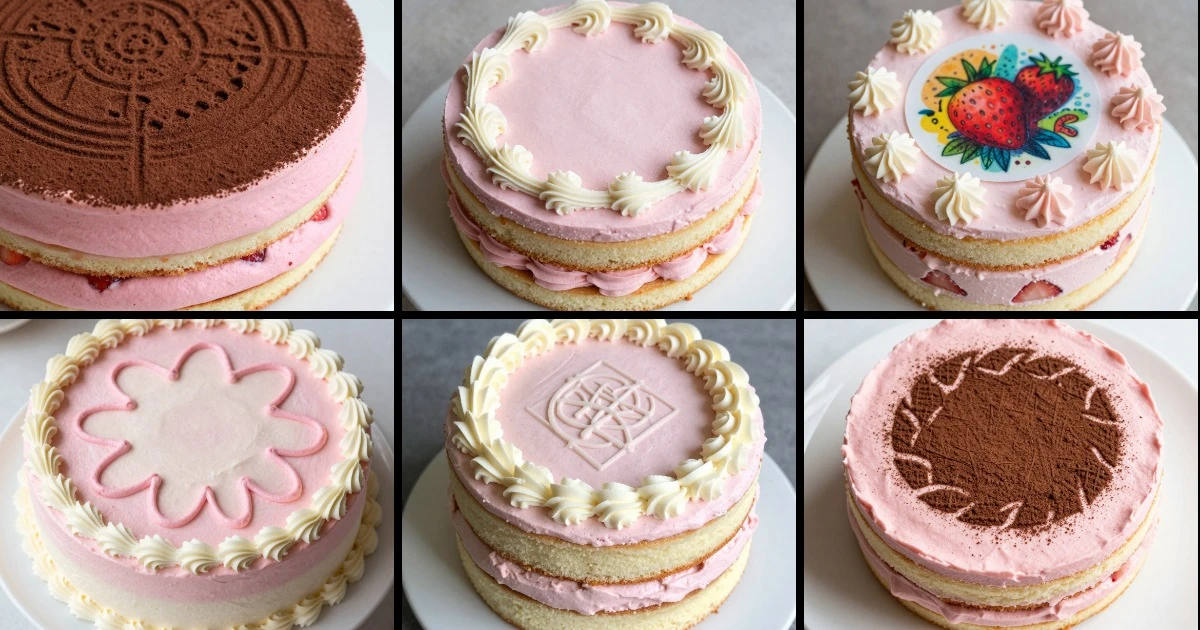
In this collection, I’m walking you through 12 strawberry cake concepts that lean into drawing and stenciling as the signature finish. Each one pairs a reliable cake base with a specific decorating method—cocoa powder stencils, outline-and-fill piping, buttercream transfer sheets, edible-ink toppers, and more. You’ll learn which frosting consistency holds clean lines, how to prevent smudging, and how to scale designs from round layers to sheet cakes. These aren’t complicated techniques; they’re just intentional ones.
Strawberry Cake Recipes for Weeknight — Fast Decorating, Maximum Impact
Weeknight strawberry cakes need speed without sacrifice. These recipes come together in under 45 minutes from bowl to table, with decorating methods that deliver polish without fuss. I’ve chosen techniques that work with simple tools and dry hands, because Tuesday nights don’t have time for piping bags that slip.
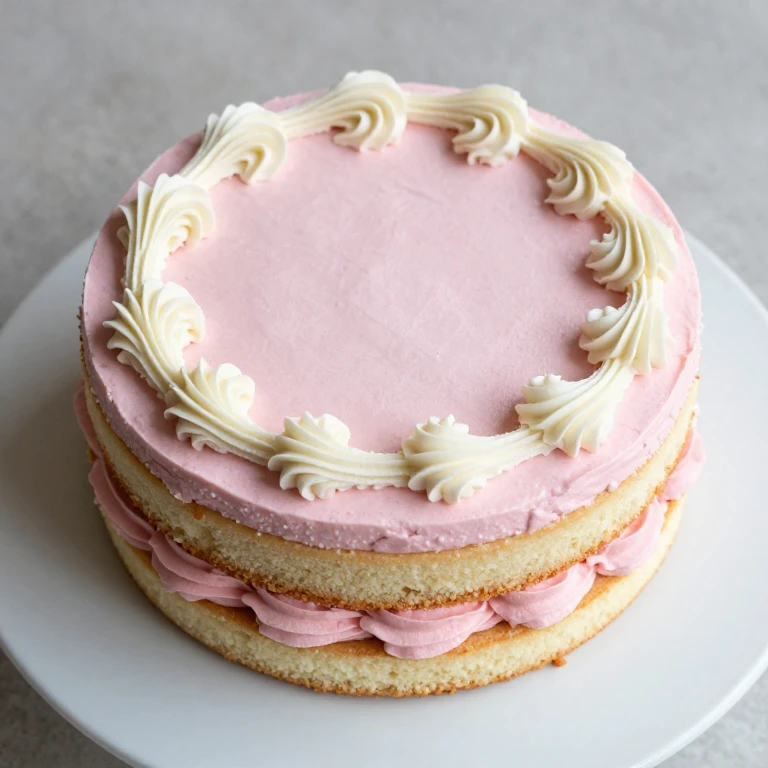
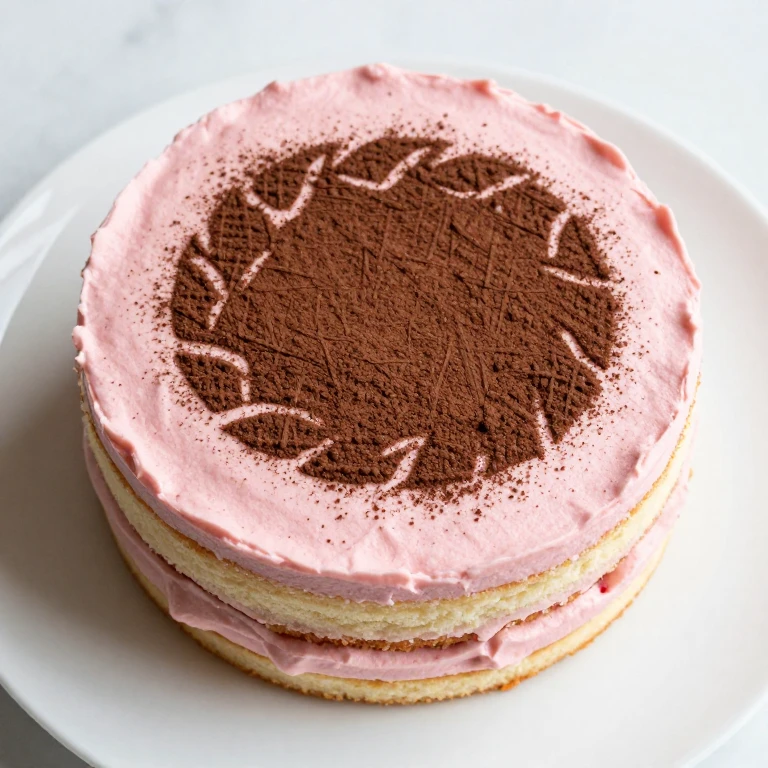
1. Cocoa Powder Stencil Strawberry Layer Cake
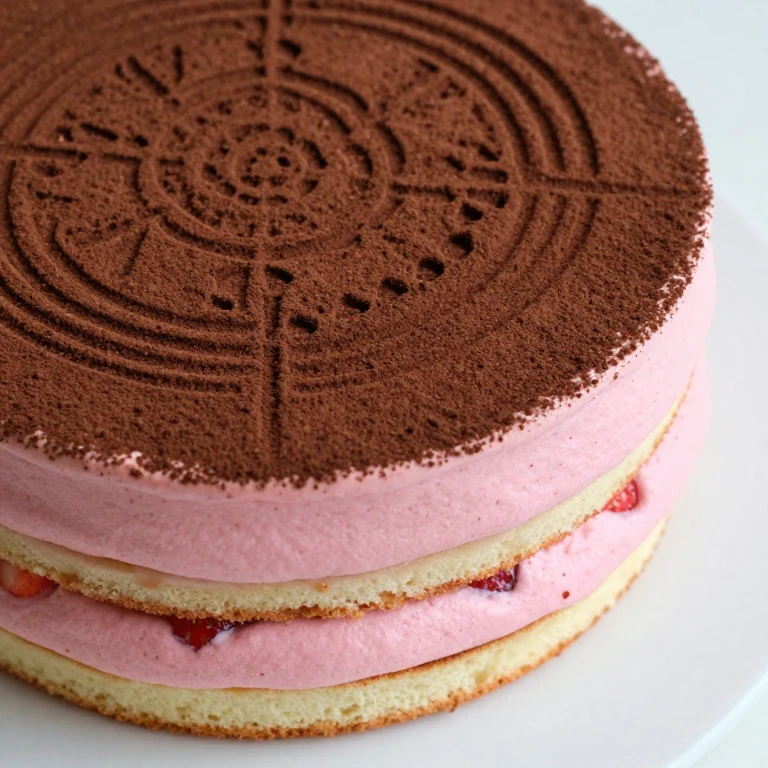
This is my go-to when I need a cake that looks gallery-ready but doesn’t demand precision piping. A simple two-layer vanilla cake gets frosted with strawberry buttercream, then a cocoa powder stencil creates a bold, graphic top. The stencil method is forgiving—dust, lift, done—and the result feels intentional without fiddling.
Ingredients
- 1 3/4 cups all-purpose flour
- 1 1/2 tsp baking powder
- 1/2 tsp salt
- 1/2 cup unsalted butter, softened
- 1 cup granulated sugar
- 2 large eggs
- 1/2 cup whole milk
- 1 tsp vanilla extract
- 1 cup strawberry buttercream (butter, powdered sugar, strawberry puree, pinch of salt)
- 2 tbsp unsweetened cocoa powder
- 1 stencil (geometric or floral pattern)
Instructions
- Preheat oven to 350°F. Grease and flour two 6-inch round pans.
- Whisk together flour, baking powder, and salt in a small bowl.
- Cream butter and sugar until pale and fluffy, about 3 minutes.
- Add eggs one at a time, beating well after each addition.
- Alternate adding flour mixture and milk, starting and ending with flour. Stir in vanilla.
- Divide batter between prepared pans and smooth the tops.
- Bake for 18–22 minutes, until a toothpick inserted in the center comes out clean.
- Cool in pans for 10 minutes, then turn out onto a wire rack to cool completely.
- Level the cake layers if domed, then place one layer on a serving plate.
- Spread a thin layer of strawberry buttercream on the first layer, then top with the second layer.
- Frost the top and sides with remaining buttercream, smoothing with an offset spatula.
- Place the stencil on top of the frosted cake, holding it firmly in place.
- Dust cocoa powder evenly over the stencil using a fine-mesh sieve.
- Carefully lift the stencil straight up to reveal the pattern.
Whirl Factor: The cocoa stencil creates a bold, graphic contrast against pale pink strawberry frosting. The texture is purely visual—no added crunch or complexity, just a modern finish that takes 3 minutes.
Weeknight Win: Total active time is 35 minutes. The stencil sits on top of set frosting, so there’s no piping precision required.
Storage: Keep covered at room temperature for up to 6 hours, or refrigerate for up to 2 days.
2. Outline-and-Fill Strawberry Shortcake
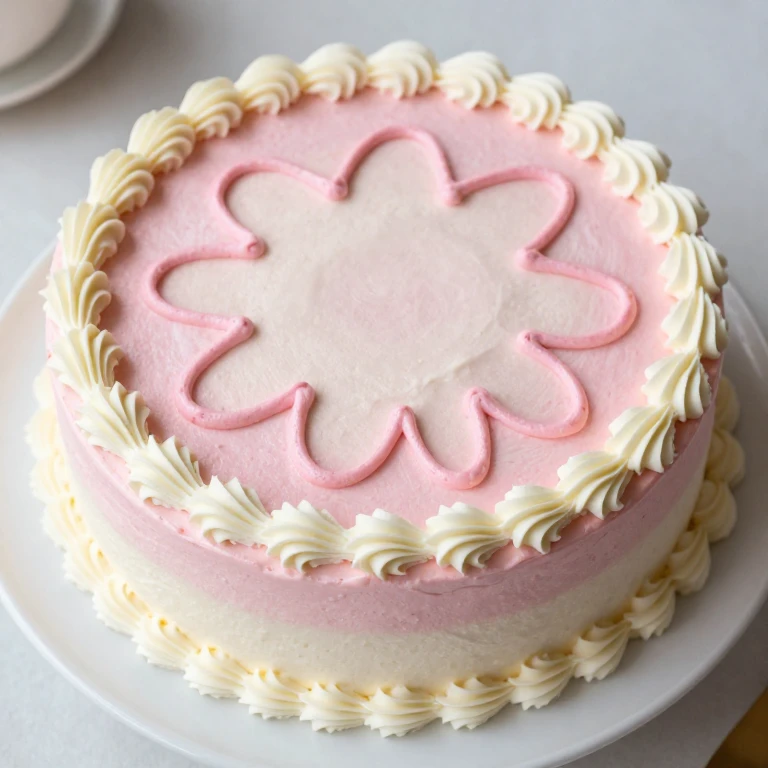
When I want something even faster, I skip the stencil and go straight to outline-and-fill piping. A single layer of fluffy vanilla cake gets a strawberry buttercream base, then I pipe a simple outline (circles, scallops, or a geometric border) and fill it with a contrasting color. The method is forgiving because the outline holds the fill in place.
Ingredients
- 1 1/2 cups all-purpose flour
- 1 1/4 tsp baking powder
- 1/2 tsp salt
- 1/3 cup unsalted butter, softened
- 2/3 cup granulated sugar
- 1 large egg
- 1/3 cup whole milk
- 1 tsp vanilla extract
- 1 1/2 cups strawberry buttercream (for base frosting)
- 1/2 cup white buttercream (for outline piping)
- 1/2 cup pink buttercream (for fill)
- 1 piping bag with round tip (#3 or #4)
Instructions
- Preheat oven to 350°F. Grease and flour one 8-inch round pan.
- Whisk together flour, baking powder, and salt.
- Cream butter and sugar until light and fluffy, about 2 minutes.
- Add egg, beating well. Alternate adding flour mixture and milk, starting and ending with flour. Stir in vanilla.
- Pour into prepared pan and smooth the top.
- Bake for 20–24 minutes, until a toothpick comes out clean.
- Cool in pan for 10 minutes, then turn out onto a wire rack to cool completely.
- Place the cooled cake on a serving plate and spread the strawberry buttercream base evenly across the top.
- Fill a piping bag with white buttercream and pipe an outline pattern—circles, scallops, or a simple border—onto the frosted surface.
- Switch to the pink buttercream and carefully fill the outlined shapes, using a small offset spatula or the back of a spoon to spread gently.
- Let the frosting set for 15 minutes before serving.
Whirl Factor: The contrast between white outline and pink fill creates a bold graphic effect. The texture is smooth throughout, so the visual contrast is the star.
Weeknight Win: This single-layer cake is ready in 40 minutes total. Outline-and-fill is faster than intricate piping because the outline acts as a guide.
Storage: Keep at room temperature for up to 8 hours, or refrigerate for up to 3 days.
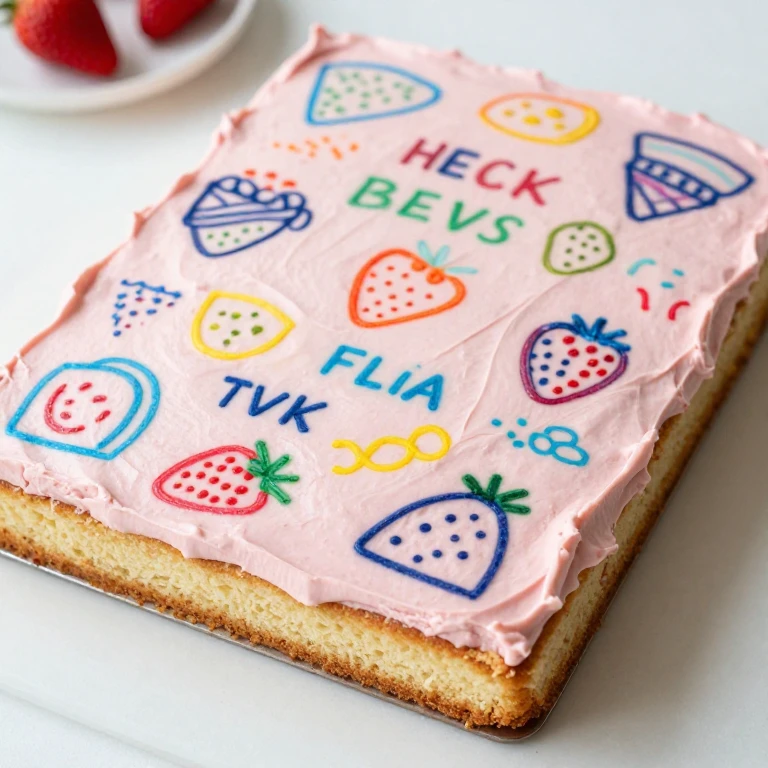
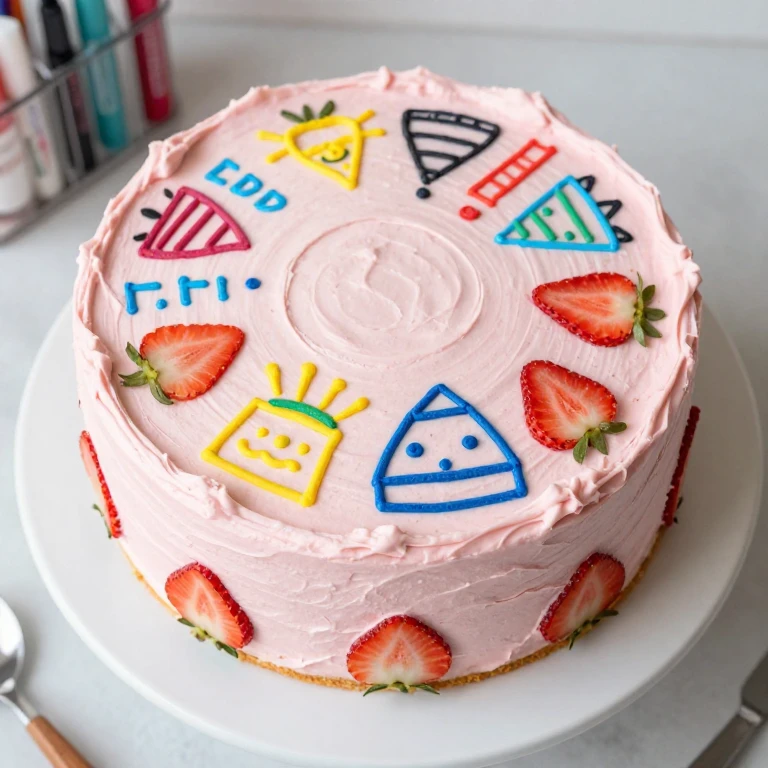
3. Edible-Marker Doodle Strawberry Sheet Cake
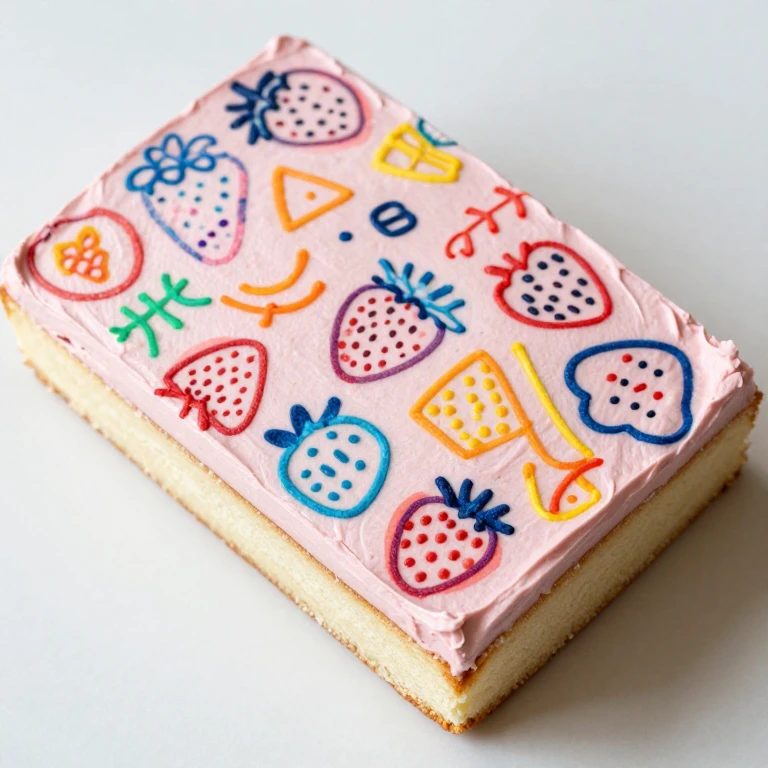
I reach for edible markers when I want the fastest possible decorated cake. A sheet cake of strawberry-vanilla gets a smooth buttercream base, then I sketch a simple pattern directly onto the frosting with food-safe markers. Lines stay crisp for hours, and the method is completely forgiving because you can wipe and redraw as you go.
Ingredients
- 2 1/4 cups all-purpose flour
- 2 tsp baking powder
- 1/2 tsp salt
- 3/4 cup unsalted butter, softened
- 1 1/2 cups granulated sugar
- 3 large eggs
- 3/4 cup whole milk
- 1 1/2 tsp vanilla extract
- 1/2 tsp strawberry extract (optional, for deeper flavor)
- 2 cups strawberry buttercream
- Edible markers (food-safe, any colors)
Instructions
- Preheat oven to 350°F. Grease and flour a 9×13-inch sheet pan.
- Whisk together flour, baking powder, and salt.
- Cream butter and sugar until pale and fluffy, about 3 minutes.
- Add eggs one at a time, beating well after each addition.
- Alternate adding flour mixture and milk, starting and ending with flour. Stir in vanilla and strawberry extract if using.
- Pour into prepared pan and smooth the top.
- Bake for 25–30 minutes, until a toothpick inserted in the center comes out clean.
- Cool completely in the pan on a wire rack.
- Spread strawberry buttercream evenly across the entire top of the cooled cake using an offset spatula.
- Once the frosting is set (about 15 minutes), use edible markers to sketch your design directly onto the surface. Try simple lines, geometric patterns, or hand-lettered words.
- Let the marker ink set for 5 minutes before serving.
Whirl Factor: Edible markers deliver graphic, hand-drawn detail without any piping skill. The finish is modern and intentional, with the marker lines staying crisp against soft buttercream.
Weeknight Win: Decorating takes 5 minutes. This is the fastest method in the collection.
Storage: Keep covered at room temperature for up to 12 hours. The marker lines may soften slightly if refrigerated, so serve within a day.
Strawberry Cake Recipes for Dinner Party — Make-Ahead Components and Showstopping Finishes
Dinner party strawberry cakes need to impress and hold up under scrutiny. These recipes pair reliable cake structures with decorating techniques that can be prepped ahead, letting you focus on plating and presentation the day of. I’ve chosen methods that look intricate but actually reward advance planning.
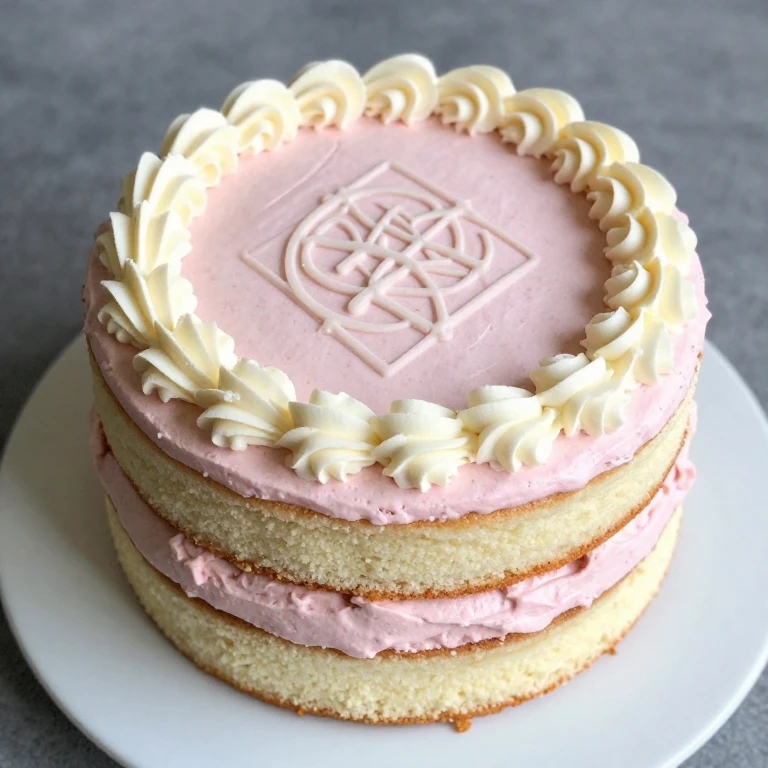
4. Buttercream Transfer Sheet Strawberry Torte
This is my signature dinner party move. I pipe an intricate design onto parchment paper, freeze it solid, then transfer it to the frosted cake just before serving. The design looks hand-piped and impossibly detailed, but the actual piping happens days ahead in your own time. The transfer method is a game-changer for stress-free entertaining.
Ingredients
- 2 cups all-purpose flour
- 2 tsp baking powder
- 1/2 tsp salt
- 3/4 cup unsalted butter, softened
- 1 1/2 cups granulated sugar
- 3 large eggs
- 3/4 cup whole milk
- 2 tsp vanilla extract
- 2 cups strawberry buttercream (for frosting the cake)
- 1 1/2 cups white buttercream (for piping the transfer design)
- Parchment paper
- 1 piping bag with fine round tip (#2)
Instructions
- Preheat oven to 350°F. Grease and flour two 8-inch round pans.
- Whisk together flour, baking powder, and salt.
- Cream butter and sugar until pale and fluffy, about 3 minutes.
- Add eggs one at a time, beating well after each addition.
- Alternate adding flour mixture and milk, starting and ending with flour. Stir in vanilla.
- Divide batter between prepared pans.
- Bake for 20–24 minutes, until a toothpick comes out clean.
- Cool in pans for 10 minutes, then turn out onto wire racks to cool completely.
- While cakes cool, prepare the transfer design. Tape a sheet of parchment paper to a flat baking sheet. Using a pencil, lightly sketch your design (vines, florals, geometric patterns) on the back of the parchment.
- Fill a piping bag with white buttercream and pipe over the pencil lines, creating an intricate pattern. Make the design slightly larger than your cake top.
- Freeze the piped design for at least 4 hours, or overnight.
- Level the cake layers, then place one on a serving plate. Spread a thin layer of strawberry buttercream on top, then add the second layer.
- Frost the top and sides with remaining strawberry buttercream, smoothing with an offset spatula.
- Remove the frozen transfer from the freezer. Peel the parchment paper away from the buttercream design.
- Carefully place the transfer design on top of the frosted cake, pressing gently to adhere. It will thaw and set within 10 minutes.
Whirl Factor: The transfer design creates an intricate, hand-piped look that’s actually made days ahead. The contrast is visual—white piped detail against pink frosting—and the texture is pure butter and sugar, no crunch.
Make-Ahead Note: The transfer design can be piped and frozen up to 1 week ahead. The cake layers can be baked and wrapped 1 day ahead. Assemble and transfer on the day of serving.
Storage: Keep refrigerated for up to 3 days. Remove from the fridge 30 minutes before serving to bring to room temperature.
5. Stenciled Cocoa Dust Strawberry Layer Cake with Piped Border
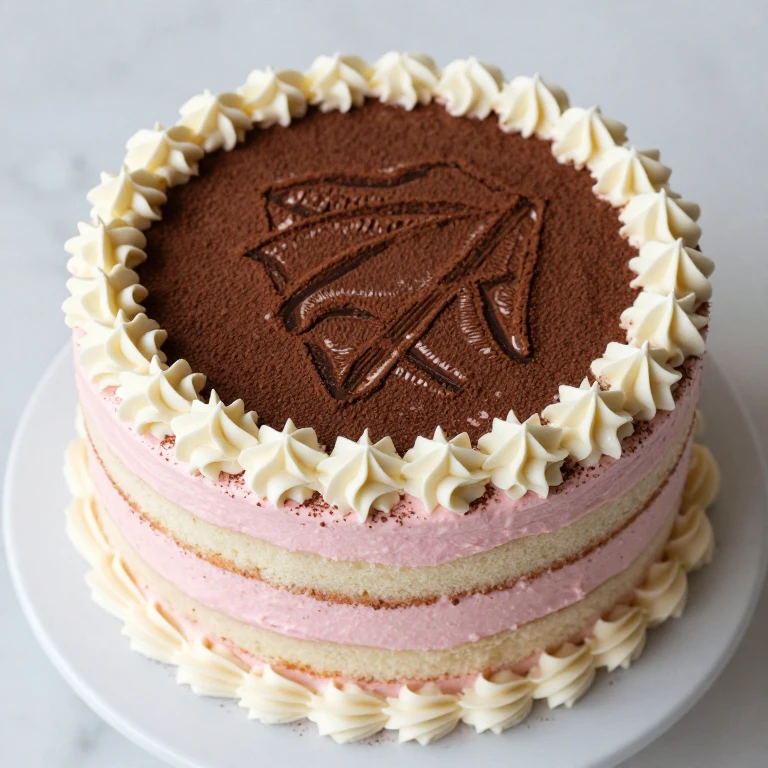
When I want to combine techniques, I layer a stencil pattern with a piped border. The cocoa dust stencil creates a bold center, while a piped buttercream border frames it. The two methods together look intricate but each component is simple and can be prepped separately.
Ingredients
- 2 1/4 cups all-purpose flour
- 2 tsp baking powder
- 1/2 tsp salt
- 3/4 cup unsalted butter, softened
- 1 1/2 cups granulated sugar
- 3 large eggs
- 3/4 cup whole milk
- 2 tsp vanilla extract
- 2 1/2 cups strawberry buttercream (for frosting)
- 3/4 cup white buttercream (for border piping)
- 3 tbsp unsweetened cocoa powder
- 1 stencil (floral or geometric)
- 1 piping bag with star tip (#16 or #18)
Instructions
- Preheat oven to 350°F. Grease and flour two 8-inch round pans.
- Whisk together flour, baking powder, and salt.
- Cream butter and sugar until pale, about 3 minutes.
- Add eggs one at a time, beating well. Alternate adding flour mixture and milk, starting and ending with flour. Stir in vanilla.
- Divide batter between prepared pans.
- Bake for 20–24 minutes, until a toothpick comes out clean.
- Cool in pans for 10 minutes, then turn out onto wire racks to cool completely.
- Level the cake layers and place one on a serving plate. Spread a thin layer of strawberry buttercream on top, then add the second layer.
- Frost the top and sides with remaining strawberry buttercream, smoothing with an offset spatula.
- Place the stencil on top of the frosted cake, holding it firmly in place.
- Dust cocoa powder evenly over the stencil using a fine-mesh sieve.
- Carefully lift the stencil straight up to reveal the pattern.
- Fill a piping bag with white buttercream and a star tip. Pipe a border around the edge of the cake top, creating a frame for the stenciled design.
- Let the frosting set for 15 minutes before serving.
Whirl Factor: The cocoa stencil creates a bold center graphic, while the white piped border adds dimensionality and frames the design. The texture contrast is visual—smooth frosting with a piped relief border.
Make-Ahead Note: The cake layers can be baked 1 day ahead. The stencil and piped border are applied on serving day, but each takes only minutes.
Storage: Keep refrigerated for up to 3 days. Bring to room temperature 30 minutes before serving.
6. Edible-Ink Printed Strawberry Cake with Hand-Piped Accents

For a truly show-stopping centerpiece, I combine edible ink printing (using an edible printer and special frosting sheets) with hand-piped buttercream accents. The printed design does the heavy lifting, while piped details add dimension and a personal touch. This method feels luxe but is actually quite manageable if you have access to an edible printer.
Ingredients
- 2 1/4 cups all-purpose flour
- 2 tsp baking powder
- 1/2 tsp salt
- 3/4 cup unsalted butter, softened
- 1 1/2 cups granulated sugar
- 3 large eggs
- 3/4 cup whole milk
- 2 tsp vanilla extract
- 2 1/2 cups strawberry buttercream (for frosting)
- 1 edible frosting sheet (printed with your chosen design)
- 1 cup white buttercream (for piped accents)
- 1 piping bag with fine round tip (#2)
Instructions
- Preheat oven to 350°F. Grease and flour two 8-inch round pans.
- Whisk together flour, baking powder, and salt.
- Cream butter and sugar until pale and fluffy, about 3 minutes.
- Add eggs one at a time, beating well. Alternate adding flour mixture and milk, starting and ending with flour. Stir in vanilla.
- Divide batter between prepared pans.
- Bake for 20–24 minutes, until a toothpick comes out clean.
- Cool in pans for 10 minutes, then turn out onto wire racks to cool completely.
- Level the cake layers and place one on a serving plate. Spread a thin layer of strawberry buttercream on top, then add the second layer.
- Frost the top and sides with remaining strawberry buttercream, smoothing with an offset spatula.
- Once the frosting is set, carefully peel the backing from the edible frosting sheet and center it on top of the cake.
- Gently smooth any air bubbles by pressing lightly from the center outward.
- Fill a piping bag with white buttercream and add hand-piped accents around the printed design—small dots, vines, or geometric details that complement the printed pattern.
- Let the frosting set for 15 minutes before serving.
Whirl Factor: The edible ink print provides a detailed, professional-looking design, while hand-piped accents add a bespoke, artisanal touch. The texture is entirely smooth and creamy.
Make-Ahead Note: The edible frosting sheet can be printed 1 week ahead and stored flat in a dry place. The cake can be baked 1 day ahead. Assemble and apply the sheet on serving day.
Storage: Keep refrigerated for up to 3 days. Bring to room temperature 30 minutes before serving.
Strawberry Cake Recipes for Meal Prep — Batch-Baked Layers, Freezer-Friendly, and Reheating Guidance
Meal prep strawberry cakes are all about efficiency and reliability. I batch-bake multiple layers, freeze them separately, and assemble with pre-made frosting. These recipes are built to hold up through freezing and thawing without drying out, so you can decorate as needed throughout the week. Each entry includes specific reheating and thawing guidance.
7. Batch-Baked Vanilla Cake Layers with Strawberry Buttercream Stencil

I bake four cake layers at once, wrap them individually, and freeze for up to 3 weeks. When I need a decorated cake, I thaw, frost, and stencil—the whole assembly takes 15 minutes. This method is perfect for meal prepping because the layers stay moist and the frosting is always ready to go.
Ingredients
- 4 1/2 cups all-purpose flour
- 4 tsp baking powder
- 1 tsp salt
- 1 1/2 cups unsalted butter, softened
- 3 cups granulated sugar
- 6 large eggs
- 1 1/2 cups whole milk
- 4 tsp vanilla extract
- 4 cups strawberry buttercream (divided for frosting and stenciling)
- 4 tbsp unsweetened cocoa powder
- 2 stencils (for variety across batches)
Instructions
- Preheat oven to 350°F. Grease and flour four 8-inch round pans.
- Whisk together flour, baking powder, and salt.
- Cream butter and sugar until pale and fluffy, about 4 minutes.
- Add eggs one at a time, beating well after each addition.
- Alternate adding flour mixture and milk, starting and ending with flour. Stir in vanilla.
- Divide batter evenly among prepared pans.
- Bake for 18–22 minutes, until a toothpick inserted in the center comes out clean.
- Cool in pans for 10 minutes, then turn out onto wire racks to cool completely.
- Once cooled, wrap each layer individually in plastic wrap, then in foil. Label with the date.
- Freeze for up to 3 weeks.
- When ready to assemble, thaw layers at room temperature for 2 hours until completely soft.
- Place one thawed layer on a serving plate and spread a thin layer of strawberry buttercream on top.
- Add the second layer and repeat, stacking all four layers with frosting between each.
- Frost the top and sides with remaining buttercream, smoothing with an offset spatula.
- Place a stencil on top and dust with cocoa powder. Lift the stencil to reveal the pattern.
Whirl Factor: The cocoa stencil adds a bold graphic finish to a moist, freezer-friendly cake. The texture contrast is visual—smooth frosting with a fine cocoa powder pattern.
Meal Prep Advantage: Bake all four layers at once. Freeze individually for up to 3 weeks. Thaw and assemble in 20 minutes total.
Reheating Note: Do not reheat. Thaw at room temperature for 2 hours. The cake is best served at room temperature or lightly chilled.
Storage: Assembled cake keeps refrigerated for up to 4 days. Freeze unbaked layers for up to 3 weeks.
8. Make-Ahead Strawberry Sheet Cake with Edible-Marker Designs
I bake a full sheet cake, freeze it plain, then thaw and decorate with edible markers as needed throughout the week. This approach gives me flexibility—I can create different designs on the same cake base, or divide the sheet into portions with individual decorations. The cake stays moist and the markers work beautifully on thawed frosting.
Ingredients
- 2 1/4 cups all-purpose flour
- 2 tsp baking powder
- 1/2 tsp salt
- 3/4 cup unsalted butter, softened
- 1 1/2 cups granulated sugar
- 3 large eggs
- 3/4 cup whole milk
- 1 1/2 tsp vanilla extract
- 1/2 tsp strawberry extract (optional)
- 2 cups strawberry buttercream
- Edible markers (food-safe, multiple colors)
Instructions
- Preheat oven to 350°F. Grease and flour a 9×13-inch sheet pan.
- Whisk together flour, baking powder, and salt.
- Cream butter and sugar until pale, about 3 minutes.
- Add eggs one at a time, beating well. Alternate adding flour mixture and milk, starting and ending with flour. Stir in vanilla and strawberry extract if using.
- Pour into prepared pan and smooth the top.
- Bake for 25–30 minutes, until a toothpick inserted in the center comes out clean.
- Cool completely in the pan on a wire rack.
- Spread strawberry buttercream evenly across the top, smoothing with an offset spatula.
- Wrap the frosted cake tightly in plastic wrap, then in foil.
- Freeze for up to 2 weeks.
- When ready to decorate, thaw at room temperature for 3 hours until completely soft.
- Use edible markers to sketch designs directly onto the frosting. Try different patterns on different sections of the cake.
- Let the marker ink set for 5 minutes before serving or cutting.
Whirl Factor: Edible markers deliver instant, customizable graphic detail. The finish is hand-drawn and modern, with the flexibility to change designs based on occasion.
Meal Prep Advantage: Bake and frost the entire cake ahead, then freeze. Decorate on demand in minutes using edible markers.
Reheating Note: Do not reheat. Thaw at room temperature for 3 hours. The cake is best served at room temperature.
Storage: Freeze frosted cake for up to 2 weeks before decorating. Once decorated, keep at room temperature for up to 12 hours.
9. Freezer-Friendly Strawberry Cake Layers with Piped Buttercream Transfers
I bake multiple cake layers, freeze them plain, and prepare buttercream transfer designs in advance. When I thaw the cake, I apply the frozen transfers, which set quickly and look intricate. This method separates the work—baking, transfer-piping, and assembly happen on different days, making meal prep stress-free.
Ingredients
- 2 cups all-purpose flour
- 2 tsp baking powder
- 1/2 tsp salt
- 3/4 cup unsalted butter, softened
- 1 1/2 cups granulated sugar
- 3 large eggs
- 3/4 cup whole milk
- 2 tsp vanilla extract
- 2 cups strawberry buttercream (for frosting)
- 1 1/2 cups white buttercream (for transfer designs)
- Parchment paper
- 1 piping bag with fine round tip (#2)
Instructions
- Preheat oven to 350°F. Grease and flour three 8-inch round pans.
- Whisk together flour, baking powder, and salt.
- Cream butter and sugar until pale, about 3 minutes.
- Add eggs one at a time, beating well. Alternate adding flour mixture and milk, starting and ending with flour. Stir in vanilla.
- Divide batter evenly among prepared pans.
- Bake for 20–24 minutes, until a toothpick comes out clean.
- Cool in pans for 10 minutes, then turn out onto wire racks to cool completely.
- Wrap each cooled layer individually in plastic wrap, then in foil. Freeze for up to 3 weeks.
- To prepare the transfers, tape parchment paper to a baking sheet. Lightly sketch your design on the back with a pencil.
- Fill a piping bag with white buttercream and pipe over the pencil lines, creating an intricate pattern.
- Freeze the piped transfers for at least 4 hours, or up to 1 week.
- When ready to assemble, thaw the cake layers at room temperature for 2 hours until completely soft.
- Place one thawed layer on a serving plate and spread a thin layer of strawberry buttercream on top. Add the second layer and repeat.
- Top with the third layer and frost the entire cake with remaining buttercream, smoothing with an offset spatula.
- Remove a frozen transfer from the freezer and peel the parchment away from the buttercream design.
- Carefully place the transfer on top of the frosted cake, pressing gently. It will thaw and set within 10 minutes.
Whirl Factor: The transfer design looks hand-piped and intricate, but it’s made days ahead and frozen until assembly. The texture is smooth buttercream throughout.
Meal Prep Advantage: Separate the work into three stages: bake layers (freeze up to 3 weeks), pipe transfers (freeze up to 1 week), assemble and apply transfer (15 minutes on serving day).
Reheating Note: Do not reheat. Thaw layers at room temperature for 2 hours. The transfer will thaw as it sits on the cake.
Storage: Freeze baked layers for up to 3 weeks. Freeze piped transfers for up to 1 week. Assembled cake keeps refrigerated for up to 3 days.
10. Batch-Prepped Strawberry Cake with Stencil and Cocoa Dust
I bake a large batch of single-layer cakes, freeze them plain, and apply stencil designs as needed. Each cake is individual-sized, so I can decorate them one at a time or all at once. The stencil method is fast and consistent, making it perfect for meal prepping multiple cakes for different occasions throughout the week.
Ingredients
- 2 1/4 cups all-purpose flour
- 2 tsp baking powder
- 1/2 tsp salt
- 3/4 cup unsalted butter, softened
- 1 1/2 cups granulated sugar
- 3 large eggs
- 3/4 cup whole milk
- 2 tsp vanilla extract
- 3 cups strawberry buttercream (divided among 4 cakes)
- 4 tbsp unsweetened cocoa powder
- 4 stencils (one per cake, can be the same or different designs)
Instructions
- Preheat oven to 350°F. Grease and flour four 6-inch round pans.
- Whisk together flour, baking powder, and salt.
- Cream butter and sugar until pale, about 3 minutes.
- Add eggs one at a time, beating well. Alternate adding flour mixture and milk, starting and ending with flour. Stir in vanilla.
- Divide batter evenly among prepared pans.
- Bake for 18–22 minutes, until a toothpick comes out clean.
- Cool in pans for 10 minutes, then turn out onto wire racks to cool completely.
- Wrap each cooled cake individually in plastic wrap, then in foil. Freeze for up to 2 weeks.
- When ready to decorate, thaw one cake at a time at room temperature for 1 hour until soft.
- Place the thawed cake on a serving plate and spread strawberry buttercream evenly across the top, smoothing with an offset spatula.
- Place a stencil on top of the frosting, holding it firmly in place.
- Dust cocoa powder evenly over the stencil using a fine-mesh sieve.
- Carefully lift the stencil straight up to reveal the pattern.
- Repeat with remaining cakes as needed throughout the week.
Whirl Factor: The cocoa stencil creates a bold, graphic top on each individual cake. The texture is smooth frosting with a fine cocoa dust pattern.
Meal Prep Advantage: Bake four individual cakes at once, freeze plain, and decorate one at a time as needed. Each cake takes 5 minutes to decorate.
Reheating Note: Do not reheat. Thaw at room temperature for 1 hour. The cake is best served at room temperature.
Storage: Freeze plain cakes for up to 2 weeks. Once decorated, keep at room temperature for up to 8 hours or refrigerate for up to 2 days.
Strawberry Cake Recipes for Family-Friendly — Kid-Adaptable Decorating, Simple Techniques, and Flexible Swaps
Family-friendly strawberry cakes are all about approachability and fun. These recipes use decorating methods that kids can actually do—stencils, edible markers, simple piping—without requiring advanced skills. I’ve included flexibility notes so you can swap flavors, adjust sweetness, or simplify techniques based on your family’s preferences. These are cakes that build confidence in young bakers.
11. Kid-Friendly Strawberry Cake with Edible-Marker Decorating Station
I make this cake and set up a decorating station with edible markers, letting kids sketch their own designs. The frosting is smooth and forgiving, the markers are easy to handle, and every kid ends up with something they’re proud of. It’s a cake that celebrates creativity over perfection.
Ingredients
- 1 3/4 cups all-purpose flour
- 1 1/2 tsp baking powder
- 1/2 tsp salt
- 1/2 cup unsalted butter, softened
- 1 cup granulated sugar
- 2 large eggs
- 1/2 cup whole milk
- 1 tsp vanilla extract
- 1/4 tsp strawberry extract (optional, for subtle flavor)
- 2 cups strawberry buttercream (smooth consistency)
- Edible markers (food-safe, multiple colors)
- Small plates or shallow bowls for markers
Instructions
- Preheat oven to 350°F. Grease and flour one 9-inch round pan.
- Whisk together flour, baking powder, and salt.
- Cream butter and sugar until light and fluffy, about 3 minutes.
- Add eggs one at a time, beating well. Alternate adding flour mixture and milk, starting and ending with flour. Stir in vanilla and strawberry extract if using.
- Pour into prepared pan and smooth the top.
- Bake for 22–26 minutes, until a toothpick inserted in the center comes out clean.
- Cool in pan for 10 minutes, then turn out onto a wire rack to cool completely.
- Place the cooled cake on a serving plate and spread strawberry buttercream evenly across the top and sides, smoothing with an offset spatula.
- Set up a decorating station with edible markers in small bowls or plates, one color per bowl.
- Let kids take turns decorating the cake with markers, sketching designs directly onto the frosting. Encourage simple patterns, drawings, or words.
- Let the marker ink set for 10 minutes before serving.
Whirl Factor: Edible markers deliver instant, personalized decoration. The finish is hand-drawn and celebrates each child’s creativity. The texture is entirely smooth and creamy.
Kid-Adaptable Note: This method requires zero piping skills and zero precision. Kids can decorate at their own pace, and the results are always charming.
Flavor Swap: Substitute strawberry extract with almond extract, or omit entirely for a pure vanilla cake.
Storage: Keep at room temperature for up to 12 hours, or refrigerate for up to 2 days.
12. Family-Friendly Strawberry Sheet Cake with Simple Stencil Topper
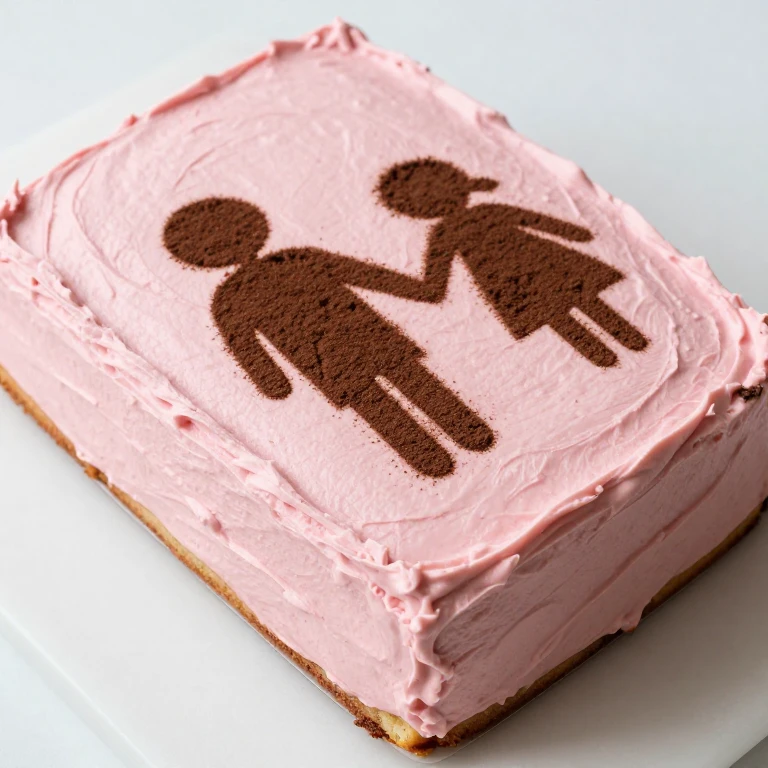
This is the cake I make for family gatherings where simplicity and reliability matter most. A sheet cake gets frosted, then a simple stencil pattern is dusted on top. The method is so straightforward that even young kids can help hold the stencil, and the result looks intentional and modern without any fuss.
Ingredients
- 2 1/4 cups all-purpose flour
- 2 tsp baking powder
- 1/2 tsp salt
- 3/4 cup unsalted butter, softened
- 1 1/2 cups granulated sugar
- 3 large eggs
- 3/4 cup whole milk
- 1 1/2 tsp vanilla extract
- 1/2 tsp strawberry extract (optional)
- 2 1/2 cups strawberry buttercream (smooth consistency)
- 3 tbsp unsweetened cocoa powder
- 1 simple stencil (geometric or floral pattern, large enough for a sheet cake)
Instructions
- Preheat oven to 350°F. Grease and flour a 9×13-inch sheet pan.
- Whisk together flour, baking powder, and salt.
- Cream butter and sugar until pale and fluffy, about 3 minutes.
- Add eggs one at a time, beating well. Alternate adding flour mixture and milk, starting and ending with flour. Stir in vanilla and strawberry extract if using.
- Pour into prepared pan and smooth the top.
- Bake for 25–30 minutes, until a toothpick inserted in the center comes out clean.
- Cool completely in the pan on a wire rack.
- Spread strawberry buttercream evenly across the entire top of the cooled cake using an offset spatula, creating a smooth, even surface.
- Place the stencil on top of the frosting, holding it firmly in place. If you have a helper, they can hold one side while you hold the other.
- Dust cocoa powder evenly over the stencil using a fine-mesh sieve, working from the center outward to avoid shifting the stencil.
- Carefully lift the stencil straight up to reveal the pattern.
- Let the frosting set for 10 minutes before cutting and serving.
Whirl Factor: The cocoa stencil creates a bold, graphic pattern that transforms a simple sheet cake into something that looks intentional and modern. The texture is smooth throughout, with the cocoa powder adding visual contrast.
Kid-Adaptable Note: Kids can help hold the stencil while you dust. The process is fast and forgiving, and the result is impressive.
Flexibility Swap: Use cinnamon instead of cocoa powder for a warmer, spiced finish. Or use powdered sugar for a lighter, more delicate pattern.
Storage: Keep covered at room temperature for up to 12 hours, or refrigerate for up to 3 days. The stencil pattern may soften if refrigerated, so decorate as close to serving time as possible.
FAQ
Can I use a different frosting for these stencil and drawing techniques?
Yes, but consistency matters. For stenciling and outline-and-fill piping, you need frosting that’s smooth and holds its shape without being too soft. American buttercream (butter and powdered sugar) works best. Cream cheese frosting is slightly softer and can smudge when dusted with cocoa powder. Swiss or Italian meringue buttercream also works well. Avoid whipped frostings, which are too delicate for stencil work.
How do I prevent cocoa powder from smudging when I lift the stencil?
The key is a firm stencil and a confident lift. Hold the stencil down with one hand while you dust with the other, pressing gently to ensure the stencil stays in place. Use a fine-mesh sieve to dust the cocoa powder in an even layer. Once you’re done dusting, lift the stencil straight up in one smooth motion—don’t wiggle or slide it. If you’re nervous, practice on a test cake or a plate of frosting first.
Can I scale these designs from a round cake to a sheet cake, or vice versa?
Absolutely. For a sheet cake, choose a larger stencil or design that fits the rectangular shape. For round cakes, you may need to adjust the stencil size or repeat the pattern multiple times. Edible markers work on any cake shape and size. For buttercream transfers, you can pipe the design to fit whatever cake size you’re using—just adjust the piping size and pattern accordingly.
How far ahead can I prepare buttercream transfer designs?
Frozen buttercream transfers keep for up to 1 week in the freezer. Pipe them onto parchment paper, freeze until solid, then store in an airtight container or wrapped tightly. When you’re ready to use them, remove from the freezer and let them thaw slightly (about 5 minutes) before peeling the parchment away. Transfer to the frosted cake while still cold—they’ll set as they thaw on the warm frosting.
What edible markers work best on buttercream frosting?
Look for food-safe edible markers specifically designed for frosting. Brands like Wilton, AmeriColor, and Chefmaster make reliable options. Test on a small area of frosting first to ensure the color is vibrant and the marker doesn’t bleed or smudge. Avoid regular markers—they’re not food-safe. The frosting should be set but not rock-hard when you apply the marker, so the ink adheres without dragging.
Can I make these cakes without strawberry flavoring?
Yes, all the cake bases are adaptable. Use pure vanilla extract instead of strawberry, or swap in almond, lemon, or even chocolate extract for different flavor profiles. The frosting is where the strawberry flavor shines, so if you want to skip strawberry entirely, use vanilla, cream cheese, or chocolate buttercream instead. The decorating techniques work with any frosting color and flavor.
How do I know when my stencil cake is fully set and ready to serve?
After applying the stencil and dusting with cocoa powder, let the frosting set for at least 15 minutes at room temperature before cutting. If you’re refrigerating the cake, let it chill for 30 minutes so the frosting sets firmly. The cocoa powder won’t smudge once the buttercream is set. If you’re serving at room temperature, wait 15 minutes. If you’re serving chilled, chill for at least 30 minutes after decorating.