
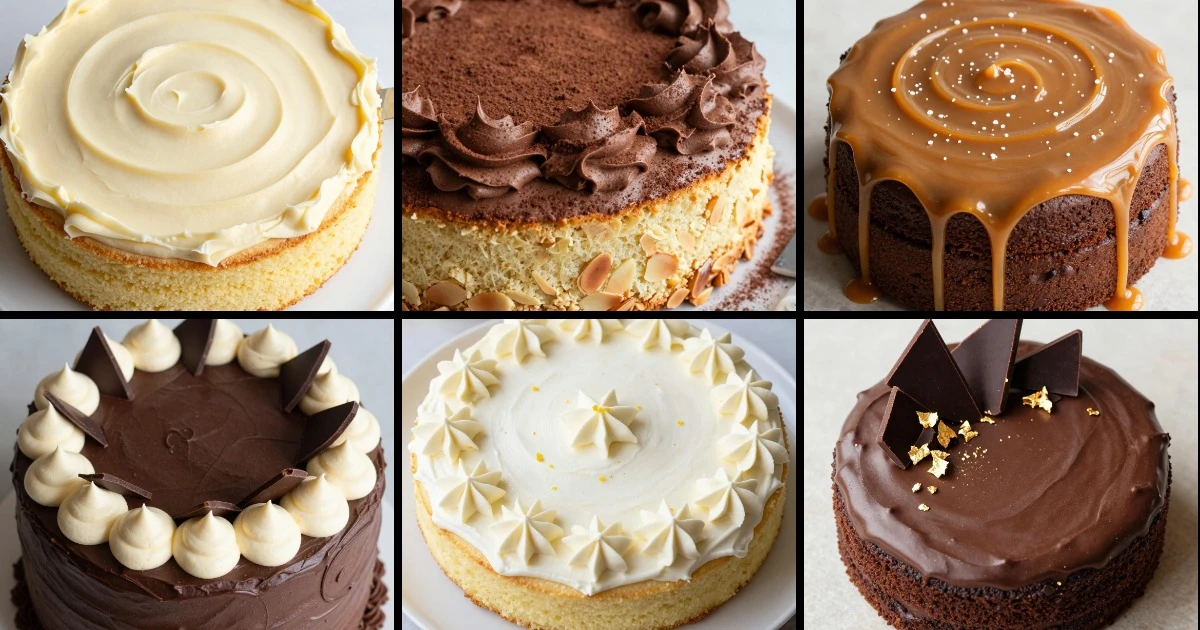
Sheet cakes are the workhorse of home baking—they feed a crowd, slice cleanly, and sit flat on any table. But here’s what I’ve learned: a simple cake becomes memorable the moment you add purposeful decoration. I’m not talking about fondant or airbrushes. I mean buttercream piped with intention, color mixed with precision, and finishes that look polished without special tools. These 12 decorated sheet cake recipes prove that bold, modern design lives on a humble rectangular base.
I’ve organized these by decoration style and flavor pairing, so you can match your design confidence to the right cake. Whether you’re reaching for smooth finishes, textured palette-knife work, piped borders, or dramatic drip accents, you’ll find a cake that fits your skill level and feeds your crowd.
Smooth & Creamy Decorated Sheet Cakes
These cakes lean on clean buttercream finishes and color contrast. They’re the foundation for learning how to spread, crumb-coat, and execute polished surfaces without piping pressure.
1. Classic Vanilla Sheet Cake With Silky Buttercream

This is my go-to when I need a blank canvas for color and design. Tender crumb, stable frosting, and a whirl factor that matters: I use a touch of almond extract to push vanilla beyond flat. The silky buttercream holds sharp edges and takes color beautifully.
Ingredients
- 2 cups all-purpose flour
- 2 tsp baking powder
- 1/2 tsp salt
- 1/2 cup unsalted butter, softened
- 1 1/4 cups granulated sugar
- 2 large eggs
- 1 cup whole milk
- 2 tsp vanilla extract
- 1/4 tsp almond extract
- 1 lb unsalted butter, softened (for frosting)
- 4 cups powdered sugar
- 3 tbsp heavy cream
- Gel food coloring as desired
Instructions
- Preheat oven to 350°F. Grease and line a 9×13-inch sheet pan with parchment paper.
- Whisk together flour, baking powder, and salt in a medium bowl.
- Beat softened butter and granulated sugar until light and fluffy, about 3 minutes.
- Add eggs one at a time, beating well after each addition.
- Alternate adding flour mixture and milk in three additions, starting and ending with flour. Mix until just combined.
- Stir in vanilla and almond extracts.
- Pour into prepared pan and smooth the top.
- Bake 28–32 minutes until a toothpick inserted in the center comes out clean.
- Cool in pan for 15 minutes, then turn out onto a wire rack to cool completely.
- For frosting: Beat softened butter until pale, about 2 minutes. Gradually add powdered sugar, then heavy cream. Beat until silky and spreadable, about 4 minutes.
- Divide frosting and tint with gel color if desired. Crumb-coat the cake first with a thin layer, chill 15 minutes, then apply final coat.
Whirl Factor: The almond extract adds subtle depth to vanilla without tasting like almonds—it’s the texture contrast between tender crumb and silky, pipeable frosting that makes this cake feel intentional.
Storage: Keep frosted cake in an airtight container at room temperature for up to 3 days, or refrigerate for up to 5 days. Unfrosted cake freezes for up to 1 month.
2. Dark Chocolate Sheet Cake With Cream Cheese Frosting
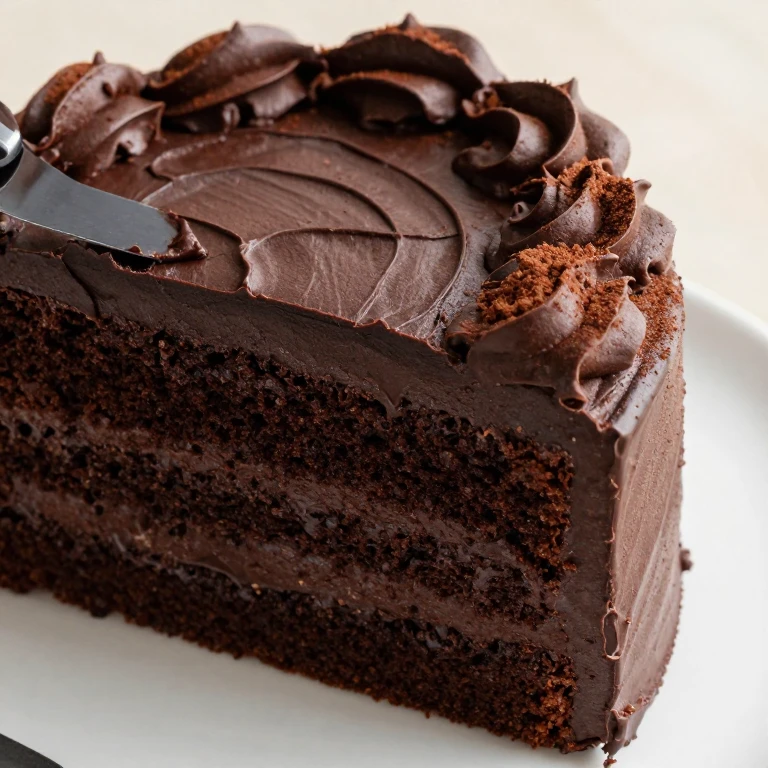
When I want bold flavor and a finish that holds piped detail, chocolate cake with tangy frosting is the answer. The cocoa deepens the crumb, and the cream cheese cuts richness without sacrificing stability.
Ingredients
- 1 3/4 cups all-purpose flour
- 2 cups granulated sugar
- 3/4 cup unsweetened cocoa powder
- 2 tsp baking soda
- 1 tsp baking powder
- 1 tsp salt
- 2 large eggs
- 1 cup strong brewed coffee, cooled
- 1 cup buttermilk
- 1/2 cup neutral oil
- 1 tsp vanilla extract
- 8 oz cream cheese, softened
- 1/2 cup unsalted butter, softened
- 3 cups powdered sugar
- 1/4 cup unsweetened cocoa powder
- Pinch of salt
Instructions
- Preheat oven to 350°F. Grease and line a 9×13-inch sheet pan.
- Whisk together flour, granulated sugar, cocoa powder, baking soda, baking powder, and salt.
- In another bowl, whisk eggs, coffee, buttermilk, oil, and vanilla until smooth.
- Fold wet ingredients into dry ingredients until just combined. Do not overmix.
- Pour into prepared pan.
- Bake 35–40 minutes until a toothpick comes out with a few moist crumbs.
- Cool in pan 20 minutes, then turn onto a wire rack to cool completely.
- For frosting: Beat cream cheese and butter until smooth. Add powdered sugar, cocoa, and salt. Beat until fluffy, about 3 minutes.
- Spread evenly over cooled cake or use a palette knife for textured finish.
Whirl Factor: The coffee amplifies cocoa flavor without adding coffee taste—it’s the texture contrast of rich, fudgy crumb against bright, tangy frosting that makes this cake craveable.
Storage: Store in the refrigerator in an airtight container for up to 5 days. Freezes well unfrosted for up to 1 month.
3. Lemon Sheet Cake With Bright White Frosting
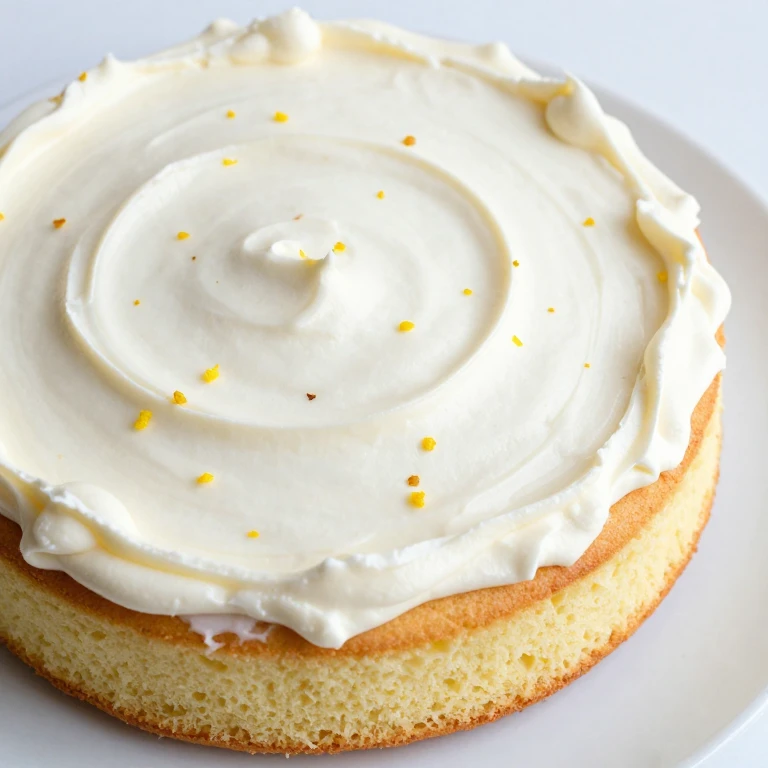
Lemon cakes can taste flat without intention. I use fresh lemon juice and zest in the batter, then spike the frosting with a touch more zest for brightness that reads immediately. The color contrast between pale yellow cake and pure white frosting is stunning.
Ingredients
- 2 cups all-purpose flour
- 2 tsp baking powder
- 1/2 tsp salt
- 1/2 cup unsalted butter, softened
- 1 1/4 cups granulated sugar
- Zest of 3 lemons
- 2 large eggs
- 1/2 cup fresh lemon juice
- 1/2 cup sour cream
- 1 lb unsalted butter, softened (for frosting)
- 4 cups powdered sugar
- 2 tbsp fresh lemon juice
- Zest of 1 lemon
- Pinch of salt
Instructions
- Preheat oven to 350°F. Grease and line a 9×13-inch sheet pan.
- Whisk together flour, baking powder, and salt.
- Beat butter, granulated sugar, and lemon zest until fragrant and fluffy, about 3 minutes.
- Add eggs one at a time, beating well after each.
- Alternate adding flour mixture and a combination of lemon juice and sour cream in three additions.
- Pour into prepared pan.
- Bake 28–32 minutes until golden and a toothpick comes out clean.
- Cool in pan 15 minutes, then turn onto a wire rack.
- For frosting: Beat butter until pale. Add powdered sugar gradually, then lemon juice, zest, and salt. Beat until smooth and bright white.
- Spread over cooled cake with an offset spatula for a smooth finish.
Whirl Factor: Fresh lemon zest in both cake and frosting creates brightness that feels intentional—the texture contrast is between tender, moist crumb and silky, spreadable frosting that holds color and detail.
Storage: Keep at room temperature in an airtight container for up to 3 days, or refrigerate for up to 5 days.
Textured & Palette-Knife Decorated Sheet Cakes
These cakes showcase frosting applied with texture in mind. Palette-knife work, swirls, and rough finishes are the decoration—no piping pressure needed.
4. Almond Sheet Cake With Rustic Chocolate Frosting
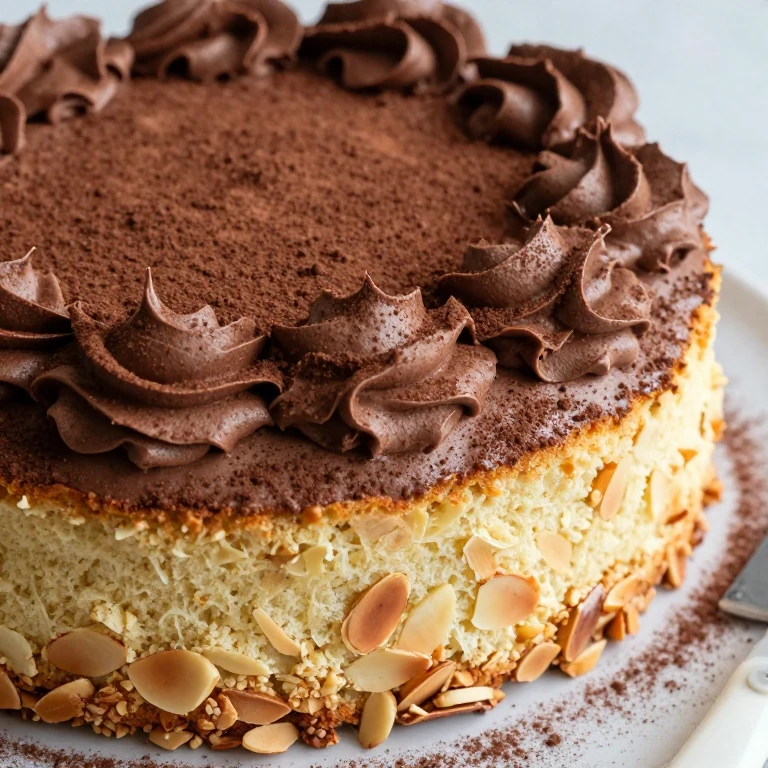
I reach for almond cake when I want subtle, sophisticated flavor that lets frosting shine. The whirl factor here is layering almond flavor in the cake, then creating intentional texture with a palette knife and cocoa dust.
Ingredients
- 1 3/4 cups all-purpose flour
- 1 cup almond flour
- 2 tsp baking powder
- 1/2 tsp salt
- 1/2 cup unsalted butter, softened
- 1 cup granulated sugar
- 3 large eggs
- 1/2 cup whole milk
- 1 tsp vanilla extract
- 1/2 tsp almond extract
- 8 oz unsalted butter, softened (for frosting)
- 2 cups powdered sugar
- 1/3 cup unsweetened cocoa powder
- 1/4 cup heavy cream
- Unsweetened cocoa powder for dusting
Instructions
- Preheat oven to 350°F. Grease and line a 9×13-inch sheet pan.
- Whisk together all-purpose flour, almond flour, baking powder, and salt.
- Beat butter and granulated sugar until light, about 3 minutes.
- Add eggs one at a time, beating after each.
- Alternate adding flour mixture and milk in three additions.
- Stir in vanilla and almond extracts.
- Pour into prepared pan.
- Bake 30–35 minutes until a toothpick comes out clean.
- Cool in pan 15 minutes, then turn onto a wire rack to cool completely.
- For frosting: Beat butter until pale. Sift in powdered sugar and cocoa powder. Add heavy cream and beat until fluffy, about 4 minutes.
- Spread frosting over cooled cake with a palette knife, creating intentional swirls and peaks. Dust with cocoa powder before serving.
Whirl Factor: Almond flour adds structure and subtle nuttiness to the crumb, while cocoa frosting with rustic texture application creates visual interest without piping skill.
Storage: Keep at room temperature in an airtight container for up to 3 days. Refrigerate for up to 5 days.
5. Vanilla Cake With Strawberry Buttercream & Textured Finish
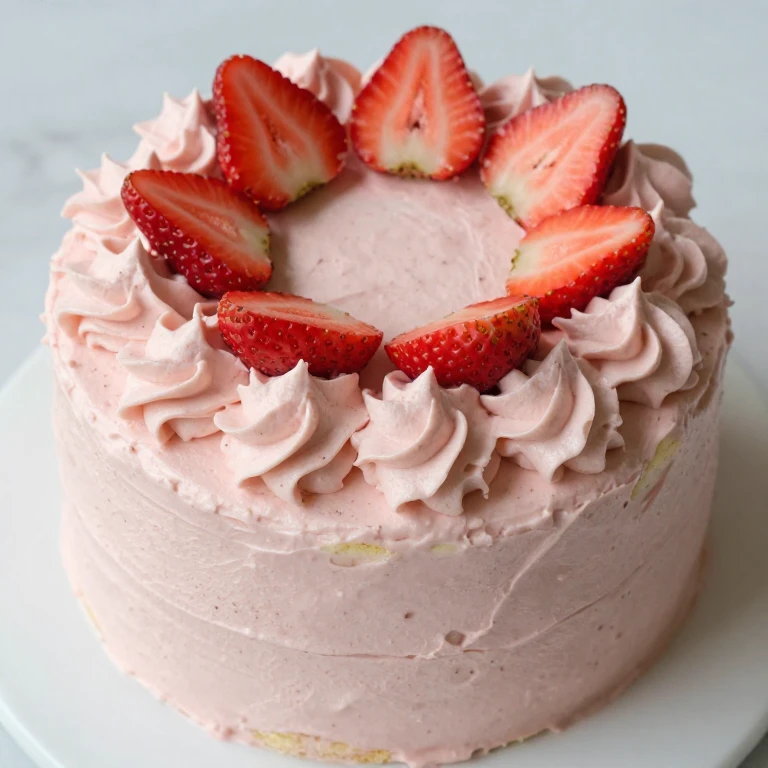
When I want color and flavor working together, fresh strawberry frosting on vanilla cake is my choice. The whirl factor is using freeze-dried strawberries for color stability and intense flavor without added liquid.
Ingredients
- 2 cups all-purpose flour
- 2 tsp baking powder
- 1/2 tsp salt
- 1/2 cup unsalted butter, softened
- 1 1/4 cups granulated sugar
- 2 large eggs
- 1 cup whole milk
- 2 tsp vanilla extract
- 1 lb unsalted butter, softened (for frosting)
- 3 1/2 cups powdered sugar
- 1/2 cup freeze-dried strawberries, finely ground
- 2 tbsp heavy cream
- Fresh strawberry slices for garnish
Instructions
- Preheat oven to 350°F. Grease and line a 9×13-inch sheet pan.
- Whisk together flour, baking powder, and salt.
- Beat butter and granulated sugar until fluffy, about 3 minutes.
- Add eggs one at a time, beating well after each.
- Alternate adding flour mixture and milk in three additions, starting and ending with flour.
- Stir in vanilla extract.
- Pour into prepared pan and smooth the top.
- Bake 28–32 minutes until a toothpick comes out clean.
- Cool in pan 15 minutes, then turn onto a wire rack to cool completely.
- For frosting: Beat softened butter until pale. Gradually add powdered sugar and ground freeze-dried strawberries. Add heavy cream and beat until fluffy.
- Spread over cooled cake with a palette knife, creating swirls and peaks. Top with fresh strawberry slices.
Whirl Factor: Freeze-dried strawberries deliver stable color and concentrated flavor without adding moisture that would weaken frosting—the texture contrast is between tender vanilla crumb and silky, textured strawberry frosting.
Storage: Keep at room temperature in an airtight container for up to 2 days, or refrigerate for up to 4 days. Do not freeze after frosting.
6. Chocolate Cake With Salted Caramel Frosting & Drip Accents
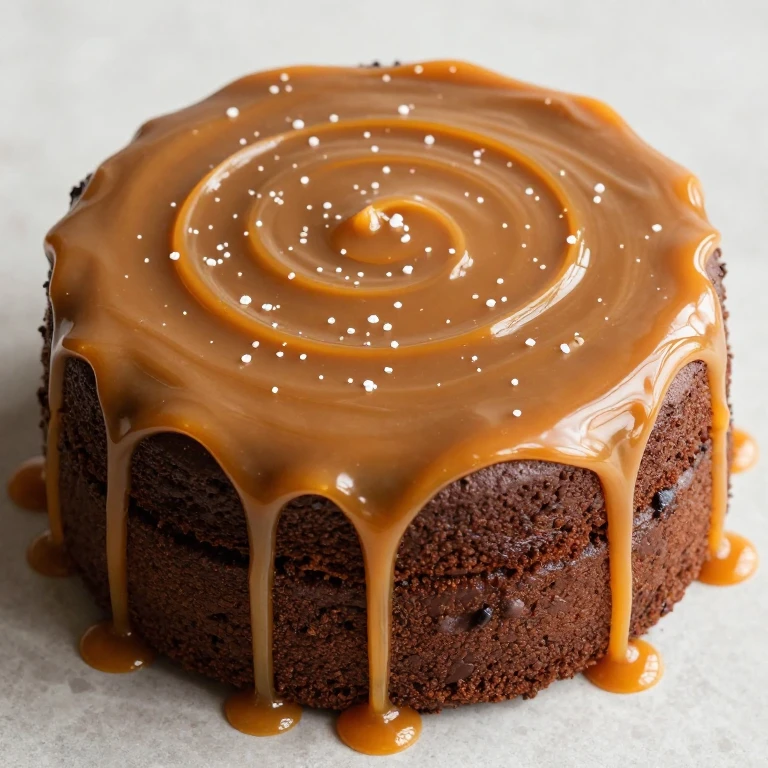
This is the cake I make when I want drama and sophistication. Dark chocolate cake with caramel frosting is naturally craveable, but the whirl factor is the salt and the drip—intentional design that feels modern without requiring piping pressure.
Ingredients
- 1 3/4 cups all-purpose flour
- 2 cups granulated sugar
- 3/4 cup unsweetened cocoa powder
- 2 tsp baking soda
- 1 tsp baking powder
- 1 tsp salt
- 2 large eggs
- 1 cup strong brewed coffee, cooled
- 1 cup buttermilk
- 1/2 cup neutral oil
- 1 tsp vanilla extract
- 1 cup unsalted butter, softened (for frosting)
- 1 cup salted caramel sauce
- 2 cups powdered sugar
- Fleur de sel for garnish
Instructions
- Preheat oven to 350°F. Grease and line a 9×13-inch sheet pan.
- Whisk together flour, granulated sugar, cocoa powder, baking soda, baking powder, and salt.
- In another bowl, whisk eggs, coffee, buttermilk, oil, and vanilla until combined.
- Fold wet ingredients into dry ingredients until just mixed.
- Pour into prepared pan.
- Bake 35–40 minutes until a toothpick comes out with moist crumbs.
- Cool in pan 20 minutes, then turn onto a wire rack to cool completely.
- For frosting: Beat butter until pale. Add caramel sauce and powdered sugar. Beat until smooth and spreadable.
- Spread frosting over cooled cake. Drizzle additional caramel sauce over the top, allowing it to drip naturally down the sides. Sprinkle with fleur de sel.
Whirl Factor: Salted caramel frosting combines sweet and salty in a single spread, while the drip technique adds visual polish without piping skill. The texture contrast is fudgy crumb against silky frosting.
Storage: Keep at room temperature in an airtight container for up to 3 days. Refrigerate for up to 5 days.
Piped & Bordered Decorated Sheet Cakes
These cakes showcase simple piping techniques: borders, rosettes, and piped accents that build confidence without requiring advanced decorator skills.
7. Vanilla Sheet Cake With Piped Rose Border
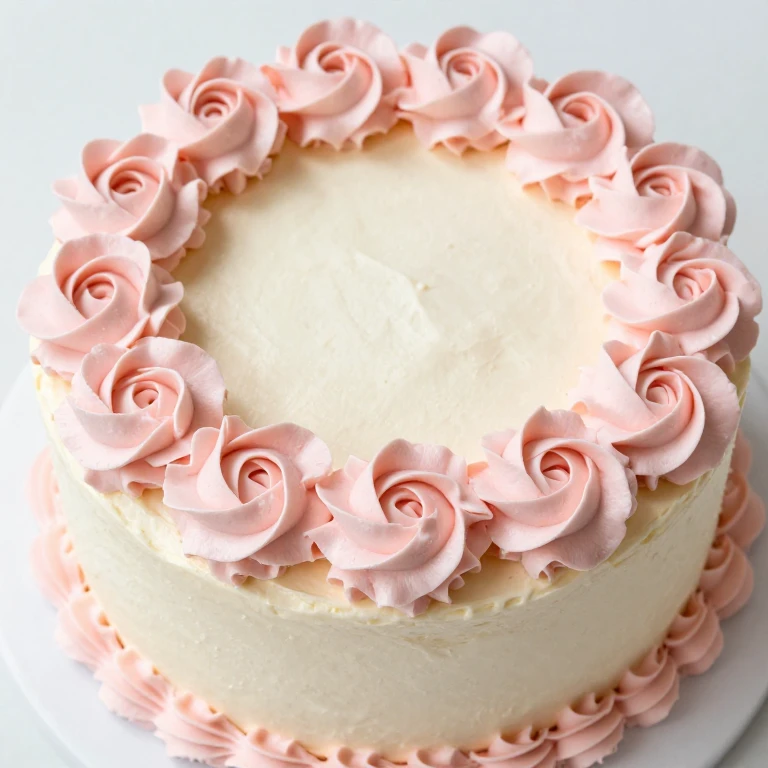
I use this cake when I want to practice piping without pressure—roses are forgiving, and a border of them looks instantly polished. The whirl factor is the vanilla-rose flavor pairing and the silky frosting that holds piped shape.
Ingredients
- 2 cups all-purpose flour
- 2 tsp baking powder
- 1/2 tsp salt
- 1/2 cup unsalted butter, softened
- 1 1/4 cups granulated sugar
- 2 large eggs
- 1 cup whole milk
- 2 tsp vanilla extract
- 1/4 tsp rose extract (optional)
- 1 lb unsalted butter, softened (for frosting)
- 4 cups powdered sugar
- 3 tbsp heavy cream
- Gel food coloring (pink or blush)
Instructions
- Preheat oven to 350°F. Grease and line a 9×13-inch sheet pan.
- Whisk together flour, baking powder, and salt.
- Beat butter and granulated sugar until light and fluffy, about 3 minutes.
- Add eggs one at a time, beating well after each.
- Alternate adding flour mixture and milk in three additions, starting and ending with flour.
- Stir in vanilla extract and rose extract if using.
- Pour into prepared pan.
- Bake 28–32 minutes until a toothpick comes out clean.
- Cool in pan 15 minutes, then turn onto a wire rack to cool completely.
- For frosting: Beat butter until pale. Gradually add powdered sugar, then heavy cream. Beat until silky, about 4 minutes. Tint with gel color.
- Crumb-coat the cake with a thin frosting layer and chill 15 minutes. Apply final coat smoothly.
- Using a piping bag fitted with a rose tip, pipe roses around the border of the cake. Fill the center with additional piped rosettes if desired.
Whirl Factor: The optional rose extract adds floral subtlety to vanilla without overwhelming it—the texture contrast is tender crumb against silky, pipeable frosting that holds shape and color.
Storage: Keep at room temperature in an airtight container for up to 3 days, or refrigerate for up to 5 days.
8. Chocolate Sheet Cake With Buttercream Piped Swags
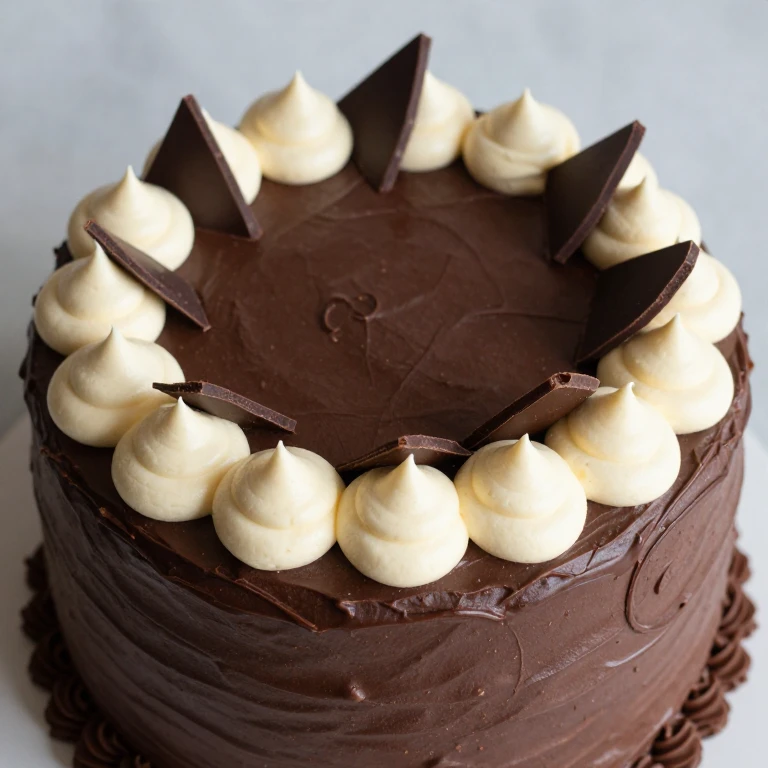
When I want to add visual interest with piping but keep technique simple, piped swags are my answer. This chocolate cake with chocolate frosting is the perfect base for learning pressure control and line work.
Ingredients
- 1 3/4 cups all-purpose flour
- 2 cups granulated sugar
- 3/4 cup unsweetened cocoa powder
- 2 tsp baking soda
- 1 tsp baking powder
- 1 tsp salt
- 2 large eggs
- 1 cup strong brewed coffee, cooled
- 1 cup buttermilk
- 1/2 cup neutral oil
- 1 tsp vanilla extract
- 8 oz unsalted butter, softened (for frosting)
- 2 cups powdered sugar
- 1/3 cup unsweetened cocoa powder
- 1/4 cup heavy cream
- Chocolate shards for garnish
Instructions
- Preheat oven to 350°F. Grease and line a 9×13-inch sheet pan.
- Whisk together flour, granulated sugar, cocoa powder, baking soda, baking powder, and salt.
- In another bowl, whisk eggs, coffee, buttermilk, oil, and vanilla until combined.
- Fold wet ingredients into dry ingredients until just mixed.
- Pour into prepared pan.
- Bake 35–40 minutes until a toothpick comes out with moist crumbs.
- Cool in pan 20 minutes, then turn onto a wire rack to cool completely.
- For frosting: Beat butter until pale. Sift in powdered sugar and cocoa powder. Add heavy cream and beat until fluffy, about 4 minutes.
- Crumb-coat the cake and chill 15 minutes. Apply final coat smoothly.
- Using a piping bag fitted with a round tip, pipe swags around the top edge of the cake. Top with chocolate shards.
Whirl Factor: Piped swags add movement and visual interest without requiring advanced skills—the texture contrast is rich, fudgy crumb against silky frosting that holds piped lines cleanly.
Storage: Keep at room temperature in an airtight container for up to 3 days, or refrigerate for up to 5 days.
9. Lemon Sheet Cake With Piped Buttercream Stars
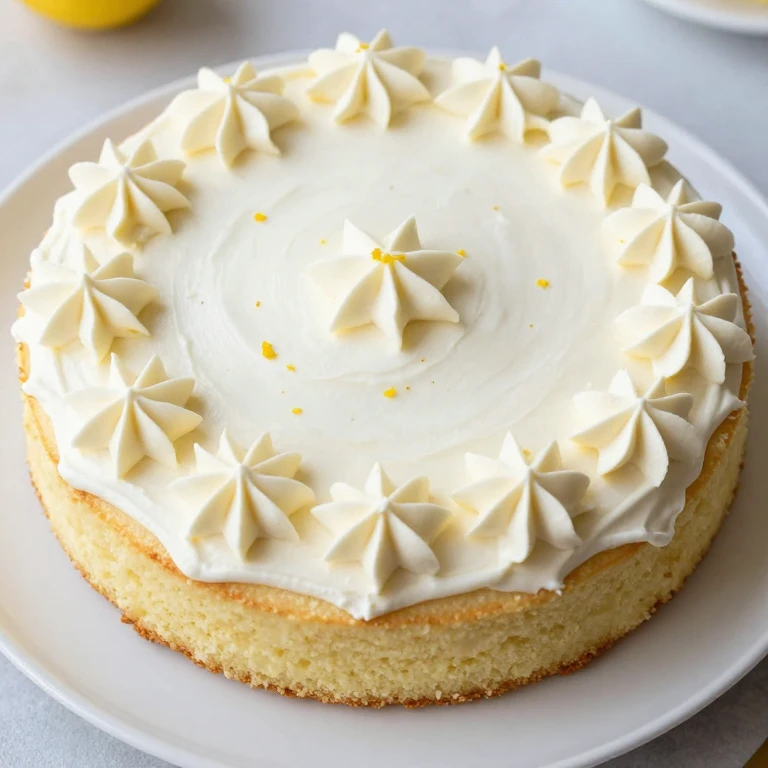
Piped stars are my confidence builder—they’re forgiving and look intentional immediately. This lemon cake with white frosting and piped stars is bright, modern, and approachable for any skill level.
Ingredients
- 2 cups all-purpose flour
- 2 tsp baking powder
- 1/2 tsp salt
- 1/2 cup unsalted butter, softened
- 1 1/4 cups granulated sugar
- Zest of 3 lemons
- 2 large eggs
- 1/2 cup fresh lemon juice
- 1/2 cup sour cream
- 1 lb unsalted butter, softened (for frosting)
- 4 cups powdered sugar
- 2 tbsp fresh lemon juice
- Zest of 1 lemon
- Pinch of salt
Instructions
- Preheat oven to 350°F. Grease and line a 9×13-inch sheet pan.
- Whisk together flour, baking powder, and salt.
- Beat butter, granulated sugar, and lemon zest until fragrant and fluffy, about 3 minutes.
- Add eggs one at a time, beating well after each.
- Alternate adding flour mixture and a combination of lemon juice and sour cream in three additions.
- Pour into prepared pan.
- Bake 28–32 minutes until golden and a toothpick comes out clean.
- Cool in pan 15 minutes, then turn onto a wire rack to cool completely.
- For frosting: Beat butter until pale. Add powdered sugar gradually, then lemon juice, zest, and salt. Beat until smooth and bright white.
- Crumb-coat the cake and chill 15 minutes. Apply final coat smoothly.
- Using a piping bag fitted with a star tip, pipe stars across the top and around the border of the cake.
Whirl Factor: Fresh lemon zest in both cake and frosting creates brightness that feels intentional—piped stars add visual polish without requiring pressure control or advanced techniques.
Storage: Keep at room temperature in an airtight container for up to 3 days, or refrigerate for up to 5 days.
Finishes & Accent Decorated Sheet Cakes
These cakes showcase dramatic finishes: chocolate shards, crumble accents, and layered textures that create visual impact with minimal piping.
10. Chocolate Cake With Chocolate Shards & Gold Leaf
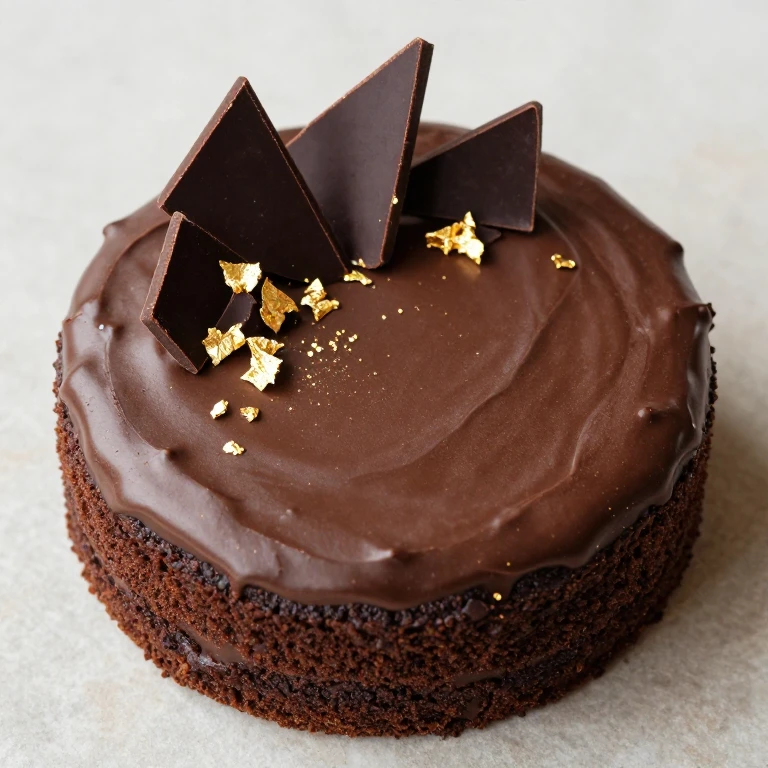
When I want to feel fancy but work simply, chocolate shards and gold leaf are my tools. This dark chocolate cake with chocolate frosting becomes instantly luxe with these minimal accents—the whirl factor is the contrast between matte frosting and shiny, sharp shards.
Ingredients
- 1 3/4 cups all-purpose flour
- 2 cups granulated sugar
- 3/4 cup unsweetened cocoa powder
- 2 tsp baking soda
- 1 tsp baking powder
- 1 tsp salt
- 2 large eggs
- 1 cup strong brewed coffee, cooled
- 1 cup buttermilk
- 1/2 cup neutral oil
- 1 tsp vanilla extract
- 8 oz unsalted butter, softened (for frosting)
- 2 cups powdered sugar
- 1/3 cup unsweetened cocoa powder
- 1/4 cup heavy cream
- 4 oz dark chocolate, melted and cooled slightly (for shards)
- Edible gold leaf (optional)
Instructions
- Preheat oven to 350°F. Grease and line a 9×13-inch sheet pan.
- Whisk together flour, granulated sugar, cocoa powder, baking soda, baking powder, and salt.
- In another bowl, whisk eggs, coffee, buttermilk, oil, and vanilla until combined.
- Fold wet ingredients into dry ingredients until just mixed.
- Pour into prepared pan.
- Bake 35–40 minutes until a toothpick comes out with moist crumbs.
- Cool in pan 20 minutes, then turn onto a wire rack to cool completely.
- For frosting: Beat butter until pale. Sift in powdered sugar and cocoa powder. Add heavy cream and beat until fluffy, about 4 minutes.
- Spread frosting over cooled cake smoothly.
- For shards: Spread melted chocolate thinly on parchment paper. Let set until firm but not brittle, about 10 minutes. Break into shards and arrange on frosted cake. Add gold leaf if desired.
Whirl Factor: Chocolate shards add texture and visual drama without piping—the contrast is between smooth frosting and sharp, glossy chocolate accents. Gold leaf amplifies luxury instantly.
Storage: Keep at room temperature in an airtight container for up to 3 days. Refrigerate for up to 5 days. Transport shards separately and add just before serving.
11. Vanilla Cake With Buttercream Crumb & Berry Accent
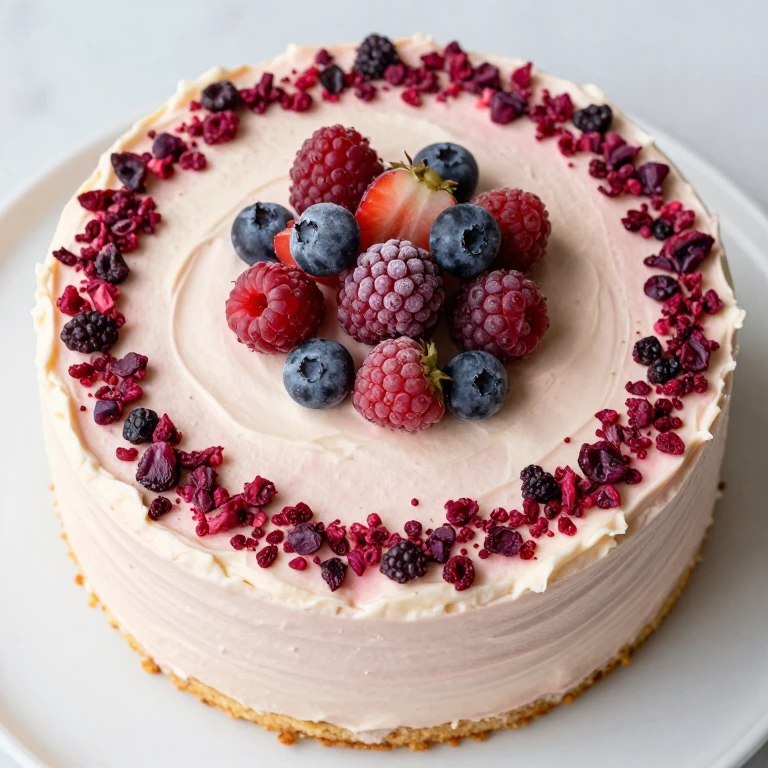
Buttercream crumb (also called crumb coat texture) is my go-to when I want visual interest without piping. I spread frosting, then press a second frosting color or crumb mixture into it for depth. This vanilla cake with mixed berries is fresh and modern.
Ingredients
- 2 cups all-purpose flour
- 2 tsp baking powder
- 1/2 tsp salt
- 1/2 cup unsalted butter, softened
- 1 1/4 cups granulated sugar
- 2 large eggs
- 1 cup whole milk
- 2 tsp vanilla extract
- 1 lb unsalted butter, softened (for frosting)
- 4 cups powdered sugar
- 3 tbsp heavy cream
- Gel food coloring (blush or berry)
- Fresh mixed berries for topping
- 1/2 cup crushed freeze-dried berries (optional, for crumb accent)
Instructions
- Preheat oven to 350°F. Grease and line a 9×13-inch sheet pan.
- Whisk together flour, baking powder, and salt.
- Beat butter and granulated sugar until light and fluffy, about 3 minutes.
- Add eggs one at a time, beating well after each.
- Alternate adding flour mixture and milk in three additions, starting and ending with flour.
- Stir in vanilla extract.
- Pour into prepared pan and smooth the top.
- Bake 28–32 minutes until a toothpick comes out clean.
- Cool in pan 15 minutes, then turn onto a wire rack to cool completely.
- For frosting: Beat softened butter until pale. Gradually add powdered sugar and heavy cream. Beat until fluffy. Divide and tint with gel color if desired.
- Spread frosting over cooled cake. Press crushed freeze-dried berries into frosting around the border, or top center with fresh berries.
Whirl Factor: Buttercream crumb texture and fresh berry accents create visual interest and flavor layering—the contrast is between silky frosting and textured, tart berry elements.
Storage: Keep at room temperature in an airtight container for up to 2 days if using fresh berries, or up to 3 days with freeze-dried berries. Refrigerate for up to 4 days.
12. Almond Cake With Pistachio Buttercream & Crushed Nut Border
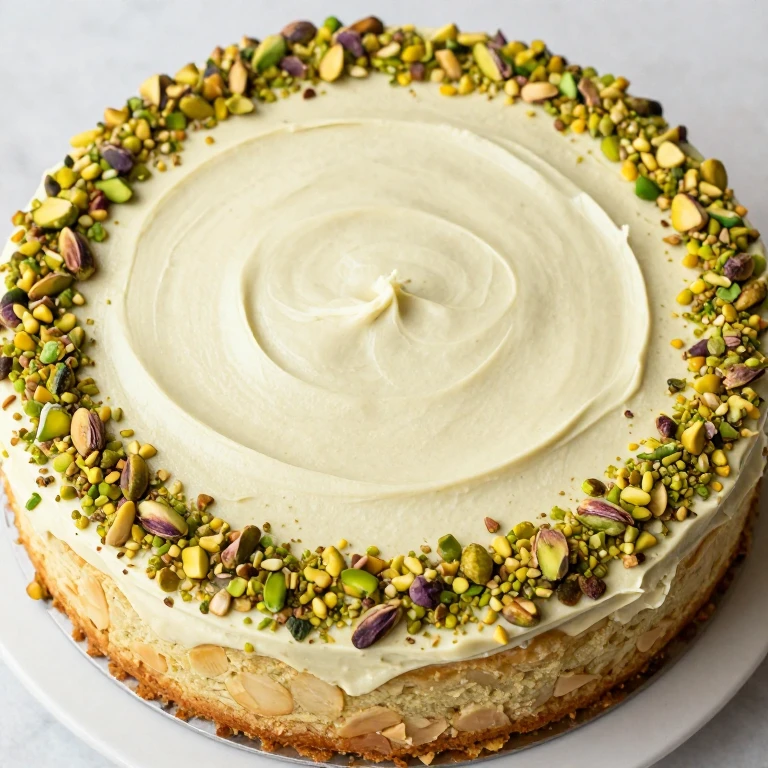
This is the cake I make when I want flavor and texture to work together in the decoration. Almond cake with pistachio frosting and a crushed pistachio border feels intentional and craveable—no advanced piping needed.
Ingredients
- 1 3/4 cups all-purpose flour
- 1 cup almond flour
- 2 tsp baking powder
- 1/2 tsp salt
- 1/2 cup unsalted butter, softened
- 1 cup granulated sugar
- 3 large eggs
- 1/2 cup whole milk
- 1 tsp vanilla extract
- 1/2 tsp almond extract
- 8 oz unsalted butter, softened (for frosting)
- 2 cups powdered sugar
- 1/2 cup roasted pistachio butter (or finely ground pistachios)
- 2 tbsp heavy cream
- 1/2 cup crushed roasted pistachios for border
Instructions
- Preheat oven to 350°F. Grease and line a 9×13-inch sheet pan.
- Whisk together all-purpose flour, almond flour, baking powder, and salt.
- Beat butter and granulated sugar until light, about 3 minutes.
- Add eggs one at a time, beating after each.
- Alternate adding flour mixture and milk in three additions.
- Stir in vanilla and almond extracts.
- Pour into prepared pan.
- Bake 30–35 minutes until a toothpick comes out clean.
- Cool in pan 15 minutes, then turn onto a wire rack to cool completely.
- For frosting: Beat butter until pale. Add powdered sugar gradually, then pistachio butter and heavy cream. Beat until smooth and spreadable.
- Spread frosting over cooled cake. Press crushed pistachios around the border and edges, or scatter across the top for a rustic finish.
Whirl Factor: Pistachio frosting adds sophisticated, nutty flavor that pairs with almond cake—the texture contrast is between tender almond crumb, silky pistachio frosting, and crunchy nut border.
Storage: Keep at room temperature in an airtight container for up to 3 days, or refrigerate for up to 5 days. Unfrosted cake freezes for up to 1 month.
When to Choose Each Style
- Smooth & Creamy Finishes: Choose these when you want a polished, modern look with minimal texture work. Perfect for practicing color mixing and crumb-coating technique.
- Textured & Palette-Knife Work: Pick these when you want visual interest without piping pressure. Swirls and rustic finishes hide imperfections and feel intentional.
- Piped Borders & Details: Select these when you’re ready to practice piping but want forgiving shapes (roses, stars, swags). Borders frame the cake and build confidence.
- Dramatic Finishes & Accents: Reach for these when you want luxury and impact with minimal technique. Shards, crumbs, and garnishes do the heavy lifting.
FAQ
What’s the best buttercream consistency for decorating sheet cakes?
I aim for a consistency that holds a peak but spreads smoothly—imagine soft-serve ice cream. If frosting is too soft, chill it for 10 minutes. If it’s too stiff, add heavy cream one teaspoon at a time. For piping, you want slightly stiffer frosting; for spreading, slightly looser.
How do I get smooth frosting without an offset spatula or turntable?
You don’t need fancy tools. I use a straight knife dipped in hot water, wiping it clean between strokes. A crumb-coat (thin first layer, chilled) under your final coat is the real secret—it traps crumbs and lets the top coat go on smoothly.
Can I make these cakes ahead and freeze them?
Absolutely. Unfrosted cakes freeze beautifully for up to 1 month wrapped tightly in plastic wrap and foil. Frosted cakes can be refrigerated for 3–5 days depending on frosting type. I don’t recommend freezing frosted cakes long-term because frosting texture can change.
What’s the best way to transport a decorated sheet cake?
Keep the cake in its pan or on a sturdy cake board. Secure it with non-slip shelf liner or a damp towel so it doesn’t slide. Transport piped or delicate decorations separately if possible, adding them just before serving. Cakes with fresh berries or drips should travel in a cake box.
How do I fix frosting that’s too soft or too stiff?
Too soft: Refrigerate for 15 minutes, or add a tablespoon of powdered sugar at a time and beat. Too stiff: Add heavy cream one teaspoon at a time and beat until spreadable. For piping, slightly stiff is better than slightly soft.
Can I use gel food coloring in all these frostings?
Yes, gel colors are my preference because they don’t add liquid like liquid dyes do. Start with a tiny amount on a toothpick and mix well—gel colors are concentrated. Cream cheese frosting takes color beautifully; chocolate frosting will shift toward brown, so choose colors accordingly.
What’s the difference between a crumb-coat and a final coat?
The crumb-coat is a thin, rough layer of frosting that traps loose crumbs. Chill it for 15 minutes, then apply your final coat over it smoothly. This technique is the difference between a polished cake and a crumbly-looking one.
Conclusion
These 12 decorated sheet cake recipes prove that bold, modern design doesn’t require special tools or years of piping practice. Pick one that matches your skill level, follow the steps, and trust the process. Your next cake is going to look intentional and taste incredible.