
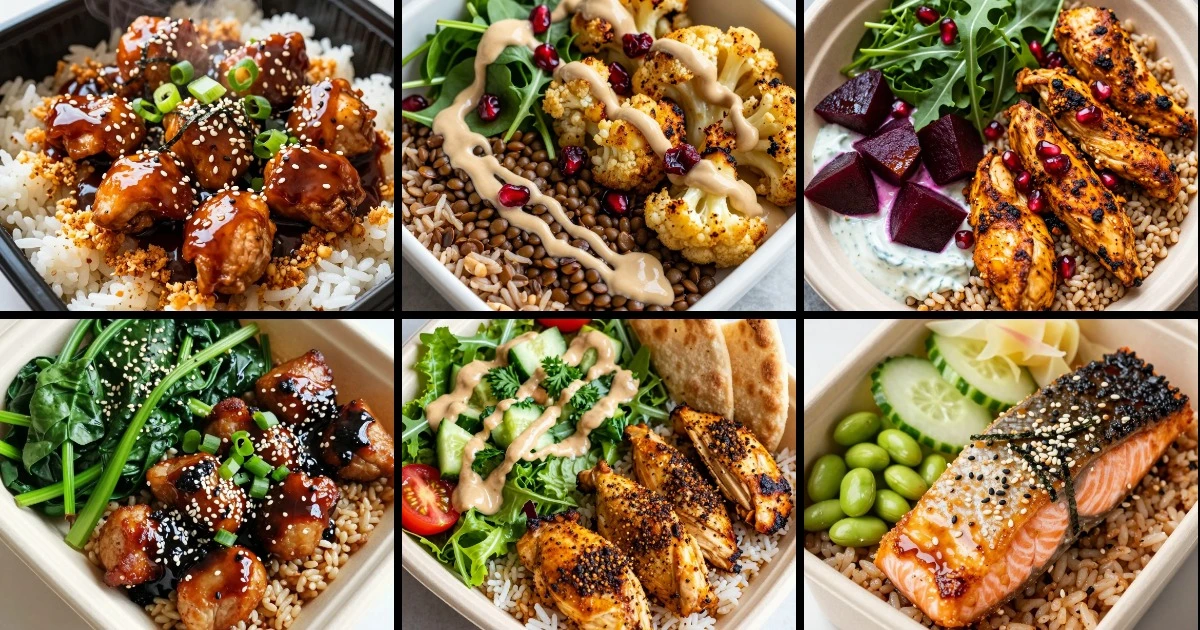
I’ve found that rice bowls are the ultimate workday lunch—they’re balanced, portable, and honestly, they taste better the next day when flavors meld. But here’s the thing: the difference between a sad desk lunch and one you actually crave comes down to three moves: choosing the right rice base, building in a textural contrast that survives the commute, and keeping sauces strategic so nothing gets soggy. I’m sharing 12 rice bowl recipes I’ve tested and refined in my own lunch rotation, each one built around a bold flavor twist and a texture element that holds up through reheating.
These aren’t generic grain bowls—each one has a Whirl Factor, a specific combination of flavor and crunch that makes it bookmark-worthy. From teriyaki chicken with crispy garlic to miso-butter mushrooms with toasted seeds, you’ll find options for every mood, every skill level, and every kind of workday.
What You’ll Find in This List
This collection spans flavor profiles from Asian-inspired to Mediterranean, with proteins ranging from chicken and shrimp to lentils and tofu. I’ve included recipes that work for meal prep (make five at once), quick assembly (20 minutes start to finish), and bold enough to taste fresh after two days in the fridge. Each entry shows you exactly where to build crunch, when to pack sauces separately, and how to reheat without losing texture.
- Fast weekday options and weekend-worthy showstoppers
- Vegetarian, seafood, and meat-forward choices
- Storage strategies that keep textures crisp through Wednesday
- Flavor twists that make rice feel exciting, not routine
1. Teriyaki Chicken with Crispy Garlic and Sesame Rice
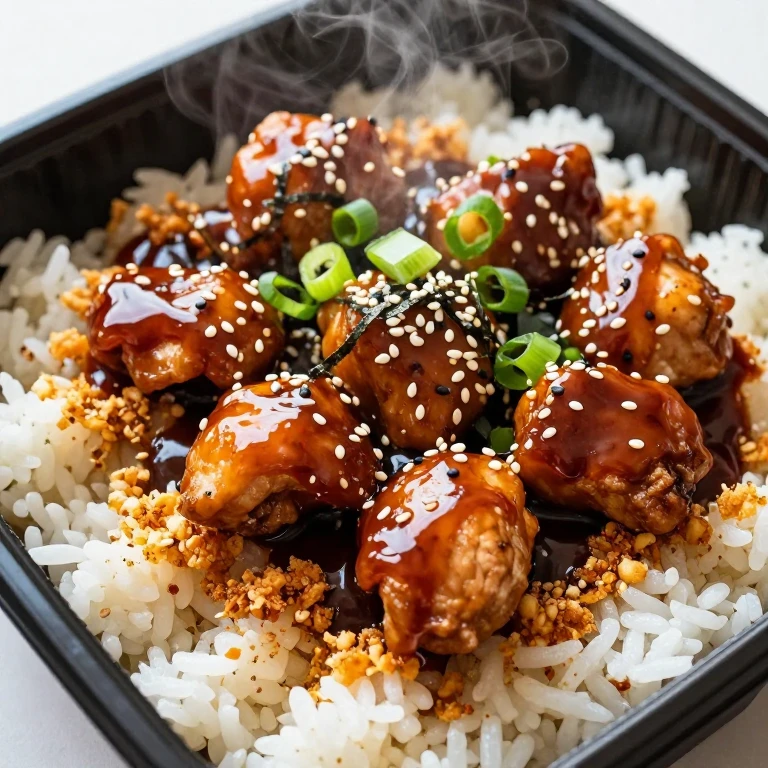
This is my go-to when I need something that tastes restaurant-quality but comes together in 25 minutes. The Whirl Factor here is crispy garlic oil tossed through the rice itself—it transforms plain white or brown rice into something with real presence. Teriyaki chicken stays juicy when you slice it thin and let it cool slightly before packing, and the crispy garlic gives you that textural pop that survives the lunch box.
Bold, umami-forward, with a crunch that lasts.
Perfect for meal prep—make the chicken and garlic oil on Sunday, assemble all week.
Ingredients
- 2 cups cooked rice (white or brown)
- 1 lb boneless, skinless chicken thighs, cut into bite-sized pieces
- 1/2 cup low-sodium soy sauce
- 3 tablespoons mirin or honey
- 1 tablespoon rice vinegar
- 4 cloves garlic, minced
- 3 tablespoons neutral oil
- 2 tablespoons sesame seeds
- 2 green onions, sliced
- Nori strips (optional)
Instructions
- Heat 1 tablespoon oil in a large skillet over medium-high heat. Add chicken and cook until golden on all sides and cooked through (165°F internal), about 8–10 minutes. Transfer to a plate.
- In the same skillet, whisk together soy sauce, mirin, and rice vinegar. Return chicken to the pan and simmer for 2–3 minutes until sauce coats the chicken. Let cool completely.
- In a small pan, heat remaining 2 tablespoons oil over medium heat. Add minced garlic and cook, stirring constantly, until golden and fragrant (about 2 minutes). Pour garlic oil over cooked rice and toss to combine.
- Divide rice between lunch containers. Top with cooled teriyaki chicken, sesame seeds, green onions, and nori if using.
The observable cue: when the garlic hits the oil, you’ll smell it immediately—that’s your signal to pull it off heat. Overdone garlic turns bitter, so move fast. If you’re prepping ahead, store the teriyaki chicken and garlic oil separately, then toss the rice the morning you pack lunch so the garlic stays crispy.
Storage tip: Keep the teriyaki chicken in one container and the rice in another until you’re ready to eat. Reheat the chicken in a microwave for 60–90 seconds, then toss with the room-temperature rice. The rice won’t dry out, and the chicken stays tender.
2. Miso-Butter Mushrooms with Toasted Seed Crunch
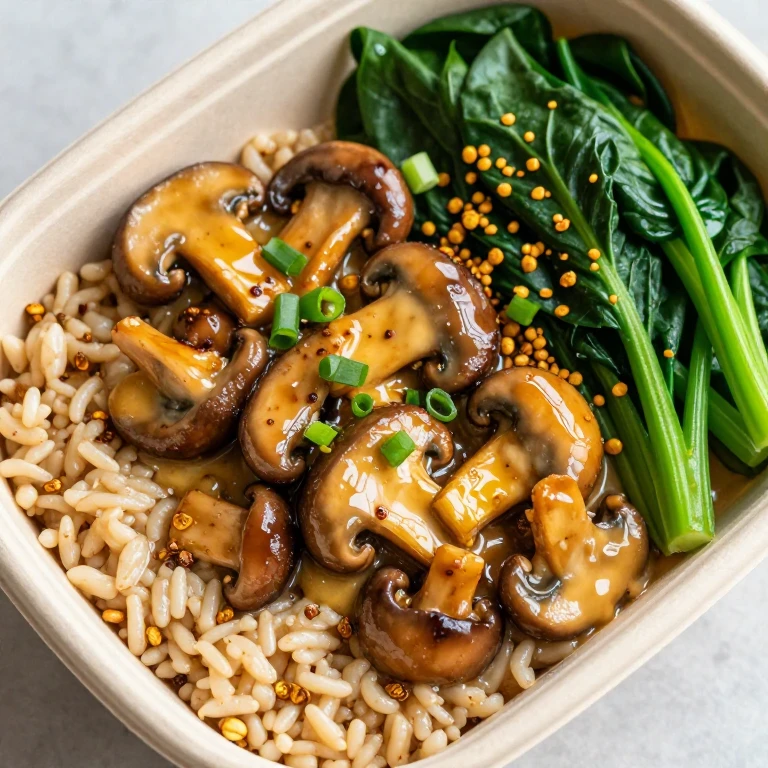
When I want something vegetarian that doesn’t feel like a compromise, this is it. Miso-butter mushrooms are earthy and rich, but the real Whirl Factor is the toasted seed blend—sunflower, pumpkin, and sesame—scattered on top right before eating. The seeds give you a savory crunch that makes every bite interesting, and they stay crisp for two days when stored separately.
Deep, savory, with nutty crunch and a whisper of umami.
Meal-prep friendly and naturally vegan-adaptable (use olive oil instead of butter).
Ingredients
- 2 cups cooked brown rice or farro
- 1 lb mixed mushrooms (cremini, shiitake, oyster), sliced
- 3 tablespoons white miso paste
- 2 tablespoons butter or olive oil
- 2 cloves garlic, minced
- 1 tablespoon rice vinegar
- 1/2 cup mixed seeds (sunflower, pumpkin, sesame)
- 2 cups fresh spinach or bok choy
- 1 green onion, sliced
- Sesame oil for drizzling
Instructions
- Heat a large skillet over medium-high heat. Add mushrooms and cook, stirring occasionally, until they release their moisture and begin to brown (about 6–8 minutes). Push to the side of the pan.
- Add butter and garlic to the empty side of the skillet. Cook for 1 minute until fragrant, then stir the miso paste into the butter until smooth. Toss mushrooms to coat, add rice vinegar, and cook for another 2 minutes.
- In a separate dry skillet, toast the seed blend over medium heat, stirring frequently, until fragrant (about 3–4 minutes). Transfer to a small container.
- Divide rice between lunch containers. Top with miso mushrooms, fresh spinach, and green onion. Pack toasted seeds separately.
The observable cue: mushrooms will stop releasing liquid and the pan will start to dry out—that’s when they’re ready to brown. If you add the miso too early, it can scorch. Wait until the mushrooms are mostly cooked, then add the miso butter and move fast.
Storage tip: Pack the toasted seeds in a small separate container. Add them to the bowl right before eating so they stay crispy and don’t absorb moisture from the mushrooms. The miso mushrooms taste even better on day two when the flavors deepen.
3. Citrus Shrimp with Crispy Shallots and Lime Rice
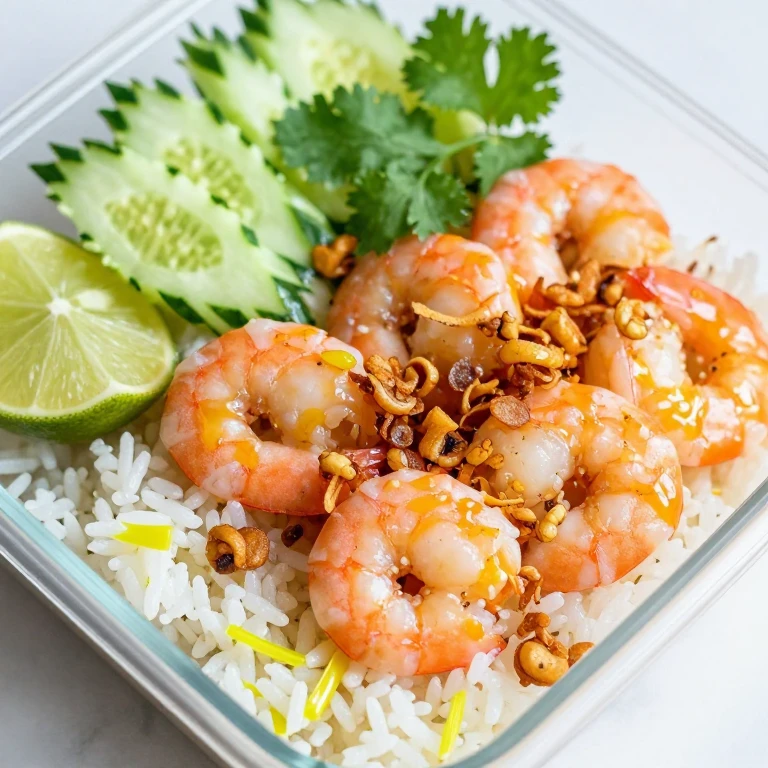
Shrimp bowls can go soggy fast, but I’ve solved it by building in two textural elements: crispy fried shallots and lime-infused rice that tastes bright enough to stand up to the acidity. The Whirl Factor is the combination of citrus-marinated shrimp and crispy shallots—it’s restaurant-quality, but takes 15 minutes from start to finish.
Bright, zesty, with crispy layers and a hint of heat.
Quick assembly and naturally gluten-free when you use tamari instead of soy sauce.
Ingredients
- 2 cups cooked jasmine rice
- 1 lb large shrimp, peeled and deveined
- 3 tablespoons lime juice
- 2 tablespoons fish sauce
- 1 tablespoon honey
- 2 cloves garlic, minced
- 1/4 teaspoon red pepper flakes
- 1/2 cup crispy fried shallots (store-bought)
- 1 cup shredded cucumber
- 1/4 cup fresh cilantro
- Lime wedges for serving
Instructions
- In a bowl, whisk together lime juice, fish sauce, honey, garlic, and red pepper flakes. Add shrimp and toss to coat. Let marinate for 10 minutes while you prepare the rice.
- Toss the cooked rice with the zest of one lime and a pinch of salt. Divide between lunch containers.
- Heat a large skillet over high heat. Add shrimp and marinade, cooking until shrimp turn pink and opaque (about 3–4 minutes total). Do not overcook. Cool slightly before packing.
- Top each rice bowl with cooled shrimp, cucumber, cilantro, and crispy shallots. Pack lime wedges separately.
The observable cue: shrimp will turn from gray to bright pink when they’re done. The moment they’re opaque all the way through, pull them off heat. Overcooked shrimp get rubbery, and you’ll lose the tender texture that makes this bowl special. If you’re worried, remove them 30 seconds early—carryover heat will finish the cooking.
Storage tip: Pack crispy shallots in a separate container and add them right before eating. Store the shrimp and rice separately if you’re prepping more than one day ahead. The shrimp will keep for two days in the fridge and reheats gently in the microwave (30–45 seconds).
4. Spiced Lentil Bowl with Roasted Cauliflower and Tahini Drizzle
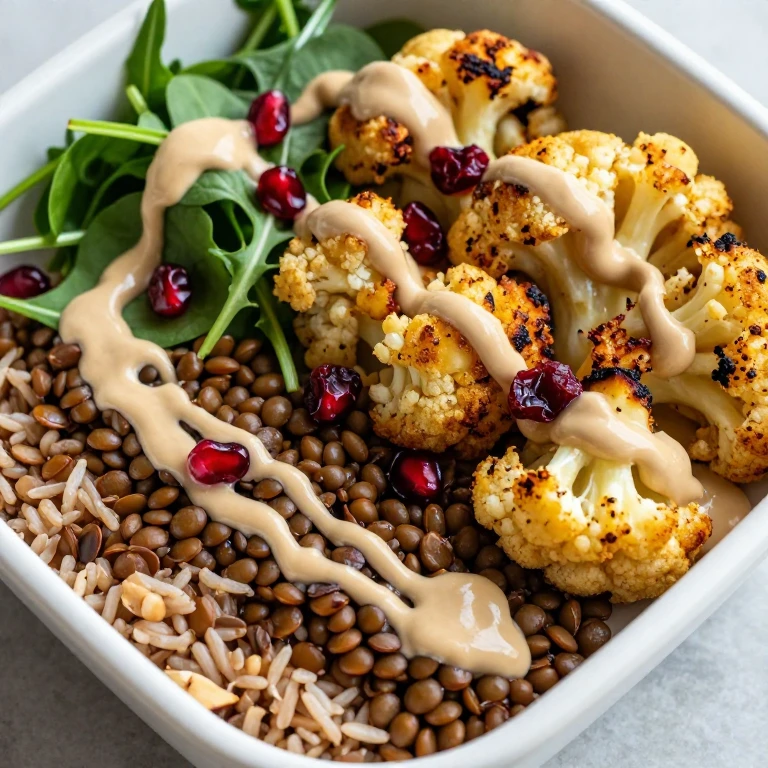
This is the bowl I make when I want something hearty enough to keep me full until dinner, but light enough that I don’t need a nap at 3 p.m. The Whirl Factor is the spice blend—cumin, coriander, and a touch of cinnamon—that makes lentils feel sophisticated instead of utilitarian. Roasted cauliflower adds texture, and tahini sauce ties everything together.
Warm-spiced, earthy, and surprisingly elegant for a desk lunch.
Completely vegetarian, naturally vegan, and freezes beautifully.
Ingredients
- 2 cups cooked brown rice
- 1 cup cooked brown or green lentils
- 2 cups cauliflower florets
- 3 tablespoons olive oil, divided
- 1 teaspoon cumin
- 1 teaspoon coriander
- 1/4 teaspoon cinnamon
- 1/4 cup tahini
- 2 tablespoons lemon juice
- 1 clove garlic, minced
- 2 cups fresh greens (spinach or arugula)
- Pomegranate seeds or dried cranberries (optional)
Instructions
- Toss cauliflower with 2 tablespoons olive oil, cumin, coriander, cinnamon, and a pinch of salt. Spread on a baking sheet and roast at 425°F for 20–25 minutes until golden and crispy at the edges.
- While cauliflower roasts, whisk together tahini, lemon juice, garlic, remaining 1 tablespoon olive oil, and 3–4 tablespoons warm water until you reach a drizzle consistency.
- Warm the cooked lentils gently in a small pot (or pack cold and reheat in the microwave). Season with a pinch of salt.
- Divide rice between lunch containers. Top with warm lentils, roasted cauliflower, fresh greens, and pomegranate seeds if using. Drizzle tahini sauce over the top.
The observable cue: cauliflower is done when the edges turn deep golden-brown and the florets are tender when pierced with a fork. Don’t stir too often—you want caramelization, not steaming. If the tahini sauce seems too thick, add water one tablespoon at a time until it reaches the right consistency.
Storage tip: Pack the tahini sauce in a separate small container and drizzle it on right before eating. The lentils and cauliflower taste even better the next day when spices have time to deepen. This bowl freezes well for up to three months—freeze before adding the tahini sauce.
5. Ginger-Soy Tofu with Pickled Vegetables and Crispy Rice Topping
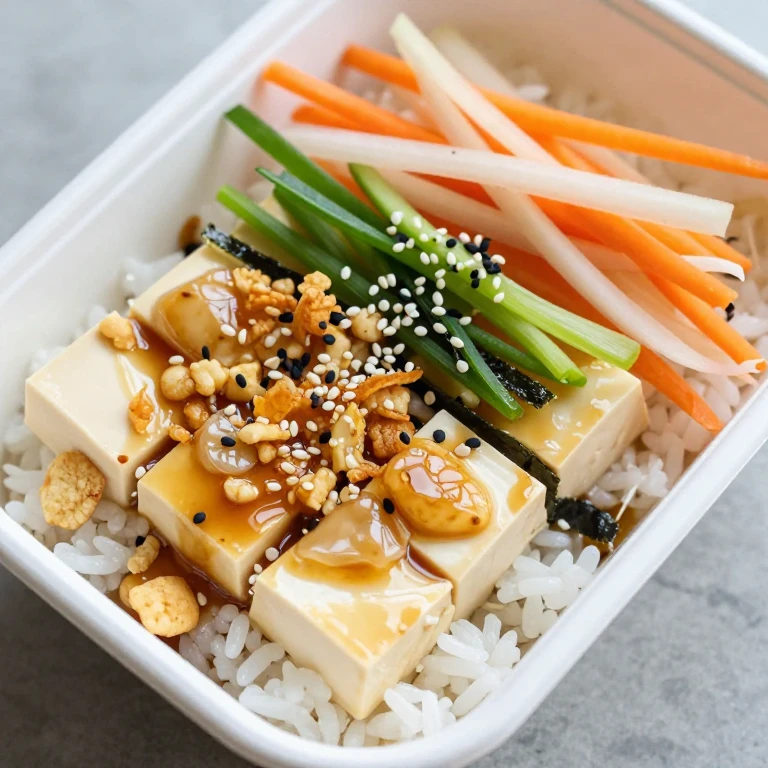
I developed this bowl for anyone who wants bold Asian flavors but needs something that holds up in a lunch box. The Whirl Factor is the combination of silky marinated tofu and quick-pickled vegetables that stay crisp and tangy for days. A crispy rice topping (like the kind you’d find at the bottom of a rice cooker) adds that textural element that makes people actually excited about lunch.
Savory, tangy, with layers of crunch and umami depth.
Vegan-friendly and naturally gluten-free when you use tamari.
Ingredients
- 2 cups cooked jasmine rice
- 14 oz extra-firm tofu, pressed and cubed
- 1/4 cup low-sodium soy sauce
- 2 tablespoons rice vinegar
- 1 tablespoon fresh ginger, minced
- 2 cloves garlic, minced
- 1 tablespoon sesame oil
- 1 cup shredded carrots and daikon (or cucumber)
- 2 tablespoons rice vinegar (for pickling)
- 1 tablespoon sugar
- 2 green onions, sliced
- Nori, sesame seeds, and crispy rice crackers for topping
Instructions
- Press tofu between paper towels for 10 minutes to remove excess moisture. Cut into 3/4-inch cubes.
- Whisk together soy sauce, rice vinegar, ginger, garlic, and sesame oil. Add tofu and gently toss to coat. Let marinate for at least 15 minutes (or up to 24 hours for deeper flavor).
- In a small bowl, combine shredded vegetables, rice vinegar, sugar, and a pinch of salt. Let sit for at least 10 minutes—the vegetables will soften slightly and become tangy.
- Divide rice between lunch containers. Top with marinated tofu, pickled vegetables, green onions, nori, sesame seeds, and crispy rice crackers. Pack crackers separately if prepping ahead.
The observable cue: tofu should feel slightly firm when pressed—if it’s mushy, it’s overcooked. When you marinate it, the edges will absorb the soy sauce and turn slightly darker. That’s exactly what you want. If you can’t find crispy rice crackers, use crushed rice cereal or even crushed nori for the same effect.
Storage tip: Pack crispy elements (rice crackers, nori) separately from the marinated tofu and vegetables. The pickled vegetables actually improve over time and will last five days in the fridge. The tofu can marinate for up to 24 hours, making this an excellent meal-prep option.
6. Harissa Chicken with Roasted Beets and Herb Yogurt
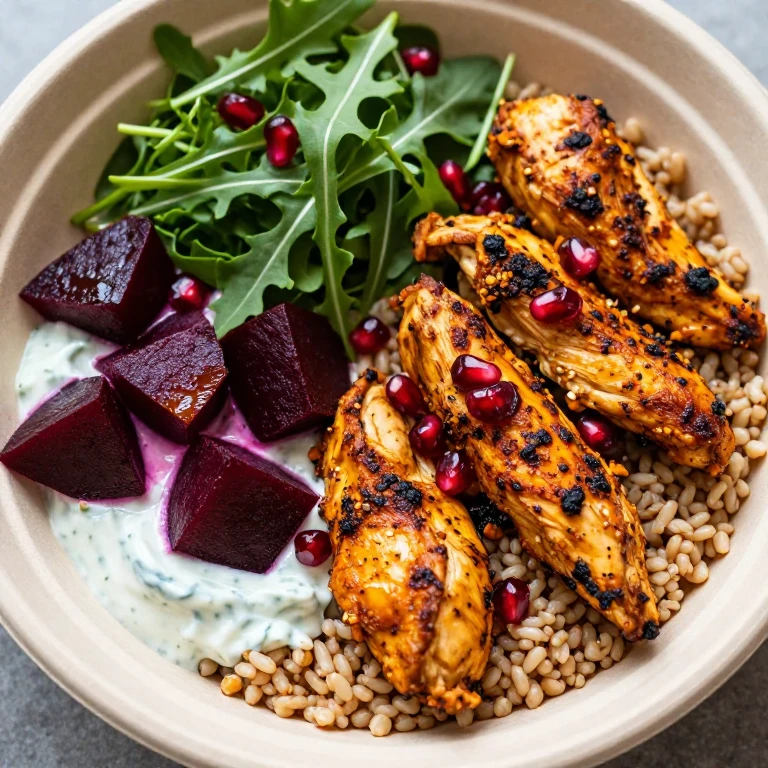
When I want something with real depth and a touch of heat, this is my move. The Whirl Factor is harissa-spiced chicken paired with earthy roasted beets and a cooling herb yogurt that balances everything. The beets add natural sweetness and brilliant color, plus they stay tender and flavorful through reheating.
Warm-spiced, slightly smoky, with cool herbal brightness cutting through.
Impressive enough for a lunch you actually want to eat at your desk, not something you rush through.
Ingredients
- 2 cups cooked farro or brown rice
- 1 lb boneless, skinless chicken breasts, cut into strips
- 3 tablespoons harissa paste
- 2 tablespoons olive oil, divided
- 2 medium beets, peeled and cubed
- 1/2 cup plain Greek yogurt
- 1/4 cup fresh mint and parsley, chopped
- 1 clove garlic, minced
- 1 tablespoon lemon juice
- 2 cups fresh greens (arugula or spinach)
- Pomegranate seeds (optional)
Instructions
- Toss beets with 1 tablespoon olive oil and a pinch of salt. Spread on a baking sheet and roast at 400°F for 25–30 minutes until tender. Set aside to cool.
- In a bowl, mix harissa paste with remaining 1 tablespoon olive oil. Coat chicken strips and let sit for 10 minutes.
- Heat a large skillet over medium-high heat. Cook chicken until golden and cooked through (165°F internal), about 8–10 minutes. Cool slightly before packing.
- Whisk together Greek yogurt, fresh herbs, garlic, and lemon juice. Divide rice between lunch containers and top with chicken, roasted beets, fresh greens, and a dollop of herb yogurt. Sprinkle pomegranate seeds if using.
The observable cue: chicken is done when it’s no longer pink inside and reaches 165°F. Harissa can char if the heat is too high, so use medium-high and don’t rush. If you see dark spots forming, lower the heat slightly. Roasted beets should pierce easily with a fork when done.
Storage tip: Pack the herb yogurt in a small separate container and add it right before eating so it stays cool and creamy. The harissa chicken and roasted beets taste even better on day two when flavors deepen. This bowl keeps for three days in the fridge.
7. Coconut Curry Shrimp with Jasmine Rice and Cucumber Salad
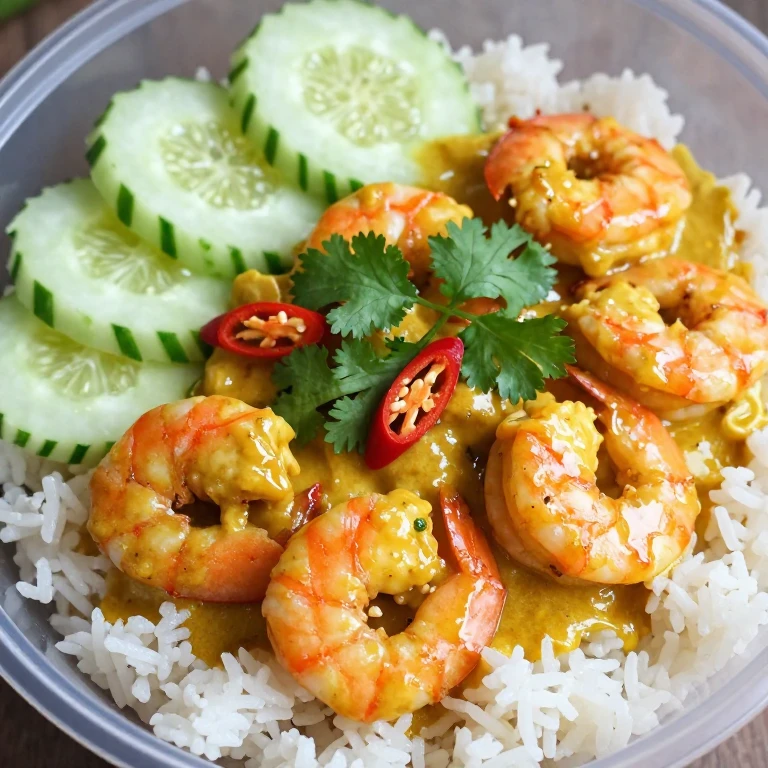
This bowl tastes like a vacation in a lunch container. The Whirl Factor is the balance between creamy coconut curry and a bright, crisp cucumber salad that cuts through the richness. Shrimp cooks so fast that you can make this fresh in the morning, and the jasmine rice absorbs the coconut flavor beautifully.
Creamy, aromatic, with bright acidity and a hint of heat.
Restaurant-quality and faster than you’d think—20 minutes from start to finish.
Ingredients
- 2 cups cooked jasmine rice
- 1 lb large shrimp, peeled and deveined
- 1 can (13.5 oz) coconut milk
- 2 tablespoons red curry paste
- 1 tablespoon fish sauce
- 1 tablespoon lime juice
- 1 tablespoon honey
- 2 cups cucumber, thinly sliced
- 1/4 cup rice vinegar
- 1 tablespoon sugar
- 1/4 cup fresh cilantro
- 1 red chili, sliced (optional)
Instructions
- In a small bowl, whisk together curry paste and a splash of coconut milk until smooth. Heat a large skillet over medium heat and add the curry paste mixture. Cook for 1–2 minutes until fragrant.
- Add remaining coconut milk, fish sauce, lime juice, and honey. Bring to a gentle simmer and add shrimp. Cook until shrimp turn pink and opaque (about 3–4 minutes). Do not overcook. Cool slightly.
- Toss cucumber slices with rice vinegar, sugar, and a pinch of salt. Let sit for 5 minutes—the cucumber will soften slightly and absorb the vinegar.
- Divide jasmine rice between lunch containers. Top with cooled coconut curry shrimp, cucumber salad, cilantro, and red chili if using.
The observable cue: shrimp are done the moment they turn opaque. The curry should smell fragrant and rich when you add the coconut milk—if it smells burnt, your heat was too high. Lower it and continue. Cucumber salad will weep slightly as it sits, which is perfect—that liquid is flavorful and keeps the bowl moist.
Storage tip: Pack the cucumber salad in a separate container if you’re prepping more than one day ahead, as it will soften over time. The shrimp keeps for two days and reheats gently (30–45 seconds in the microwave). The coconut curry actually tastes better on day two when flavors meld.
8. Black Garlic and Soy Glazed Pork with Sesame Greens
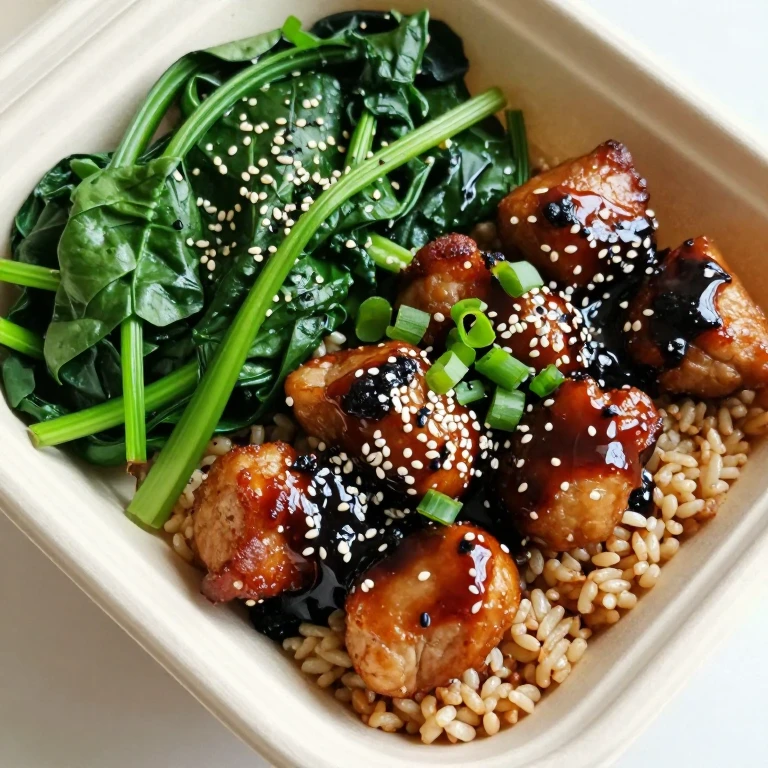
I discovered black garlic a few years ago and immediately started building bowls around it. The Whirl Factor is the umami-rich glaze made from black garlic and soy sauce—it’s complex, slightly sweet, and makes pork taste like you’ve been cooking it for hours. Sesame-dressed greens add a fresh, nutty contrast.
Deep, umami-forward, with a subtle sweetness and sesame brightness.
Meal-prep friendly and naturally gluten-free when you use tamari.
Ingredients
- 2 cups cooked brown rice
- 1 lb pork tenderloin, sliced into 1/4-inch medallions
- 1/4 cup black garlic, minced (or 6–8 whole cloves)
- 3 tablespoons low-sodium soy sauce
- 1 tablespoon mirin
- 1 tablespoon rice vinegar
- 1 tablespoon sesame oil
- 2 tablespoons neutral oil
- 3 cups mixed greens (spinach, bok choy, or mizuna)
- 2 tablespoons sesame seeds
- 1 green onion, sliced
Instructions
- Whisk together black garlic, soy sauce, mirin, rice vinegar, and sesame oil. Set aside.
- Heat neutral oil in a large skillet over medium-high heat. Cook pork medallions until golden and cooked through (145°F internal), about 3–4 minutes per side. Pour the black garlic glaze over the pork and toss gently to coat. Cool slightly.
- Toss greens with a pinch of salt and a light drizzle of sesame oil. Divide rice between lunch containers and top with glazed pork, sesame greens, sesame seeds, and green onion.
- If packing ahead, keep the pork and greens separate until you’re ready to eat so the greens stay crisp.
The observable cue: pork is done at 145°F—use a meat thermometer to be sure. The glaze should coat the pork in a glossy layer. If black garlic is whole, mince it finely so it distributes evenly through the glaze. If you can’t find black garlic, roasted garlic paste works as a substitute, though the flavor will be slightly different.
Storage tip: Keep the glazed pork and sesame greens in separate containers until you’re ready to eat. The pork keeps for three days and reheats gently in the microwave (60–90 seconds). The sesame greens taste best when added fresh or at most a few hours before eating.
9. Za’atar Roasted Chicken with Tahini Sauce and Fattoush Salad
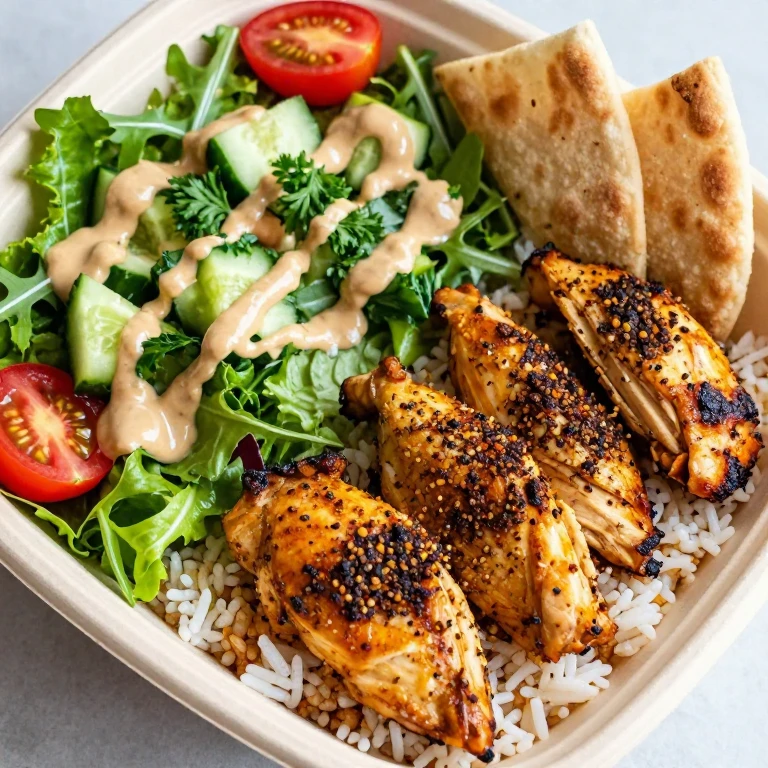
This bowl brings Mediterranean flavors to your lunch box in a way that feels intentional and sophisticated. The Whirl Factor is the za’atar-crusted chicken paired with a silky tahini sauce and a crispy fattoush salad. The pita chips stay crispy when packed separately, so you get that textural contrast that makes lunch exciting.
Herbaceous, nutty, with bright lemon and crispy layers.
Naturally vegetarian-adaptable (use chickpeas instead of chicken) and gluten-free if you use gluten-free pita.
Ingredients
- 2 cups cooked white or brown rice
- 1 lb boneless, skinless chicken thighs, cut into bite-sized pieces
- 3 tablespoons za’atar spice blend
- 2 tablespoons olive oil
- 1/4 cup tahini
- 2 tablespoons lemon juice
- 1 clove garlic, minced
- 2 cups mixed greens (romaine, arugula)
- 1 cup cucumber, diced
- 1/2 cup cherry tomatoes, halved
- 1/4 cup fresh parsley
- Pita chips (store-bought or homemade)
Instructions
- Toss chicken with za’atar and a pinch of salt. Heat olive oil in a large skillet over medium-high heat and cook chicken until golden and cooked through (165°F internal), about 8–10 minutes. Cool slightly.
- Whisk together tahini, lemon juice, garlic, and 3–4 tablespoons warm water until you reach a drizzle consistency.
- Toss greens, cucumber, tomatoes, and parsley together in a bowl.
- Divide rice between lunch containers. Top with za’atar chicken, fattoush salad, and a drizzle of tahini sauce. Pack pita chips separately.
The observable cue: chicken is done when it reaches 165°F internally and is no longer pink. Za’atar should smell herbaceous and warm when it hits the hot oil. If it smells burnt or too intense, your heat was too high. The tahini sauce should be pourable but not watery—adjust water gradually.
Storage tip: Pack pita chips in a separate container and add them right before eating so they stay crispy. Store the tahini sauce separately as well. The za’atar chicken and fattoush salad keep for three days in the fridge. The salad is best eaten within a day of assembly, so pack it separately if prepping multiple days ahead.
10. Miso-Glazed Salmon with Pickled Ginger and Crispy Skin
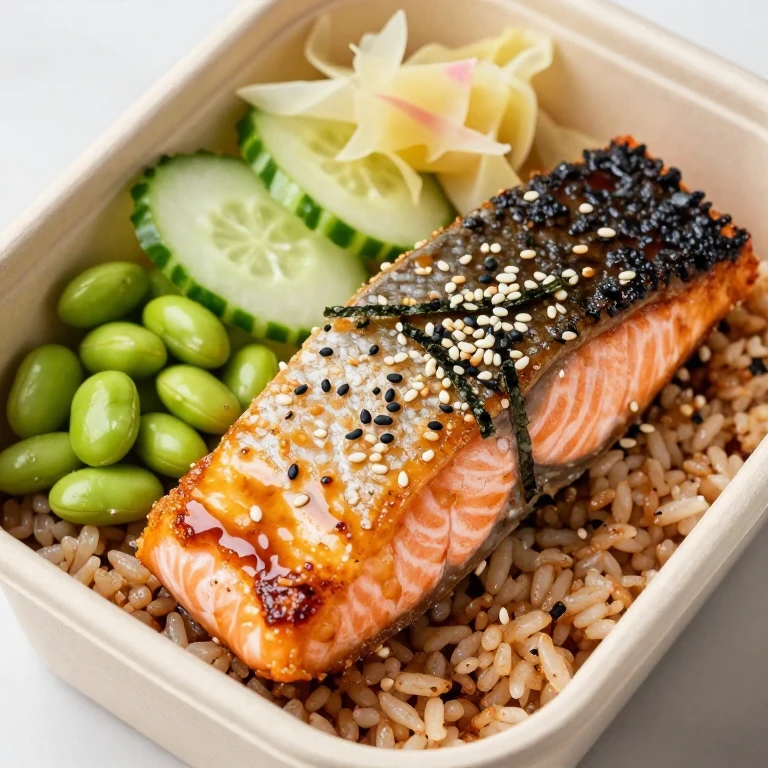
Salmon bowls are a game-changer for workday lunches because salmon stays moist and flavorful even after reheating. The Whirl Factor is the miso glaze combined with crispy skin and quick-pickled ginger that cuts through the richness. This bowl feels fancy but comes together in 20 minutes.
Rich, umami-forward, with bright acidity and crispy textural contrast.
Naturally gluten-free and packed with omega-3s to keep you focused through the afternoon.
Ingredients
- 2 cups cooked sushi rice or brown rice
- 2 salmon fillets (6 oz each), skin on
- 3 tablespoons white miso paste
- 1 tablespoon mirin
- 1 teaspoon sesame oil
- 1/2 cup fresh ginger, thinly sliced
- 1/4 cup rice vinegar
- 1 tablespoon sugar
- 2 cups cucumber, thinly sliced
- 1/4 cup edamame
- Sesame seeds and nori for topping
Instructions
- Pat salmon dry with paper towels. Mix miso, mirin, and sesame oil together. Spread on the flesh side of the salmon.
- Heat a skillet over medium-high heat, skin-side down. Cook salmon for 4–5 minutes until skin is crispy, then flip and cook for another 2–3 minutes until cooked through. Cool slightly and break into bite-sized pieces.
- Combine ginger slices, rice vinegar, sugar, and a pinch of salt. Let sit for 10 minutes—the ginger will soften and become tangy.
- Divide rice between lunch containers. Top with miso salmon, pickled ginger, cucumber, edamame, sesame seeds, and nori.
The observable cue: salmon skin is crispy when it makes a crackling sound as you press it with a spatula. The flesh should be opaque and flake easily when tested with a fork. If the glaze browns too quickly, lower the heat—you want the miso to caramelize gently, not char. Pickled ginger will soften as it sits, which is perfect.
Storage tip: Pack pickled ginger in a separate container if you’re prepping more than one day ahead. The miso salmon keeps for three days and tastes great cold or gently reheated (30–45 seconds in the microwave). The crispy skin holds up surprisingly well, even after reheating.
11. Kimchi Beef with Crispy Rice and Gochujang Mayo

This bowl is bold, spicy, and unapologetically flavorful. The Whirl Factor is the combination of tender beef, funky kimchi, and a gochujang-spiked mayo that ties everything together. Crispy rice at the bottom of the bowl adds textural depth and absorbs all the good flavors.
Spicy, funky, with layers of umami and creamy heat.
Fast assembly and naturally meal-prep friendly—the flavors actually improve on day two.
Ingredients
- 2 cups cooked short-grain white or brown rice
- 3/4 lb beef sirloin or ribeye, thinly sliced
- 3 tablespoons low-sodium soy sauce
- 1 tablespoon sesame oil
- 2 cloves garlic, minced
- 1 tablespoon honey
- 1 cup kimchi, chopped
- 1/4 cup mayonnaise
- 2 tablespoons gochujang (Korean red chili paste)
- 1 tablespoon rice vinegar
- 2 green onions, sliced
- Sesame seeds for topping
Instructions
- Whisk together soy sauce, sesame oil, garlic, and honey. Add sliced beef and toss to coat. Let marinate for 10 minutes.
- Heat a large skillet or cast iron over high heat. Cook beef until browned and cooked to your preference (about 2–3 minutes for medium-rare). Transfer to a plate and cool slightly.
- Whisk together mayonnaise, gochujang, and rice vinegar until smooth. Adjust spice level to taste.
- Divide rice between lunch containers. Top with beef, chopped kimchi, green onions, and sesame seeds. Drizzle gochujang mayo on the side.
The observable cue: beef should be deeply browned on the outside and tender inside. Don’t move it around too much in the pan—let it sit for 30 seconds to develop a crust. Gochujang mayo should be creamy and pourable. If it’s too thick, add a teaspoon of water at a time until it reaches the right consistency.
Storage tip: Pack gochujang mayo in a small separate container and drizzle it on right before eating. The beef and kimchi taste even better on day two when flavors meld. This bowl keeps for three days in the fridge. The rice will absorb the kimchi flavors as it sits, which is exactly what you want.
12. Beet and Feta Grain Bowl with Walnut Crunch and Pomegranate Molasses

This is the bowl I make when I want something vegetarian that feels completely satisfying and restaurant-worthy. The Whirl Factor is the combination of earthy roasted beets, creamy feta, and toasted walnuts with a pomegranate molasses drizzle that brings everything together. It’s naturally gluten-free and works beautifully with any grain you have on hand.
Earthy, tart, with nutty crunch and a touch of pomegranate sweetness.
Completely vegetarian and naturally vegan-adaptable (use nutritional yeast instead of feta).
Ingredients
- 2 cups cooked farro, quinoa, or brown rice
- 3 medium beets, peeled and cubed
- 2 tablespoons olive oil, divided
- 1 cup walnuts, roughly chopped
- 1/2 cup crumbled feta cheese
- 2 cups fresh greens (spinach, arugula, or mixed)
- 1/4 cup pomegranate molasses
- 2 tablespoons red wine vinegar
- 1 clove garlic, minced
- Pomegranate seeds (optional)
- Fresh mint for garnish
Instructions
- Toss beets with 1 tablespoon olive oil and a pinch of salt. Spread on a baking sheet and roast at 400°F for 25–30 minutes until tender and caramelized at the edges.
- Toast walnuts in a dry skillet over medium heat, stirring frequently, until fragrant (about 4–5 minutes). Transfer to a plate to cool.
- Whisk together pomegranate molasses, red wine vinegar, remaining 1 tablespoon olive oil, and minced garlic. Toss fresh greens with half of this dressing.
- Divide grain between lunch containers. Top with roasted beets, dressed greens, toasted walnuts, crumbled feta, and pomegranate seeds if using. Drizzle remaining dressing on the side.
The observable cue: roasted beets should pierce easily with a fork and have caramelized edges. The walnuts are done when they smell nutty and warm—don’t let them go too dark or they’ll taste burnt. Pomegranate molasses should smell tart and slightly sweet. If you can’t find it, whisk together 2 tablespoons pomegranate juice with 1 tablespoon honey and 1 tablespoon red wine vinegar as a substitute.
Storage tip: Pack the toasted walnuts and feta in separate containers and add them right before eating so they stay fresh and don’t soften. The roasted beets and dressed greens can be packed together and will keep for three days. This bowl actually tastes better on day two when all the flavors have had time to meld.
How to Choose the Right One
Each of these bowls is built around a specific Whirl Factor—a combination of bold flavor and textural contrast that makes lunch worth looking forward to. Here’s how I navigate the list depending on what I need:
- If you want something fast (under 20 minutes): Try the Citrus Shrimp, Coconut Curry Shrimp, or Teriyaki Chicken. All three come together quickly and taste restaurant-quality.
- If you want meal-prep friendly (make five at once): Go for the Teriyaki Chicken, Spiced Lentil Bowl, or Ginger-Soy Tofu. These taste even better on day two when flavors deepen.
- If you want vegetarian options: The Miso-Butter Mushrooms, Spiced Lentil Bowl, Ginger-Soy Tofu, and Beet and Feta Grain Bowl are all completely satisfying without any meat.
- If you want something warm and comforting: The Harissa Chicken, Coconut Curry Shrimp, and Spiced Lentil Bowl all feel cozy and nourishing, even when eaten cold.
- If you want maximum textural contrast: The Crispy Garlic Teriyaki Chicken, Miso-Butter Mushrooms, Ginger-Soy Tofu, and Kimchi Beef all build in multiple layers of crunch that survive the lunch box.
FAQ
Can I make all 12 bowls at once for the week?
I wouldn’t recommend making all 12 in one sitting—that’s a lot of prep. Instead, I pick three or four bowls and make two servings of each on Sunday. That way you get variety without spending your entire afternoon cooking. Choose recipes with complementary ingredients so you’re not buying 12 different proteins.
Which bowls freeze best?
The Spiced Lentil Bowl, Teriyaki Chicken, Harissa Chicken, and Kimchi Beef all freeze beautifully for up to three months. Freeze them before adding fresh herbs, crispy elements, or creamy sauces. Thaw overnight in the fridge and reheat gently in the microwave. Seafood bowls are best eaten fresh or within two days.
How do I keep crispy elements crispy?
This is the secret to a great lunch bowl: pack all crispy and crunchy elements separately and add them right before eating. This includes crispy garlic, toasted seeds, pita chips, crispy shallots, and toasted walnuts. If you’re prepping multiple days ahead, store them in a separate airtight container.
What’s the best container for packing these bowls?
I use glass containers with divided compartments so I can keep sauces, crispy elements, and proteins separate until lunchtime. If you use a single container, pack the rice on the bottom, proteins and cooked vegetables in the middle, and fresh elements (greens, herbs, crispy toppings) on top. This way, everything stays where it should be.
Can I make these bowls vegan?
Yes. The Miso-Butter Mushrooms, Spiced Lentil Bowl, Ginger-Soy Tofu, and Beet and Feta Grain Bowl are already vegan or easily adaptable. For the others, swap the protein: use extra-firm tofu, chickpeas, or tempeh in place of meat or seafood. The sauces and flavor profiles will work just as well.
How long do these bowls keep in the fridge?
Most bowls keep for three days. Seafood bowls (shrimp, salmon) are best eaten within two days. Store each component separately if you’re prepping multiple days ahead—the rice, protein, and fresh elements all have different shelf lives. Always check for off smells before eating.
Can I reheat these bowls, or should I eat them cold?
Both work. I usually eat the rice and proteins warm (microwave for 60–90 seconds) and add fresh elements cold. The exception is seafood—I prefer it room temperature or cold. Experiment to see what you prefer. Most of these bowls taste great either way.