
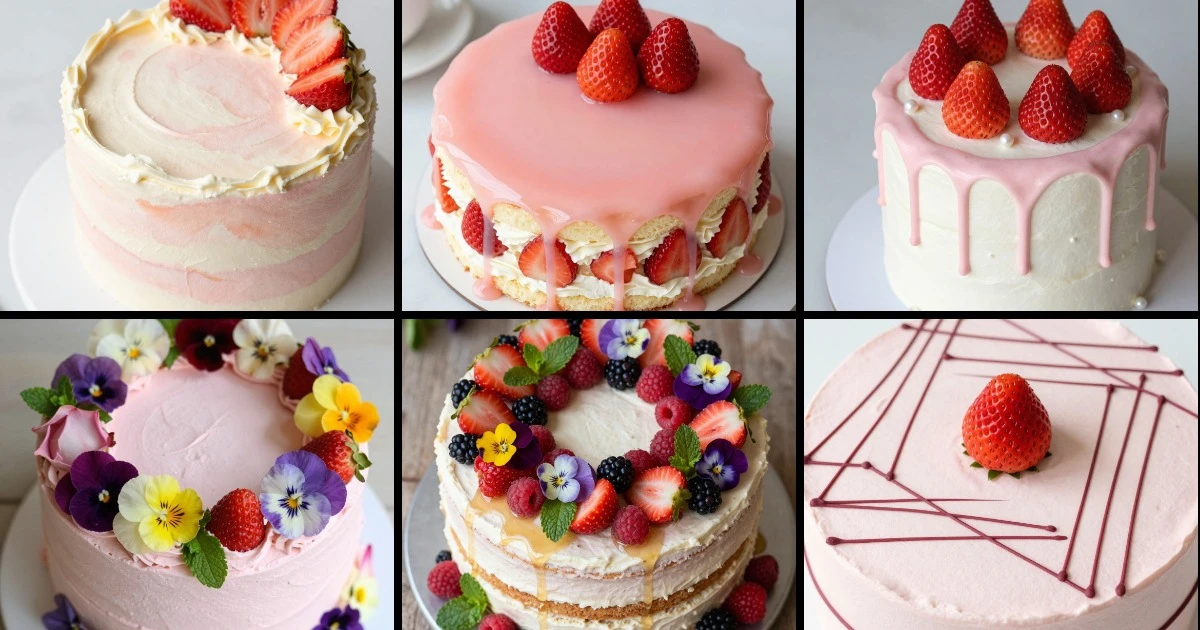
I’ve learned that strawberry cake isn’t just about flavor—it’s about how it looks on the plate and how it feels in your mouth. The best aesthetic strawberry cakes combine bold visual moves with texture contrast: silky buttercream against crisp edges, glossy mirror glaze against matte florals, clean lines against organic fruit placement. I’ve organized these 12 designs by decorating style so you can pick the look that matches your skill level and the vibe you’re after. Whether you’re after watercolor brushstrokes, dramatic drip effects, or minimal line art, each one has a clear twist that makes it stand out.
What I love about building these cakes is that the decorating technique becomes the signature. You’re not just frosting a cake—you’re creating a statement piece. I’ve included full recipes, color-mixing notes, and practical tips for each style so you can execute these looks with confidence. Let’s dive into the designs that will make your next cake truly memorable.
Watercolor Buttercream Strawberry Cake Recipes
Watercolor effects are all about layering soft color washes across buttercream. The technique gives you an artistic, hand-painted finish that looks gallery-worthy but is totally achievable with a palette knife and patience. I always start with a neutral base and build color depth with thin, overlapping strokes.
1. Soft Blush Watercolor Layer Cake
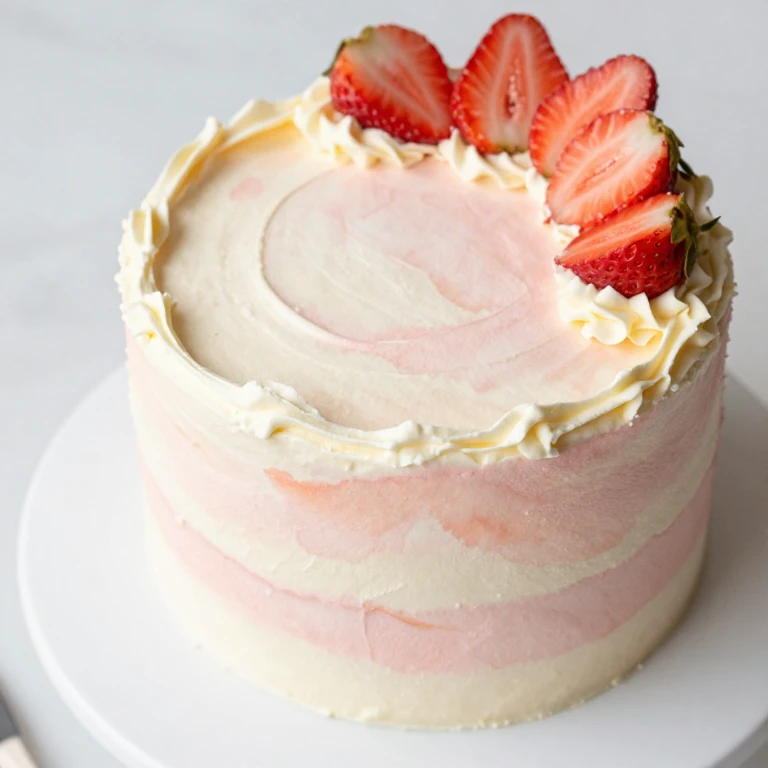
This is my go-to when I want that effortless-looking painted effect. I use a basic vanilla cake, stabilized buttercream, and food coloring mixed to create dusty rose, peach, and cream washes. The strawberries sit on top as both garnish and color anchor.
Ingredients
- 2 cups all-purpose flour
- 1 3/4 teaspoons baking powder
- 1/2 teaspoon salt
- 1/2 cup unsalted butter, softened
- 1 cup granulated sugar
- 2 large eggs
- 1 teaspoon vanilla extract
- 3/4 cup whole milk
- 3 cups unsalted butter, softened (for frosting)
- 4 cups powdered sugar
- 2 tablespoons heavy cream
- 1/2 teaspoon vanilla extract
- Gel food coloring (rose, peach, cream)
- 1 pound fresh strawberries, hulled and halved
Instructions
- Preheat oven to 350°F. Grease and flour two 8-inch round cake pans.
- In a medium bowl, whisk together flour, baking powder, and salt.
- In a large bowl, cream butter and sugar until light and fluffy, about 3 minutes.
- Add eggs one at a time, beating well after each addition. Stir in vanilla extract.
- Alternate adding flour mixture and milk to the butter mixture, beginning and ending with flour. Mix until just combined.
- Divide batter evenly between prepared pans and smooth the tops.
- Bake for 25–30 minutes, until a toothpick inserted in the center comes out clean.
- Cool in pans for 10 minutes, then turn out onto wire racks to cool completely.
- For the frosting, beat softened butter until creamy. Gradually add powdered sugar, one cup at a time, beating well after each addition.
- Add heavy cream and vanilla extract. Beat until light and fluffy, about 2 minutes. Add a pinch of gel coloring to tint the base frosting a very pale cream.
- Level cake layers and place the first layer on a cake board or plate. Spread a thin layer of frosting on top.
- Add the second cake layer and frost the top and sides with a crumb coat. Chill for 15 minutes.
- Apply the final frosting layer, keeping it smooth but not overly polished—slight texture is part of the watercolor look.
- Mix small amounts of frosting with rose, peach, and deeper cream gel colors in separate small bowls.
- Using a palette knife or offset spatula, apply thin, overlapping washes of colored frosting across the cake, allowing colors to blend slightly where they meet.
- Arrange fresh strawberry halves on top and around the sides, pressing gently into the frosting.
- Chill for at least 30 minutes before serving.
Whirl Factor: The soft watercolor wash creates an artistic finish while the fresh strawberries provide crisp, juicy texture contrast against creamy buttercream.
Flavor Spin: Swap vanilla for almond extract in the cake, or add a tablespoon of strawberry jam to the frosting for deeper berry flavor.
Storage: Keep this cake refrigerated in an airtight container for up to 3 days. The watercolor frosting holds its color best when chilled.
2. Ombré Gradient Watercolor Cake
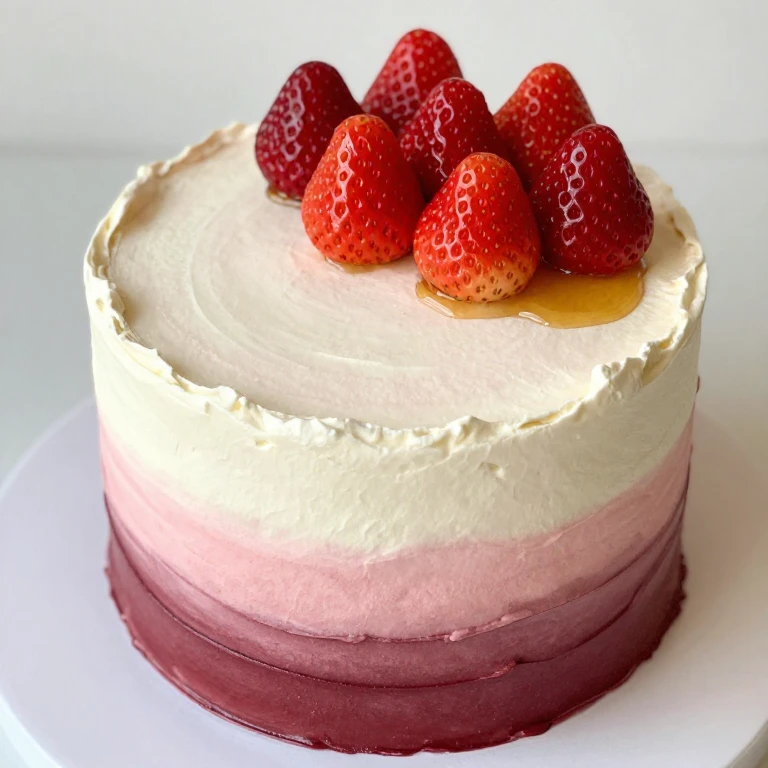
I love this version because it’s a step up in visual drama. You’re creating a color gradient that flows from light to deep, which requires planning your color placement but rewards you with a seriously Instagram-worthy result.
Ingredients
- 2 cups all-purpose flour
- 1 3/4 teaspoons baking powder
- 1/2 teaspoon salt
- 1/2 cup unsalted butter, softened
- 1 cup granulated sugar
- 2 large eggs
- 1 teaspoon vanilla extract
- 3/4 cup whole milk
- 3 cups unsalted butter, softened (for frosting)
- 4 cups powdered sugar
- 2 tablespoons heavy cream
- 1/2 teaspoon vanilla extract
- Gel food coloring (rose, red, burgundy)
- 1 pound fresh strawberries, hulled
- 2 tablespoons honey
Instructions
- Preheat oven to 350°F. Grease and flour two 8-inch round cake pans.
- Whisk together flour, baking powder, and salt in a medium bowl.
- Cream butter and sugar in a large bowl until light and fluffy, about 3 minutes.
- Add eggs one at a time, beating well after each addition. Stir in vanilla extract.
- Alternate adding flour mixture and milk, beginning and ending with flour. Mix until just combined.
- Divide batter evenly between prepared pans.
- Bake for 25–30 minutes, until a toothpick inserted in the center comes out clean.
- Cool in pans for 10 minutes, then turn out onto wire racks to cool completely.
- Make the frosting by beating softened butter until creamy. Gradually add powdered sugar, beating well after each addition.
- Add heavy cream and vanilla extract. Beat until light and fluffy, about 2 minutes.
- Divide frosting into 5 small bowls. Tint them with gel coloring to create a gradient: very pale pink, light pink, medium rose, deep rose, and burgundy.
- Level cake layers and place the first layer on a cake board. Spread a thin layer of frosting on top.
- Add the second cake layer and apply a crumb coat. Chill for 15 minutes.
- Apply the final frosting layer, working in sections. Start at the top with the palest pink and work downward, blending each shade into the next with a palette knife to create a seamless gradient.
- Arrange fresh strawberries on top, placing darker berries near the deeper color areas for visual cohesion.
- Drizzle lightly with honey for shine and extra sweetness.
- Chill for at least 30 minutes before serving.
Whirl Factor: The ombré gradient adds sophisticated color movement while fresh strawberries provide bright, crisp flavor and textural pop.
Flavor Spin: Add 1/4 teaspoon of strawberry extract to the frosting for concentrated berry flavor, or layer the cake with strawberry jam between layers.
Storage: Refrigerate in an airtight container for up to 3 days. The ombré frosting is best served chilled for color clarity and texture.
3. Peachy-Pink Watercolor with Gold Leaf
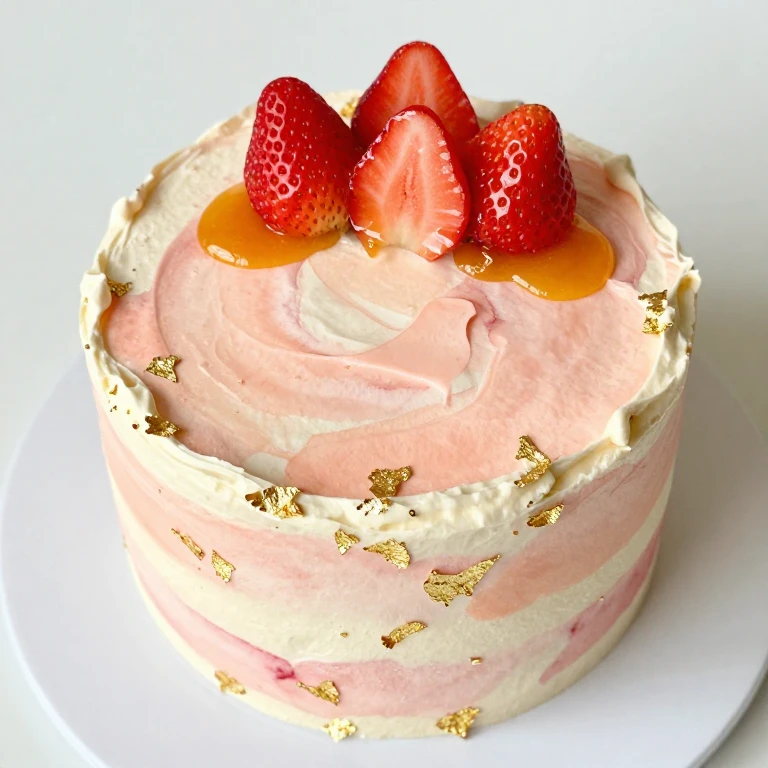
This one feels luxe without being fussy. I combine warm peach and soft pink washes with edible gold leaf for a finish that reads as elegant and modern. The combination of matte buttercream and metallic accents is my favorite texture play.
Ingredients
- 2 cups all-purpose flour
- 1 3/4 teaspoons baking powder
- 1/2 teaspoon salt
- 1/2 cup unsalted butter, softened
- 1 cup granulated sugar
- 2 large eggs
- 1 teaspoon vanilla extract
- 3/4 cup whole milk
- 3 cups unsalted butter, softened (for frosting)
- 4 cups powdered sugar
- 2 tablespoons heavy cream
- 1/2 teaspoon vanilla extract
- Gel food coloring (peach, rose)
- Edible gold leaf (24-karat)
- 1 pound fresh strawberries, hulled
- 2 tablespoons apricot jam, warmed
Instructions
- Preheat oven to 350°F. Grease and flour two 8-inch round cake pans.
- Whisk together flour, baking powder, and salt.
- Cream butter and sugar until light and fluffy, about 3 minutes.
- Add eggs one at a time, beating well after each addition. Stir in vanilla extract.
- Alternate adding flour mixture and milk, beginning and ending with flour.
- Divide batter evenly between prepared pans.
- Bake for 25–30 minutes, until a toothpick inserted in the center comes out clean.
- Cool in pans for 10 minutes, then turn out onto wire racks to cool completely.
- Make the frosting by beating softened butter until creamy. Gradually add powdered sugar, beating well after each addition.
- Add heavy cream and vanilla extract. Beat until light and fluffy, about 2 minutes.
- Divide frosting into 3 bowls. Tint one with peach gel coloring, one with rose, and leave one pale cream.
- Level cake layers and place the first layer on a cake board. Spread a thin layer of frosting on top.
- Add the second cake layer and apply a crumb coat. Chill for 15 minutes.
- Apply the final frosting layer, using a palette knife to blend peach and rose washes across the top and sides in organic, overlapping strokes.
- While frosting is still slightly soft, carefully apply edible gold leaf in scattered patches across the top, pressing gently with a dry brush.
- Arrange fresh strawberries on top, pressing them gently into the frosting.
- Brush strawberries lightly with warmed apricot jam for a glossy finish.
- Chill for at least 30 minutes before serving.
Whirl Factor: Warm watercolor washes combined with metallic gold leaf create an elevated, gallery-quality finish while fresh strawberries deliver crisp, juicy contrast.
Flavor Spin: Add 1/2 teaspoon of almond extract to the frosting for subtle depth, or layer the cake with apricot jam for complementary flavor.
Storage: Keep refrigerated in an airtight container for up to 3 days. Gold leaf is food-safe and won’t degrade when chilled.
Mirror Glaze and Drip Strawberry Cake Recipes
Mirror glazes create that stunning, high-shine finish that looks almost liquid-smooth. The technique requires patience and precision, but the payoff is a cake that looks like it belongs in a patisserie window. I always make sure my glaze is the right temperature before pouring—too hot and it slides off, too cool and it won’t set smoothly.
4. Classic Strawberry Mirror Glaze Cake
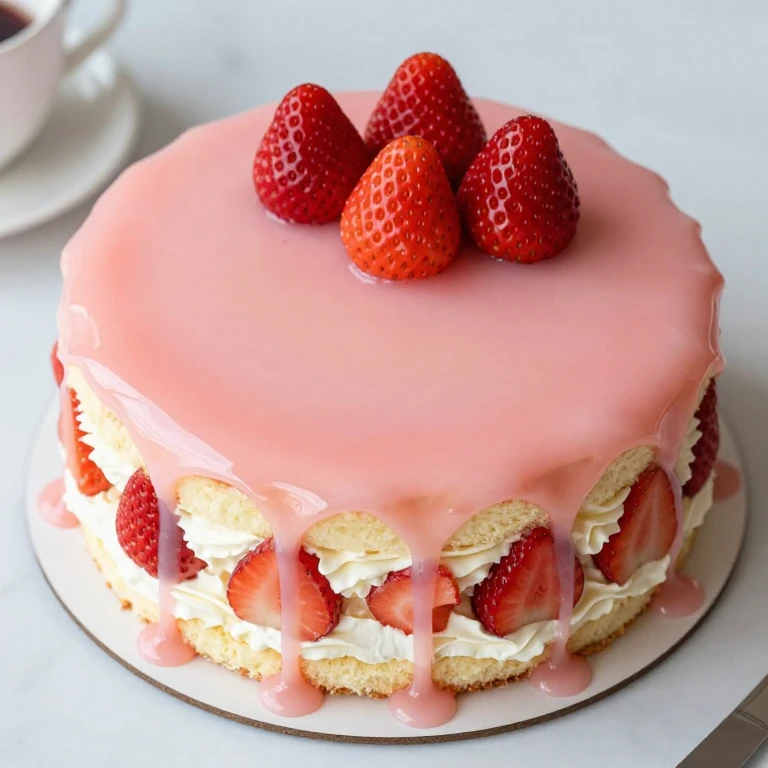
This is the foundational mirror glaze cake I return to constantly. A simple vanilla sponge, silky strawberry pastry cream filling, and a glossy pink mirror glaze create a finish that’s simultaneously elegant and approachable.
Ingredients
- 1 3/4 cups all-purpose flour
- 1 1/2 teaspoons baking powder
- 1/4 teaspoon salt
- 1/2 cup unsalted butter, softened
- 3/4 cup granulated sugar
- 2 large eggs
- 1/2 teaspoon vanilla extract
- 1/2 cup whole milk
- For the pastry cream: 1 cup whole milk, 4 egg yolks, 1/4 cup granulated sugar, 2 tablespoons cornstarch, 1/2 teaspoon vanilla extract, 1/2 cup heavy cream, 1/2 cup fresh strawberry puree
- For the mirror glaze: 1 cup granulated sugar, 1/2 cup heavy cream, 4 ounces white chocolate, chopped, 1/2 cup condensed milk, 2 tablespoons unsalted butter, 1/4 cup fresh strawberry puree, 1/2 teaspoon gelatin powder, 1 tablespoon water
- Fresh strawberries for garnish
Instructions
- Preheat oven to 350°F. Grease and flour an 8-inch round cake pan.
- Whisk together flour, baking powder, and salt.
- Cream butter and sugar until light and fluffy, about 3 minutes.
- Add eggs one at a time, beating well after each addition. Stir in vanilla extract.
- Alternate adding flour mixture and milk, beginning and ending with flour.
- Pour batter into prepared pan.
- Bake for 25–30 minutes, until a toothpick inserted in the center comes out clean.
- Cool in pan for 10 minutes, then turn out onto a wire rack to cool completely.
- For the pastry cream, heat 1 cup milk in a saucepan until steaming. In a bowl, whisk egg yolks with sugar until pale, then whisk in cornstarch.
- Slowly pour hot milk into egg mixture while whisking constantly to temper the eggs.
- Pour the mixture back into the saucepan and cook over medium heat, stirring constantly, until thickened, about 2 minutes.
- Remove from heat and stir in vanilla extract. Press plastic wrap directly onto the surface and chill for at least 30 minutes.
- In a separate bowl, whip heavy cream to stiff peaks. Fold into chilled pastry cream along with strawberry puree.
- For the mirror glaze, bloom gelatin in water for 5 minutes. In a saucepan, heat sugar and cream over medium heat, stirring until sugar dissolves. Remove from heat and add white chocolate, condensed milk, and butter, stirring until smooth.
- Heat the gelatin mixture gently and stir into the glaze. Add strawberry puree and stir until fully combined. Let cool to 85–90°F before using.
- Level the cake and place it on a wire rack set over a baking sheet. Spread pastry cream filling on top of the cake.
- Pour the mirror glaze slowly over the center of the cake, letting it flow evenly to the edges. Work quickly and don’t disturb the cake once the glaze begins to set.
- Chill for at least 2 hours before serving. Arrange fresh strawberries on top just before serving.
Whirl Factor: The glossy mirror glaze creates a stunning, professional finish while the silky strawberry pastry cream provides luxurious texture contrast and bold flavor.
Flavor Spin: Add a tablespoon of strawberry liqueur to the glaze for adult flavor, or layer the cake with fresh strawberry jam before adding the pastry cream.
Storage: Keep refrigerated in an airtight container for up to 2 days. The mirror glaze is best served chilled for optimal shine and texture.
5. Marbled Mirror Glaze Strawberry Cake
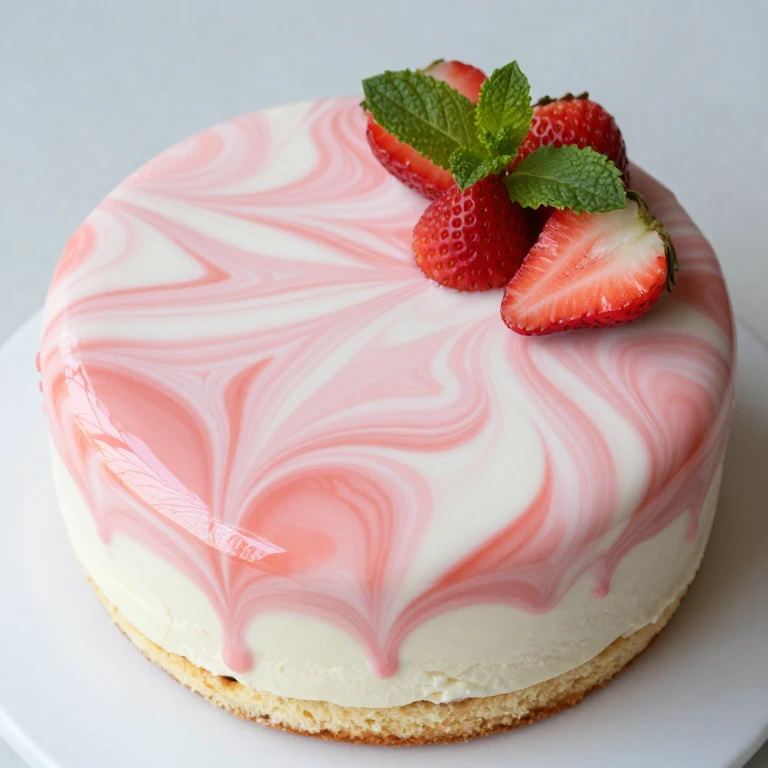
I created this version to add visual complexity to the mirror glaze. By pouring two complementary glazes and swirling them together, you get a marbled effect that reads as intentional and sophisticated.
Ingredients
- 1 3/4 cups all-purpose flour
- 1 1/2 teaspoons baking powder
- 1/4 teaspoon salt
- 1/2 cup unsalted butter, softened
- 3/4 cup granulated sugar
- 2 large eggs
- 1/2 teaspoon vanilla extract
- 1/2 cup whole milk
- For the pastry cream: 1 cup whole milk, 4 egg yolks, 1/4 cup granulated sugar, 2 tablespoons cornstarch, 1/2 teaspoon vanilla extract, 1/2 cup heavy cream
- For the pink glaze: 1 cup granulated sugar, 1/2 cup heavy cream, 4 ounces white chocolate, chopped, 1/2 cup condensed milk, 2 tablespoons unsalted butter, 1/4 cup strawberry puree, 1/2 teaspoon gelatin powder, 1 tablespoon water
- For the white glaze: 1 cup granulated sugar, 1/2 cup heavy cream, 4 ounces white chocolate, chopped, 1/2 cup condensed milk, 2 tablespoons unsalted butter, 1/2 teaspoon gelatin powder, 1 tablespoon water
- Fresh strawberries and mint leaves for garnish
Instructions
- Preheat oven to 350°F. Grease and flour an 8-inch round cake pan.
- Whisk together flour, baking powder, and salt.
- Cream butter and sugar until light and fluffy, about 3 minutes.
- Add eggs one at a time, beating well after each addition. Stir in vanilla extract.
- Alternate adding flour mixture and milk, beginning and ending with flour.
- Pour batter into prepared pan and bake for 25–30 minutes, until a toothpick inserted in the center comes out clean.
- Cool in pan for 10 minutes, then turn out onto a wire rack to cool completely.
- For the pastry cream, heat 1 cup milk until steaming. Whisk egg yolks with sugar until pale, then whisk in cornstarch.
- Slowly pour hot milk into egg mixture while whisking constantly.
- Pour the mixture back into the saucepan and cook over medium heat, stirring constantly, until thickened, about 2 minutes.
- Remove from heat and stir in vanilla extract. Press plastic wrap directly onto the surface and chill for at least 30 minutes.
- Whip heavy cream to stiff peaks and fold into chilled pastry cream.
- For both glazes, bloom gelatin in water for 5 minutes. In a saucepan, heat sugar and cream over medium heat, stirring until sugar dissolves. Remove from heat and add white chocolate, condensed milk, and butter, stirring until smooth.
- Heat the gelatin mixture gently and stir into the glaze. For the pink glaze, add strawberry puree. For the white glaze, leave as is. Cool both to 85–90°F before using.
- Level the cake and place it on a wire rack set over a baking sheet. Spread pastry cream filling on top.
- Pour the pink glaze and white glaze simultaneously from opposite sides of the cake, allowing them to meet in the middle.
- Using a skewer or thin knife, drag through the glazes in a back-and-forth motion to create a marbled effect.
- Chill for at least 2 hours. Arrange fresh strawberries and mint leaves on top just before serving.
Whirl Factor: The marbled glaze creates dynamic visual movement while the silky pastry cream provides luxurious texture and bold strawberry flavor.
Flavor Spin: Add 1/2 teaspoon of rose extract to the pink glaze for floral notes, or swirl in a tablespoon of strawberry jam before glazing.
Storage: Keep refrigerated in an airtight container for up to 2 days. The marbled glaze maintains its visual impact best when chilled.
6. Strawberry Drip Cake with White Chocolate Glaze
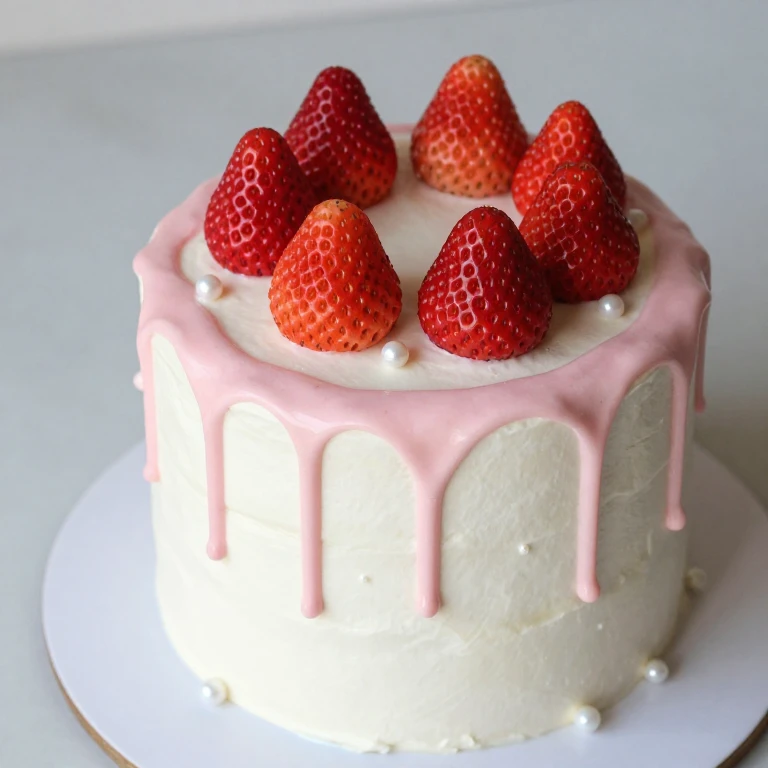
Drip cakes are my favorite shortcut to drama. Instead of a full mirror glaze, you’re creating controlled drips down the sides while keeping the top smooth. The effect is modern and playful without requiring perfect temperature control.
Ingredients
- 2 cups all-purpose flour
- 1 3/4 teaspoons baking powder
- 1/2 teaspoon salt
- 1/2 cup unsalted butter, softened
- 1 cup granulated sugar
- 2 large eggs
- 1 teaspoon vanilla extract
- 3/4 cup whole milk
- 3 cups unsalted butter, softened (for frosting)
- 4 cups powdered sugar
- 2 tablespoons heavy cream
- 1/2 teaspoon vanilla extract
- For the drip glaze: 4 ounces white chocolate, chopped, 2 tablespoons unsalted butter, 2 tablespoons heavy cream, 1/4 cup strawberry puree, 1 tablespoon corn syrup
- Fresh strawberries and edible pearls for garnish
Instructions
- Preheat oven to 350°F. Grease and flour two 8-inch round cake pans.
- Whisk together flour, baking powder, and salt.
- Cream butter and sugar until light and fluffy, about 3 minutes.
- Add eggs one at a time, beating well after each addition. Stir in vanilla extract.
- Alternate adding flour mixture and milk, beginning and ending with flour.
- Divide batter evenly between prepared pans.
- Bake for 25–30 minutes, until a toothpick inserted in the center comes out clean.
- Cool in pans for 10 minutes, then turn out onto wire racks to cool completely.
- For the frosting, beat softened butter until creamy. Gradually add powdered sugar, beating well after each addition.
- Add heavy cream and vanilla extract. Beat until light and fluffy, about 2 minutes.
- Level cake layers and place the first layer on a cake board. Spread a thin layer of frosting on top.
- Add the second cake layer and frost the top and sides with a smooth, even layer of buttercream.
- For the drip glaze, combine white chocolate, butter, and heavy cream in a heatproof bowl. Heat gently, stirring constantly, until smooth. Remove from heat and stir in strawberry puree and corn syrup.
- Let the glaze cool to about 95°F. It should be pourable but not too thin.
- Spoon the glaze onto the top center of the cake and let it flow naturally toward the edges, creating organic drips down the sides. Use a spoon or squeeze bottle for controlled drips.
- Arrange fresh strawberries on top and scatter edible pearls for texture and shine.
- Chill for at least 1 hour before serving.
Whirl Factor: The controlled white chocolate drips create modern visual movement while fresh strawberries provide crisp, juicy contrast against creamy buttercream.
Flavor Spin: Add 1/2 teaspoon of vanilla bean paste to the drip glaze for depth, or layer the cake with strawberry jam between layers.
Storage: Keep refrigerated in an airtight container for up to 3 days. The drip glaze holds its shape best when chilled.
Pressed Flowers and Fresh Fruit Strawberry Cake Recipes
I’m drawn to this style because it celebrates the beauty of real ingredients. Edible flowers and fresh berries pressed into frosting create a finish that feels both artistic and grounded. The key is choosing flowers that are actually edible and arranging them with intentional spacing so they read as a design choice rather than clutter.
7. Semi-Naked Cake with Pressed Strawberries and Pansies
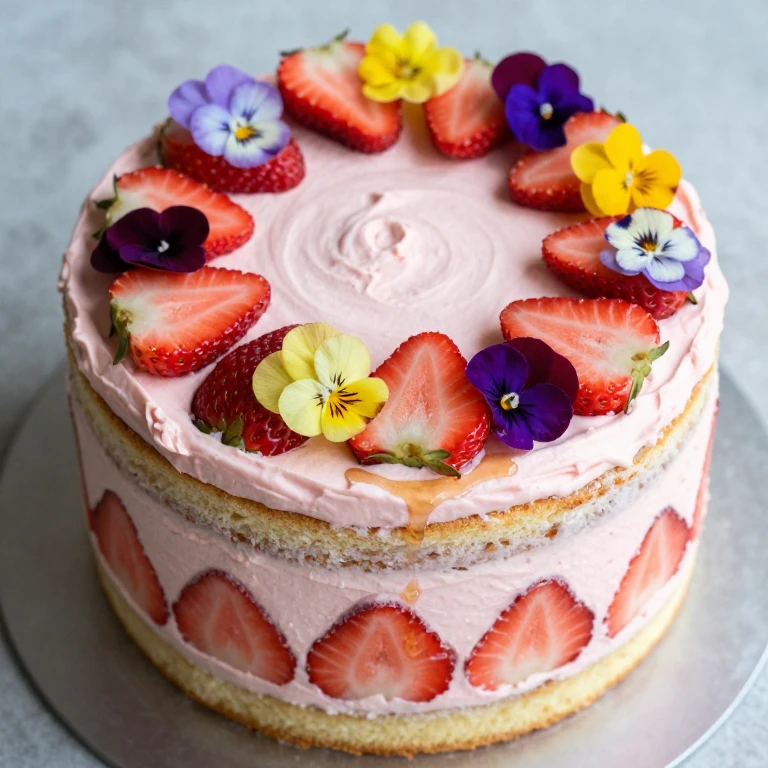
This is my go-to when I want to showcase the cake layers themselves. The semi-naked style leaves some frosting visible on the sides while showing off the internal structure. Pressed flowers and strategically placed strawberries complete the look.
Ingredients
- 2 cups all-purpose flour
- 1 3/4 teaspoons baking powder
- 1/2 teaspoon salt
- 1/2 cup unsalted butter, softened
- 1 cup granulated sugar
- 2 large eggs
- 1 teaspoon vanilla extract
- 3/4 cup whole milk
- 3 cups unsalted butter, softened (for frosting)
- 4 cups powdered sugar
- 2 tablespoons heavy cream
- 1/2 teaspoon vanilla extract
- Gel food coloring (pale pink)
- 1 pound fresh strawberries, hulled and sliced
- Edible pansies and viola flowers
- 2 tablespoons honey
Instructions
- Preheat oven to 350°F. Grease and flour two 8-inch round cake pans.
- Whisk together flour, baking powder, and salt.
- Cream butter and sugar until light and fluffy, about 3 minutes.
- Add eggs one at a time, beating well after each addition. Stir in vanilla extract.
- Alternate adding flour mixture and milk, beginning and ending with flour.
- Divide batter evenly between prepared pans.
- Bake for 25–30 minutes, until a toothpick inserted in the center comes out clean.
- Cool in pans for 10 minutes, then turn out onto wire racks to cool completely.
- For the frosting, beat softened butter until creamy. Gradually add powdered sugar, beating well after each addition.
- Add heavy cream and vanilla extract. Beat until light and fluffy, about 2 minutes. Tint with a small amount of pale pink gel coloring.
- Level cake layers and place the first layer on a cake board. Spread a thin layer of frosting on top, then arrange a layer of sliced strawberries on the frosting.
- Add the second cake layer and frost the top and sides, but leave about 1/2 inch of cake visible around the sides for the semi-naked effect.
- Arrange fresh strawberry slices on top of the cake, pressing them gently into the frosting in a circular pattern.
- Press edible pansies and violas into the frosting between the strawberry slices, creating a balanced, scattered arrangement.
- Drizzle lightly with honey for shine and sweetness.
- Chill for at least 30 minutes before serving.
Whirl Factor: The semi-naked style showcases cake layers while pressed edible flowers create an artistic, garden-inspired finish with fresh strawberries providing crisp texture contrast.
Flavor Spin: Layer the cake with strawberry jam between layers, or add 1/4 teaspoon of rose extract to the frosting for subtle floral notes.
Storage: Keep refrigerated in an airtight container for up to 2 days. Fresh flowers are best used within a few hours of arrangement for optimal appearance.
8. Fully Frosted Cake with Edible Flower Crown
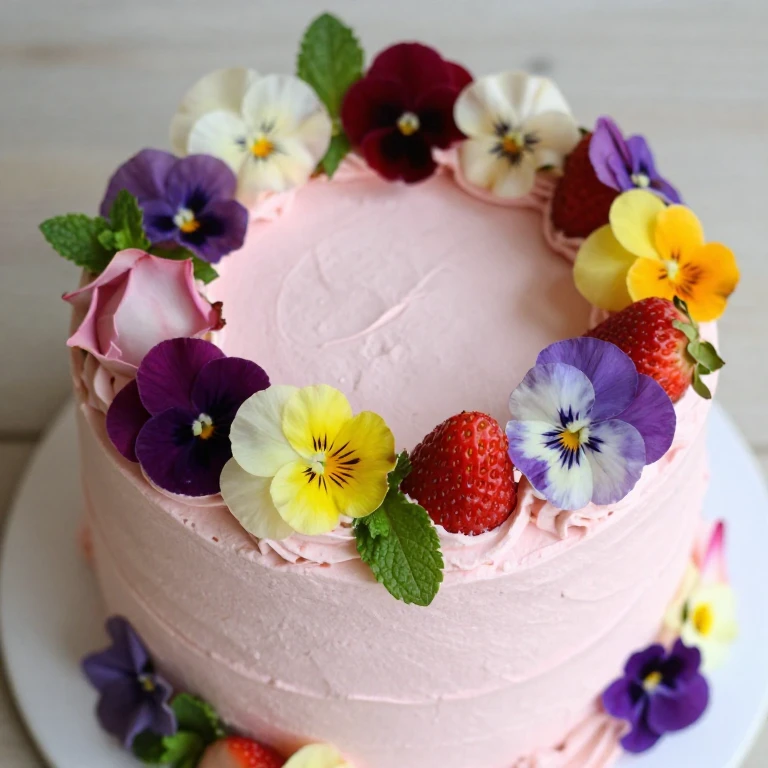
When I want maximum impact, I create a frosted cake with a crown of edible flowers arranged on top. The flowers sit on a bed of frosting, creating a focal point that draws the eye upward and makes the cake feel like a celebration.
Ingredients
- 2 cups all-purpose flour
- 1 3/4 teaspoons baking powder
- 1/2 teaspoon salt
- 1/2 cup unsalted butter, softened
- 1 cup granulated sugar
- 2 large eggs
- 1 teaspoon vanilla extract
- 3/4 cup whole milk
- 3 cups unsalted butter, softened (for frosting)
- 4 cups powdered sugar
- 2 tablespoons heavy cream
- 1/2 teaspoon vanilla extract
- Gel food coloring (pale pink)
- Edible flowers: pansies, violas, cornflowers, and rose petals
- Fresh mint leaves
- 1 pound fresh strawberries, hulled
Instructions
- Preheat oven to 350°F. Grease and flour two 8-inch round cake pans.
- Whisk together flour, baking powder, and salt.
- Cream butter and sugar until light and fluffy, about 3 minutes.
- Add eggs one at a time, beating well after each addition. Stir in vanilla extract.
- Alternate adding flour mixture and milk, beginning and ending with flour.
- Divide batter evenly between prepared pans.
- Bake for 25–30 minutes, until a toothpick inserted in the center comes out clean.
- Cool in pans for 10 minutes, then turn out onto wire racks to cool completely.
- For the frosting, beat softened butter until creamy. Gradually add powdered sugar, beating well after each addition.
- Add heavy cream and vanilla extract. Beat until light and fluffy, about 2 minutes. Tint with a small amount of pale pink gel coloring.
- Level cake layers and place the first layer on a cake board. Spread a thin layer of frosting on top.
- Add the second cake layer and frost the entire top and sides with a smooth, even layer of buttercream.
- Arrange edible flowers in a crown pattern on top of the cake, starting from the outer edge and working inward in a circular arrangement. Intersperse with fresh mint leaves and whole strawberries.
- Keep the center of the cake clear to showcase the frosting color.
- Chill for at least 30 minutes before serving.
Whirl Factor: The edible flower crown creates a sophisticated, garden-inspired focal point while fresh strawberries and mint provide crisp, herbaceous contrast against creamy buttercream.
Flavor Spin: Add 1/2 teaspoon of rose water to the frosting for floral depth, or layer the cake with strawberry jam between layers.
Storage: Keep refrigerated in an airtight container for up to 2 days. Fresh flowers are best used within a few hours of arrangement for optimal appearance and color.
9. Rustic Fruit Arrangement Cake with Honey Drizzle
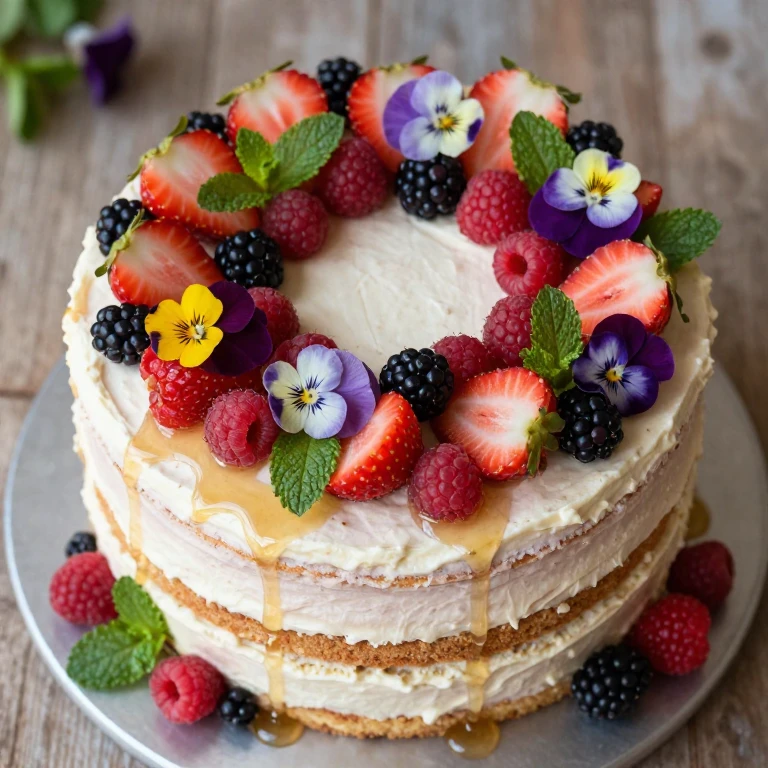
This version feels organic and unstudied, which is exactly what I’m after. I layer strawberries, raspberries, and blackberries on top, then drizzle with honey and add edible flowers in the gaps. The effect is abundant and inviting.
Ingredients
- 2 cups all-purpose flour
- 1 3/4 teaspoons baking powder
- 1/2 teaspoon salt
- 1/2 cup unsalted butter, softened
- 1 cup granulated sugar
- 2 large eggs
- 1 teaspoon vanilla extract
- 3/4 cup whole milk
- 3 cups unsalted butter, softened (for frosting)
- 4 cups powdered sugar
- 2 tablespoons heavy cream
- 1/2 teaspoon vanilla extract
- Gel food coloring (cream or pale pink)
- 1 pound fresh strawberries, hulled and halved
- 1 cup fresh raspberries
- 1 cup fresh blackberries
- Edible flowers: pansies, violas, and rose petals
- Fresh mint leaves
- 3 tablespoons honey
Instructions
- Preheat oven to 350°F. Grease and flour two 8-inch round cake pans.
- Whisk together flour, baking powder, and salt.
- Cream butter and sugar until light and fluffy, about 3 minutes.
- Add eggs one at a time, beating well after each addition. Stir in vanilla extract.
- Alternate adding flour mixture and milk, beginning and ending with flour.
- Divide batter evenly between prepared pans.
- Bake for 25–30 minutes, until a toothpick inserted in the center comes out clean.
- Cool in pans for 10 minutes, then turn out onto wire racks to cool completely.
- For the frosting, beat softened butter until creamy. Gradually add powdered sugar, beating well after each addition.
- Add heavy cream and vanilla extract. Beat until light and fluffy, about 2 minutes. Tint with a small amount of gel coloring if desired, keeping it pale.
- Level cake layers and place the first layer on a cake board. Spread a thin layer of frosting on top.
- Add the second cake layer and frost the entire top and sides with buttercream, creating a slightly textured finish with your spatula.
- Arrange strawberry halves on top of the cake, working in concentric circles from the outside edge toward the center.
- Fill the gaps between strawberries with raspberries and blackberries, creating pockets of color and texture.
- Tuck edible flowers and fresh mint leaves into the gaps between fruits.
- Drizzle honey over the entire top, allowing it to pool slightly in the gaps between fruits.
- Chill for at least 30 minutes before serving.
Whirl Factor: The abundant fruit arrangement creates visual movement and color variety while the honey drizzle adds shine and sweetness, contrasting beautifully with fresh, crisp berries.
Flavor Spin: Layer the cake with jam (strawberry, raspberry, or mixed berry) between layers, or add 1/4 teaspoon of almond extract to the frosting.
Storage: Keep refrigerated in an airtight container for up to 2 days. Fresh berries are best arranged close to serving time for optimal appearance and texture.
Minimalist and Modern Line Art Strawberry Cake Recipes
I love the restraint of minimalist design. Clean lines, negative space, and intentional color placement create a sophisticated look that feels contemporary and gallery-worthy. The key is choosing one or two graphic elements and executing them with precision.
10. Minimalist Line Art Cake with Single Strawberry
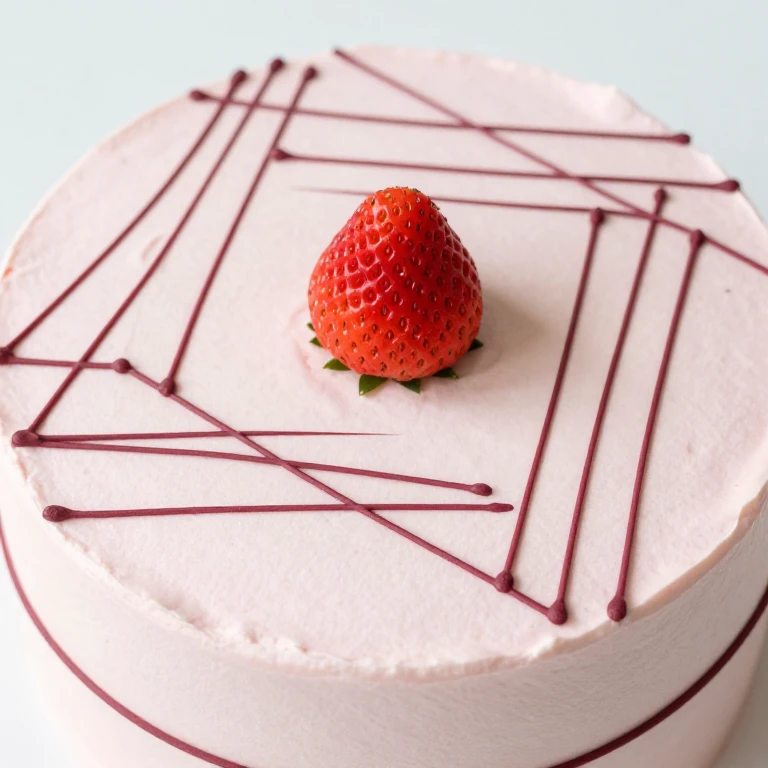
This is the most stripped-back version I make. A solid-colored frosting serves as the canvas for clean, thin lines piped in contrasting color. A single fresh strawberry sits on top as the only garnish, creating a focal point that draws the eye.
Ingredients
- 2 cups all-purpose flour
- 1 3/4 teaspoons baking powder
- 1/2 teaspoon salt
- 1/2 cup unsalted butter, softened
- 1 cup granulated sugar
- 2 large eggs
- 1 teaspoon vanilla extract
- 3/4 cup whole milk
- 3 cups unsalted butter, softened (for frosting)
- 4 cups powdered sugar
- 2 tablespoons heavy cream
- 1/2 teaspoon vanilla extract
- Gel food coloring (pale pink for base, deep rose or burgundy for lines)
- Piping bag and fine round piping tip
- 1 fresh strawberry with leaves intact
Instructions
- Preheat oven to 350°F. Grease and flour two 8-inch round cake pans.
- Whisk together flour, baking powder, and salt.
- Cream butter and sugar until light and fluffy, about 3 minutes.
- Add eggs one at a time, beating well after each addition. Stir in vanilla extract.
- Alternate adding flour mixture and milk, beginning and ending with flour.
- Divide batter evenly between prepared pans.
- Bake for 25–30 minutes, until a toothpick inserted in the center comes out clean.
- Cool in pans for 10 minutes, then turn out onto wire racks to cool completely.
- For the frosting, beat softened butter until creamy. Gradually add powdered sugar, beating well after each addition.
- Add heavy cream and vanilla extract. Beat until light and fluffy, about 2 minutes.
- Divide frosting into two bowls. Tint one with pale pink gel coloring for the base coat, and tint a small amount with deep rose or burgundy for piping lines.
- Level cake layers and place the first layer on a cake board. Spread a thin layer of pale pink frosting on top.
- Add the second cake layer and frost the entire top and sides with a smooth, even layer of pale pink buttercream.
- Transfer the deep rose frosting to a piping bag fitted with a fine round tip.
- Pipe clean, thin lines across the top of the cake in a geometric pattern: parallel lines, a grid, or abstract curved lines. Keep lines evenly spaced and precise.
- Place a single fresh strawberry in the center or off-center on top of the cake as the focal point.
- Chill for at least 30 minutes before serving.
Whirl Factor: Clean geometric lines create a modern, gallery-quality finish while a single fresh strawberry provides bold color contrast and crisp, juicy texture.
Flavor Spin: Add 1/2 teaspoon of vanilla bean paste to the frosting for depth, or layer the cake with a thin spread of strawberry jam between layers.
Storage: Keep refrigerated in an airtight container for up to 3 days. Piped lines hold their shape best when the cake is chilled.
11. Modern Geometric Cake with Negative Space
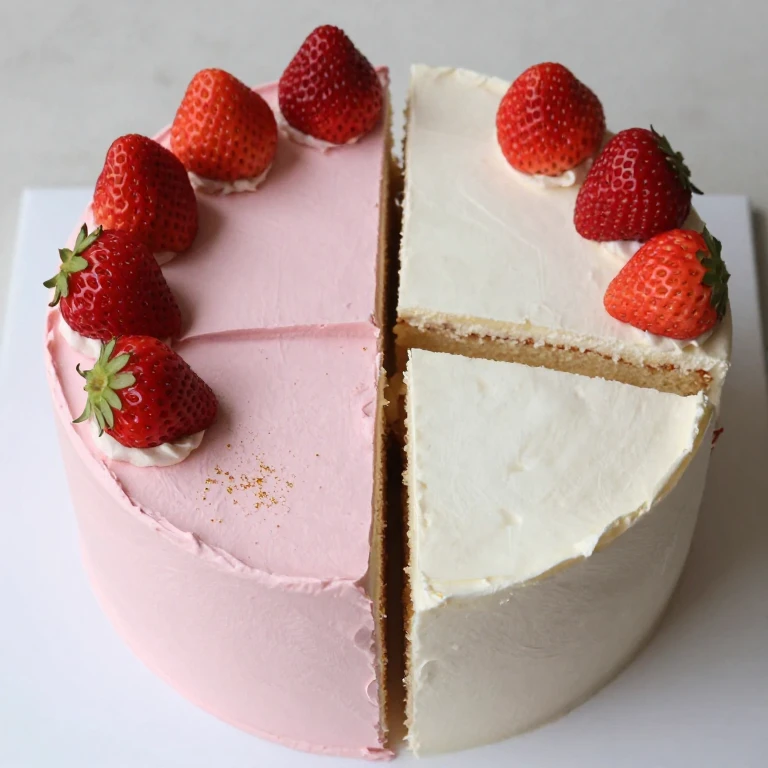
I designed this version to play with negative space and color blocking. The frosting is divided into sections—some frosted, some left bare to show the cake layer beneath—creating a bold, architectural look.
Ingredients
- 2 cups all-purpose flour
- 1 3/4 teaspoons baking powder
- 1/2 teaspoon salt
- 1/2 cup unsalted butter, softened
- 1 cup granulated sugar
- 2 large eggs
- 1 teaspoon vanilla extract
- 3/4 cup whole milk
- 3 cups unsalted butter, softened (for frosting)
- 4 cups powdered sugar
- 2 tablespoons heavy cream
- 1/2 teaspoon vanilla extract
- Gel food coloring (pale pink and deep rose)
- Fresh strawberries for garnish
- Edible gold dust (optional)
Instructions
- Preheat oven to 350°F. Grease and flour two 8-inch round cake pans.
- Whisk together flour, baking powder, and salt.
- Cream butter and sugar until light and fluffy, about 3 minutes.
- Add eggs one at a time, beating well after each addition. Stir in vanilla extract.
- Alternate adding flour mixture and milk, beginning and ending with flour.
- Divide batter evenly between prepared pans.
- Bake for 25–30 minutes, until a toothpick inserted in the center comes out clean.
- Cool in pans for 10 minutes, then turn out onto wire racks to cool completely.
- For the frosting, beat softened butter until creamy. Gradually add powdered sugar, beating well after each addition.
- Add heavy cream and vanilla extract. Beat until light and fluffy, about 2 minutes.
- Divide frosting into two bowls. Tint one with pale pink and one with deep rose gel coloring.
- Level cake layers and place the first layer on a cake board.
- Add the second cake layer. Using an offset spatula, divide the top of the cake into quadrants mentally.
- Frost two opposite quadrants with pale pink frosting, leaving the other two quadrants bare to show the cake layer beneath.
- Frost the sides of the cake with deep rose frosting, creating a clean line where the side frosting meets the top.
- Arrange fresh strawberries on the bare quadrants, pressing them gently into the cake.
- If desired, dust the pale pink frosted areas with edible gold dust for a subtle metallic accent.
- Chill for at least 30 minutes before serving.
Whirl Factor: The geometric color blocking and negative space create a bold, modern look while fresh strawberries and exposed cake layers provide visual and textural contrast.
Flavor Spin: Add 1/4 teaspoon of rose extract to the deep rose frosting, or layer the cake with strawberry jam between layers.
Storage: Keep refrigerated in an airtight container for up to 3 days. The geometric frosting holds its shape best when chilled.
12. Minimalist Monochrome Cake with Piped Details

This final design uses a single color palette with varying shades and textures. I frost the cake in one color, then pipe delicate details in a slightly darker or lighter shade. The result feels cohesive and intentional.
Ingredients
- 2 cups all-purpose flour
- 1 3/4 teaspoons baking powder
- 1/2 teaspoon salt
- 1/2 cup unsalted butter, softened
- 1 cup granulated sugar
- 2 large eggs
- 1 teaspoon vanilla extract
- 3/4 cup whole milk
- 3 cups unsalted butter, softened (for frosting)
- 4 cups powdered sugar
- 2 tablespoons heavy cream
- 1/2 teaspoon vanilla extract
- Gel food coloring (pale pink and deep rose)
- Piping bag and medium round piping tip
- Fresh strawberries and mint leaves for garnish
Instructions
- Preheat oven to 350°F. Grease and flour two 8-inch round cake pans.
- Whisk together flour, baking powder, and salt.
- Cream butter and sugar until light and fluffy, about 3 minutes.
- Add eggs one at a time, beating well after each addition. Stir in vanilla extract.
- Alternate adding flour mixture and milk, beginning and ending with flour.
- Divide batter evenly between prepared pans.
- Bake for 25–30 minutes, until a toothpick inserted in the center comes out clean.
- Cool in pans for 10 minutes, then turn out onto wire racks to cool completely.
- For the frosting, beat softened butter until creamy. Gradually add powdered sugar, beating well after each addition.
- Add heavy cream and vanilla extract. Beat until light and fluffy, about 2 minutes.
- Divide frosting into two bowls. Tint one with pale pink for the base coat, and tint a small amount with deep rose for piping details.
- Level cake layers and place the first layer on a cake board. Spread a thin layer of pale pink frosting on top.
- Add the second cake layer and frost the entire top and sides with a smooth, even layer of pale pink buttercream.
- Transfer the deep rose frosting to a piping bag fitted with a medium round tip.
- Pipe small dots, dashes, or short lines in a scattered pattern across the top of the cake, creating visual interest without overwhelming the design.
- Arrange fresh strawberries on top and tuck mint leaves into the gaps between piped details.
- Chill for at least 30 minutes before serving.
Whirl Factor: The monochrome color palette with delicate piped details creates a sophisticated, cohesive look while fresh strawberries and mint provide crisp color contrast and textural pop.
Flavor Spin: Add 1/2 teaspoon of vanilla bean paste to the frosting for depth, or layer the cake with strawberry jam between layers.
Storage: Keep refrigerated in an airtight container for up to 3 days. Piped details hold their shape best when the cake is chilled.
When to Choose Each Style
If you need a cake that looks impressive with minimal technical skill, reach for the watercolor buttercream style—the soft, overlapping washes forgive slight imperfections and read as intentional. When you want maximum visual drama and have time for temperature precision, the mirror glaze and drip styles deliver that patisserie-quality finish. For a garden-inspired, romantic look that celebrates fresh ingredients, choose the pressed flowers and fruit arrangement styles. And when you’re after pure, modern sophistication, the minimalist line art cakes create a gallery-quality finish that feels contemporary and intentional. Consider your skill level, available time, and the vibe you want to create—each style has its own strengths.
FAQ
What’s the best way to color buttercream for watercolor effects?
I always use gel food coloring rather than liquid, as it mixes more evenly without thinning the frosting. Start with a tiny amount—less than you think you need—and build color gradually. For soft, dusty tones, use less coloring. For deeper shades, add more incrementally. I mix my colors on a small plate with a palette knife before adding them to the frosting, which gives me better control and lets me see the final shade before committing.
How do I prevent my mirror glaze from sliding off the cake?
Temperature is everything. Your glaze needs to be between 85–90°F when you pour it. If it’s too hot, it’ll slide right off. If it’s too cool, it won’t flow smoothly. I use a thermometer every time. Also, make sure your cake is chilled and level before glazing—any warmth or tilt will cause the glaze to move. Pour slowly from the center and let gravity do the work.
Which edible flowers are actually safe to use?
I stick to flowers I know are food-safe: pansies, violas, cornflowers, rose petals (from pesticide-free roses), nasturtiums, and calendula. Always source from a reputable supplier that sells specifically for culinary use, never from a florist. Wash them gently and pat dry before using. If you’re unsure about any flower, skip it—there are plenty of beautiful options.
Can I make these cakes ahead of time?
Yes, most of these cakes are actually better made a day ahead. The cake layers can be baked, wrapped, and stored at room temperature for up to 2 days. Buttercream frosting can be made up to 3 days ahead and stored in an airtight container in the refrigerator. Assemble and decorate the cake on the day you plan to serve it, or up to 8 hours ahead if you’re using stable frosting. Mirror glazed cakes are best glazed the day of serving for optimal shine.
How do I get strawberry puree for the glazes?
I blend fresh or frozen strawberries in a food processor until completely smooth, then strain through a fine-mesh sieve to remove seeds. For 1/4 cup of puree, I use about 1/2 pound of fresh strawberries. You can also use frozen strawberries, which work beautifully. If using frozen, thaw them first and strain off excess liquid before blending.
What’s the difference between semi-naked and fully frosted cakes?
A semi-naked cake has frosting on the top and just a thin layer on the sides, leaving some cake layers visible. It’s perfect when you want to showcase the cake structure and create a more casual, rustic look. A fully frosted cake has frosting completely covering the top and sides, creating a smooth canvas for decorating. Choose based on the aesthetic you’re after—semi-naked feels more organic and garden-inspired, while fully frosted feels polished and formal.
Conclusion
These 12 aesthetic strawberry cake designs give you options for every skill level and occasion. Whether you’re drawn to soft watercolor washes, dramatic mirror glazes, romantic pressed flowers, or modern line art, each style offers a clear path to a cake that looks as beautiful as it tastes. Pick one that speaks to you, gather your ingredients, and create something stunning.